

Hi Stampers
If truth be known… I do not have a green thumb. The fact that I forget to water plants might have something to do with it. So I don’t have any plants in the house. In the 80’s when dried flowers were the rage, I had a few arrangements but soon realized they were BIG dust collectors, so they ended up getting tossed out.
But NOW…. Succulent Gardens are all the rage . I have seen them in magazines, floral shops and home decor stores. I am going to have to look into the real ones, cuz I think they might be drought tolerant, but in the meantime, I wanted to make one… if only for the sake to say “I made one”. But I love it! I picked up a container at a local craft store and got to die cutting, sponging multiple colours on the leaves and curling the edges. Part of what I like about the Succulent Plants are the compact nature of them. I have this sitting on a table in my Living Room and must admit that it gives a touch of nature to the room. It isn’t overly large and fake looking (if you know what I mean).
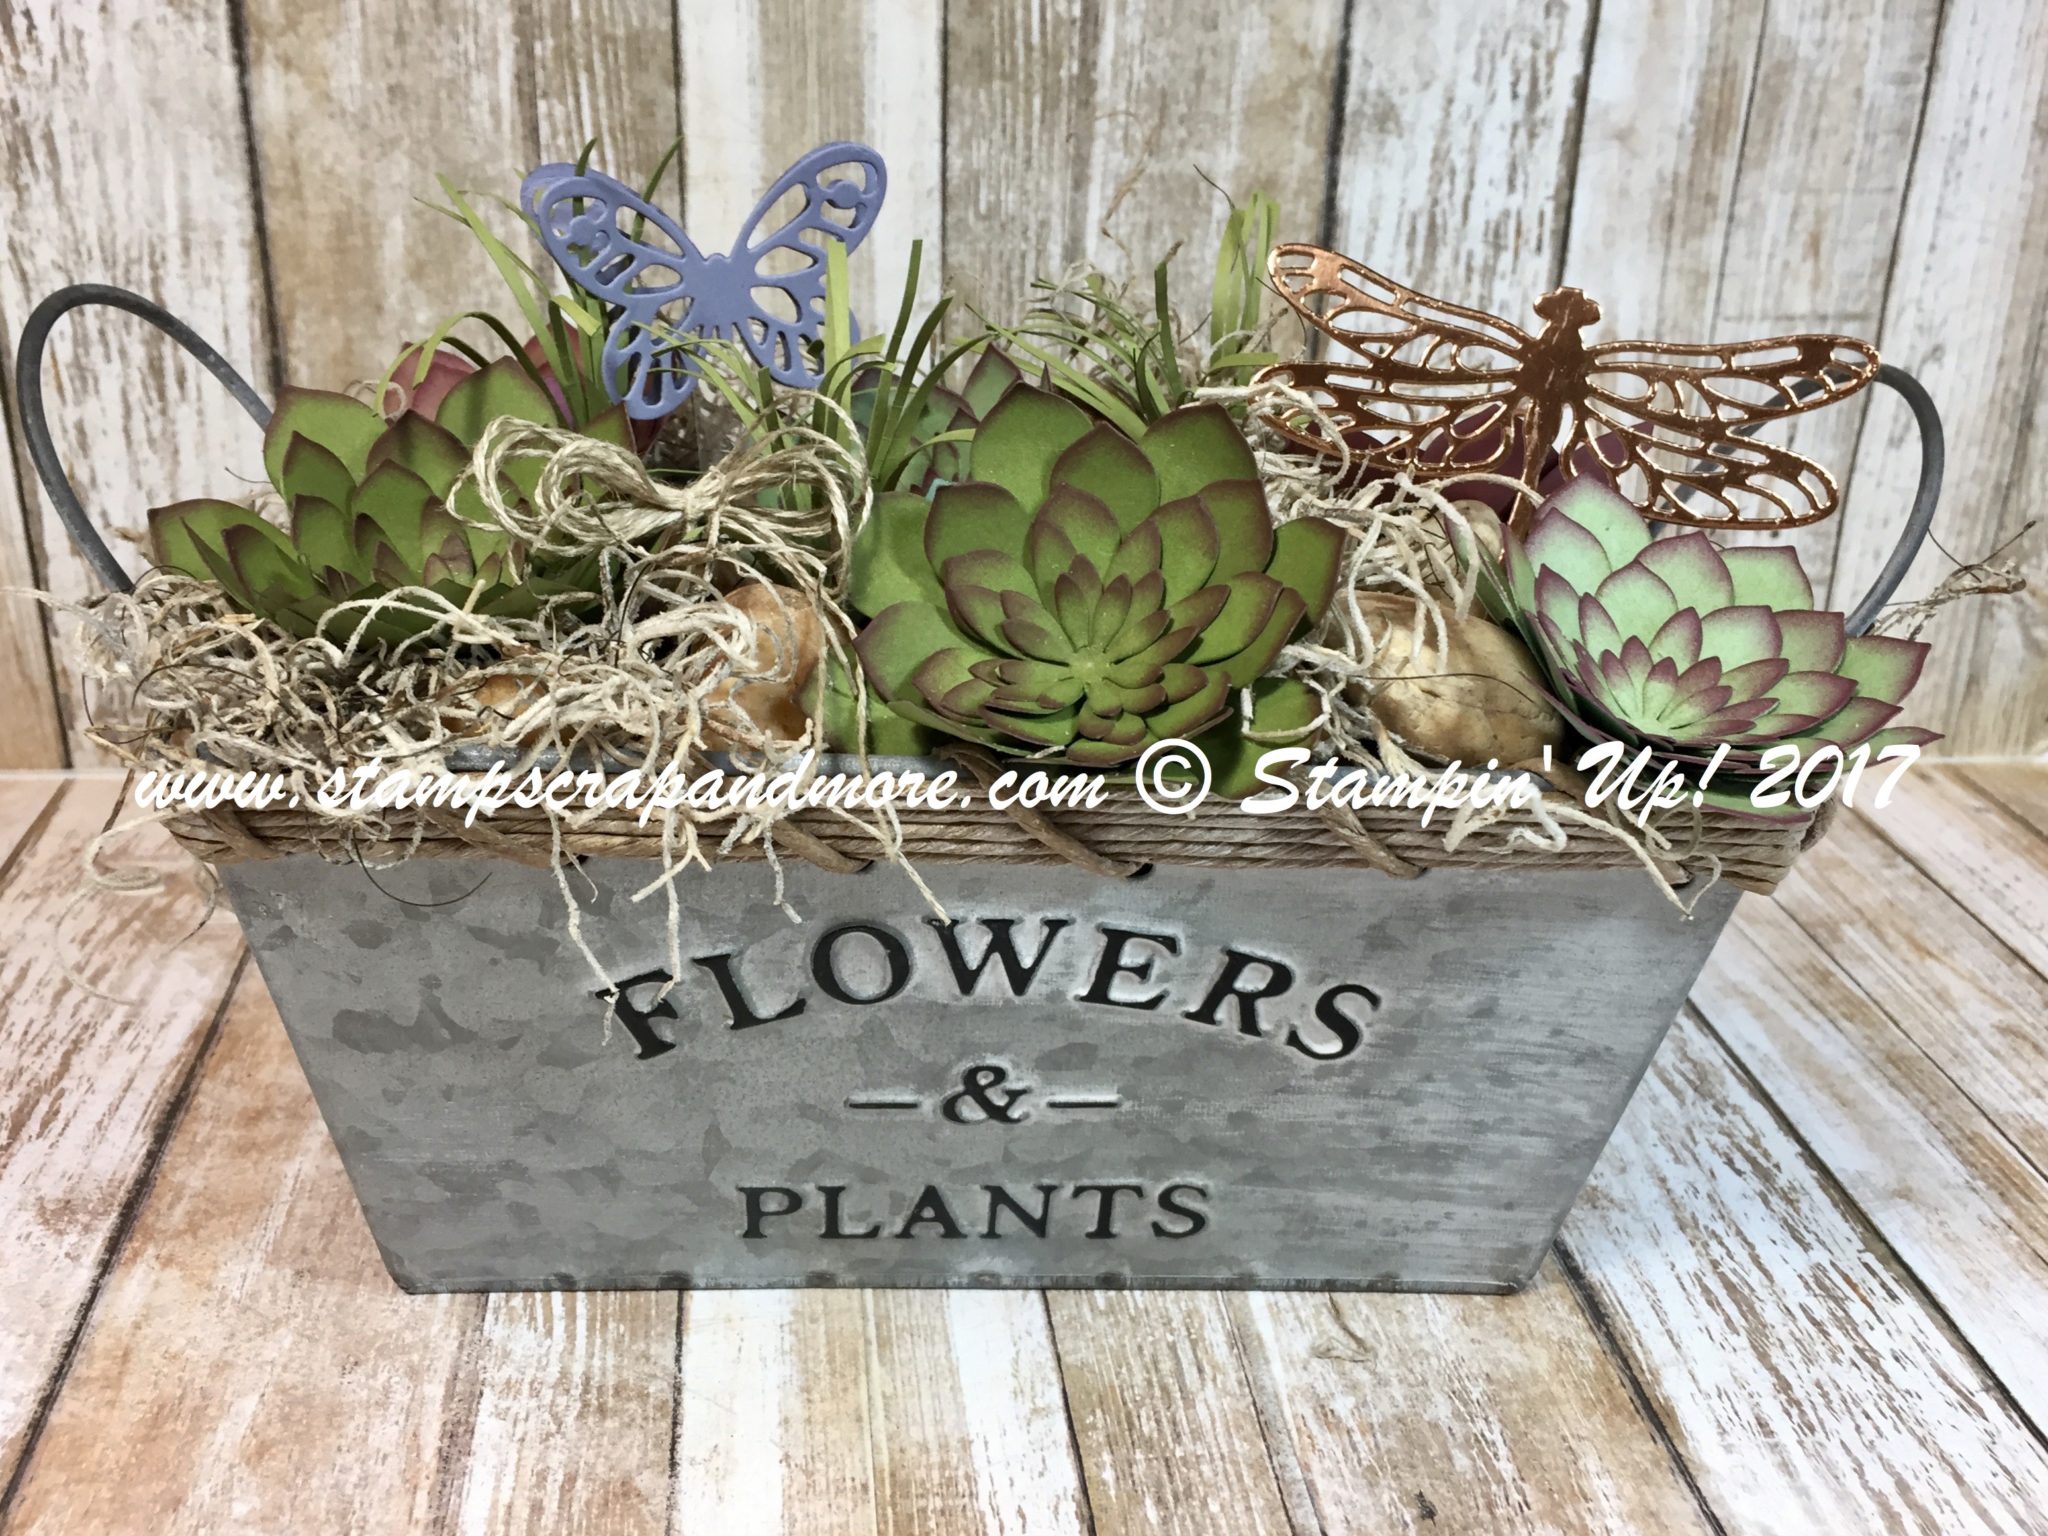
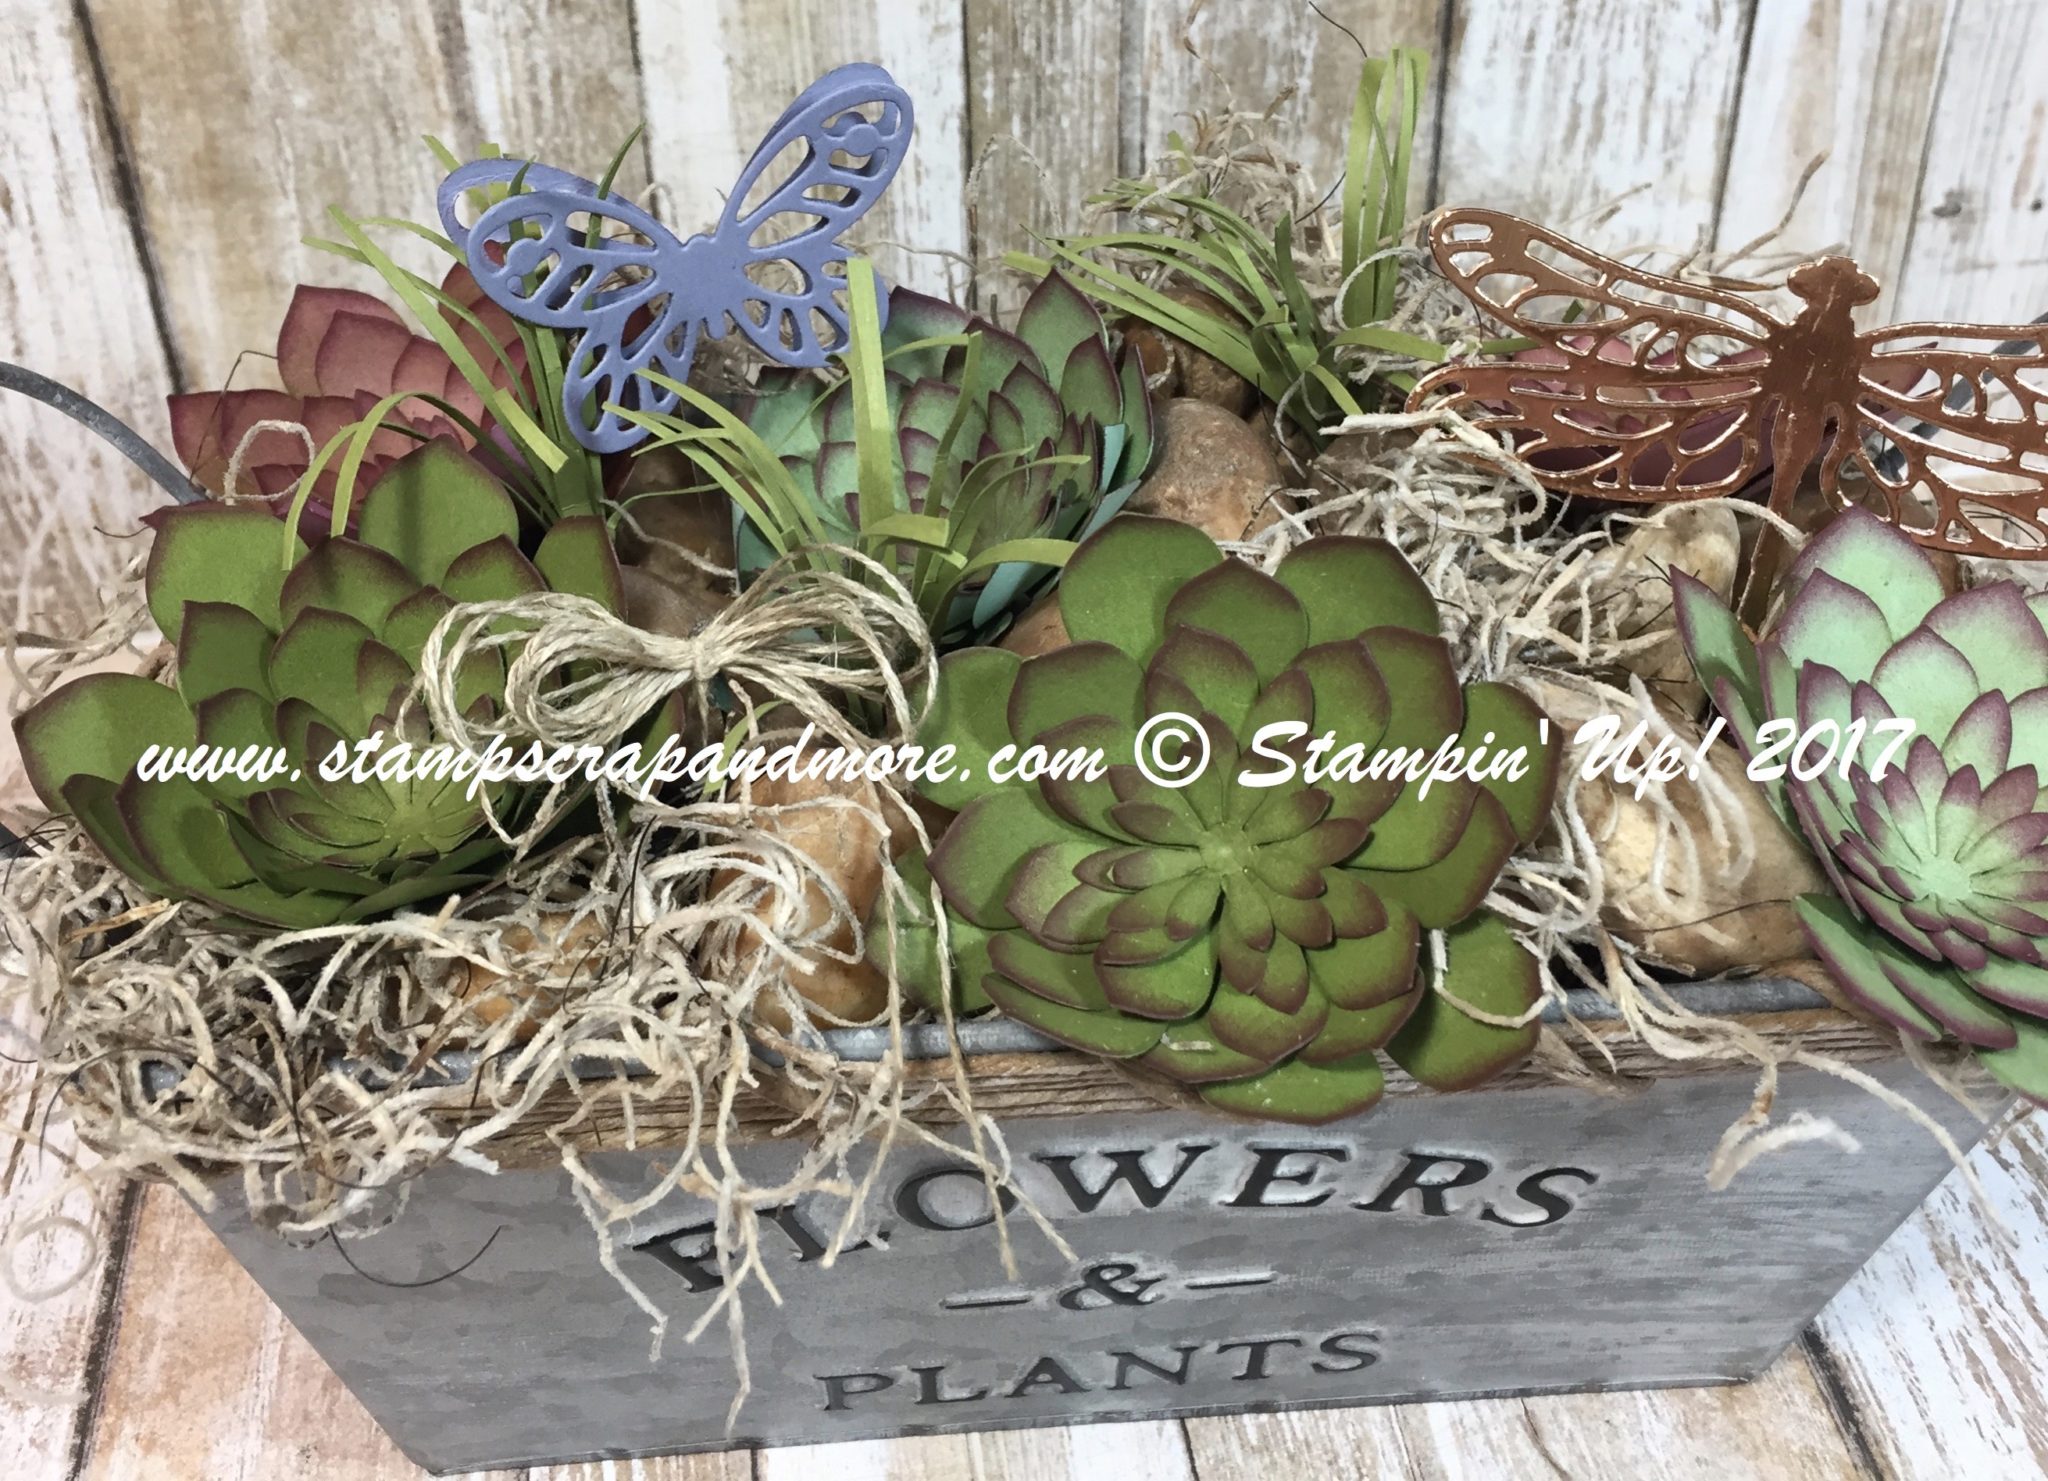
I hit Dollar Tree to get the Floral Foam and Moss (they were a bargain at $1.25 each. I had rocks in a candle arrangement that was unused and put them in the planter. Didn’t this turn out gorgeous… even if I do say so myself.
Tips to create a realistic succulent garden
- Sponge multiple colours on the leaves. On the Old Olive leaves, I sponged Old Olive, then Crumb Cake. On the Mint Macron leaves I sponged Mint Macaron then Crumb Cake. On the Sweet Sugarplum leaves I sponged Sweet Sugarplum then Crumb Cake.
- Sponge each leaf tip with Rich Razzelberry to give them the added detail.
- Use your bone folder to curl the edges.
- Add height with other elements like the butterfly and dragonfly.
- I also added height but taking a piece of Old Olive card stock 2″ x 6″. I took the Fringe Scissors and cut along the 2″ side (ending just before the edge). Then I rolled the fringe around a piece of floral wire. I used some hot glue to adhere the rolled piece together then curled the pieces with my fingers. When I was happy with the shape I added them to the container for a bit of height and additional texture.
- I added some rocks to the container and placed the Succulents amongst the rocks.
- I added more moss to the arrangement after I placed the succulents, spilling some over the sides.
- Keep the container on the small size… the bigger you get the more fake it looks. My container is about 7″ x 3″.
Give it a shot… there are many types of containers you can use, mason jars, old tea cups, old bowls, clay pots…. the possibilities are endless.
Thanks for stopping by,Elizabeth, Your Stampin' Up! Demonstrator
www.StampScrapAndMore.com