
Hello Stampers
Sometimes you just need to take time to play – no commitments, Clubs, Classes, etc… just to remind yourself that Creativity is Contentment and why we love Stampin’ Up!. Today is that day for me and I realize that I need to do it more often.
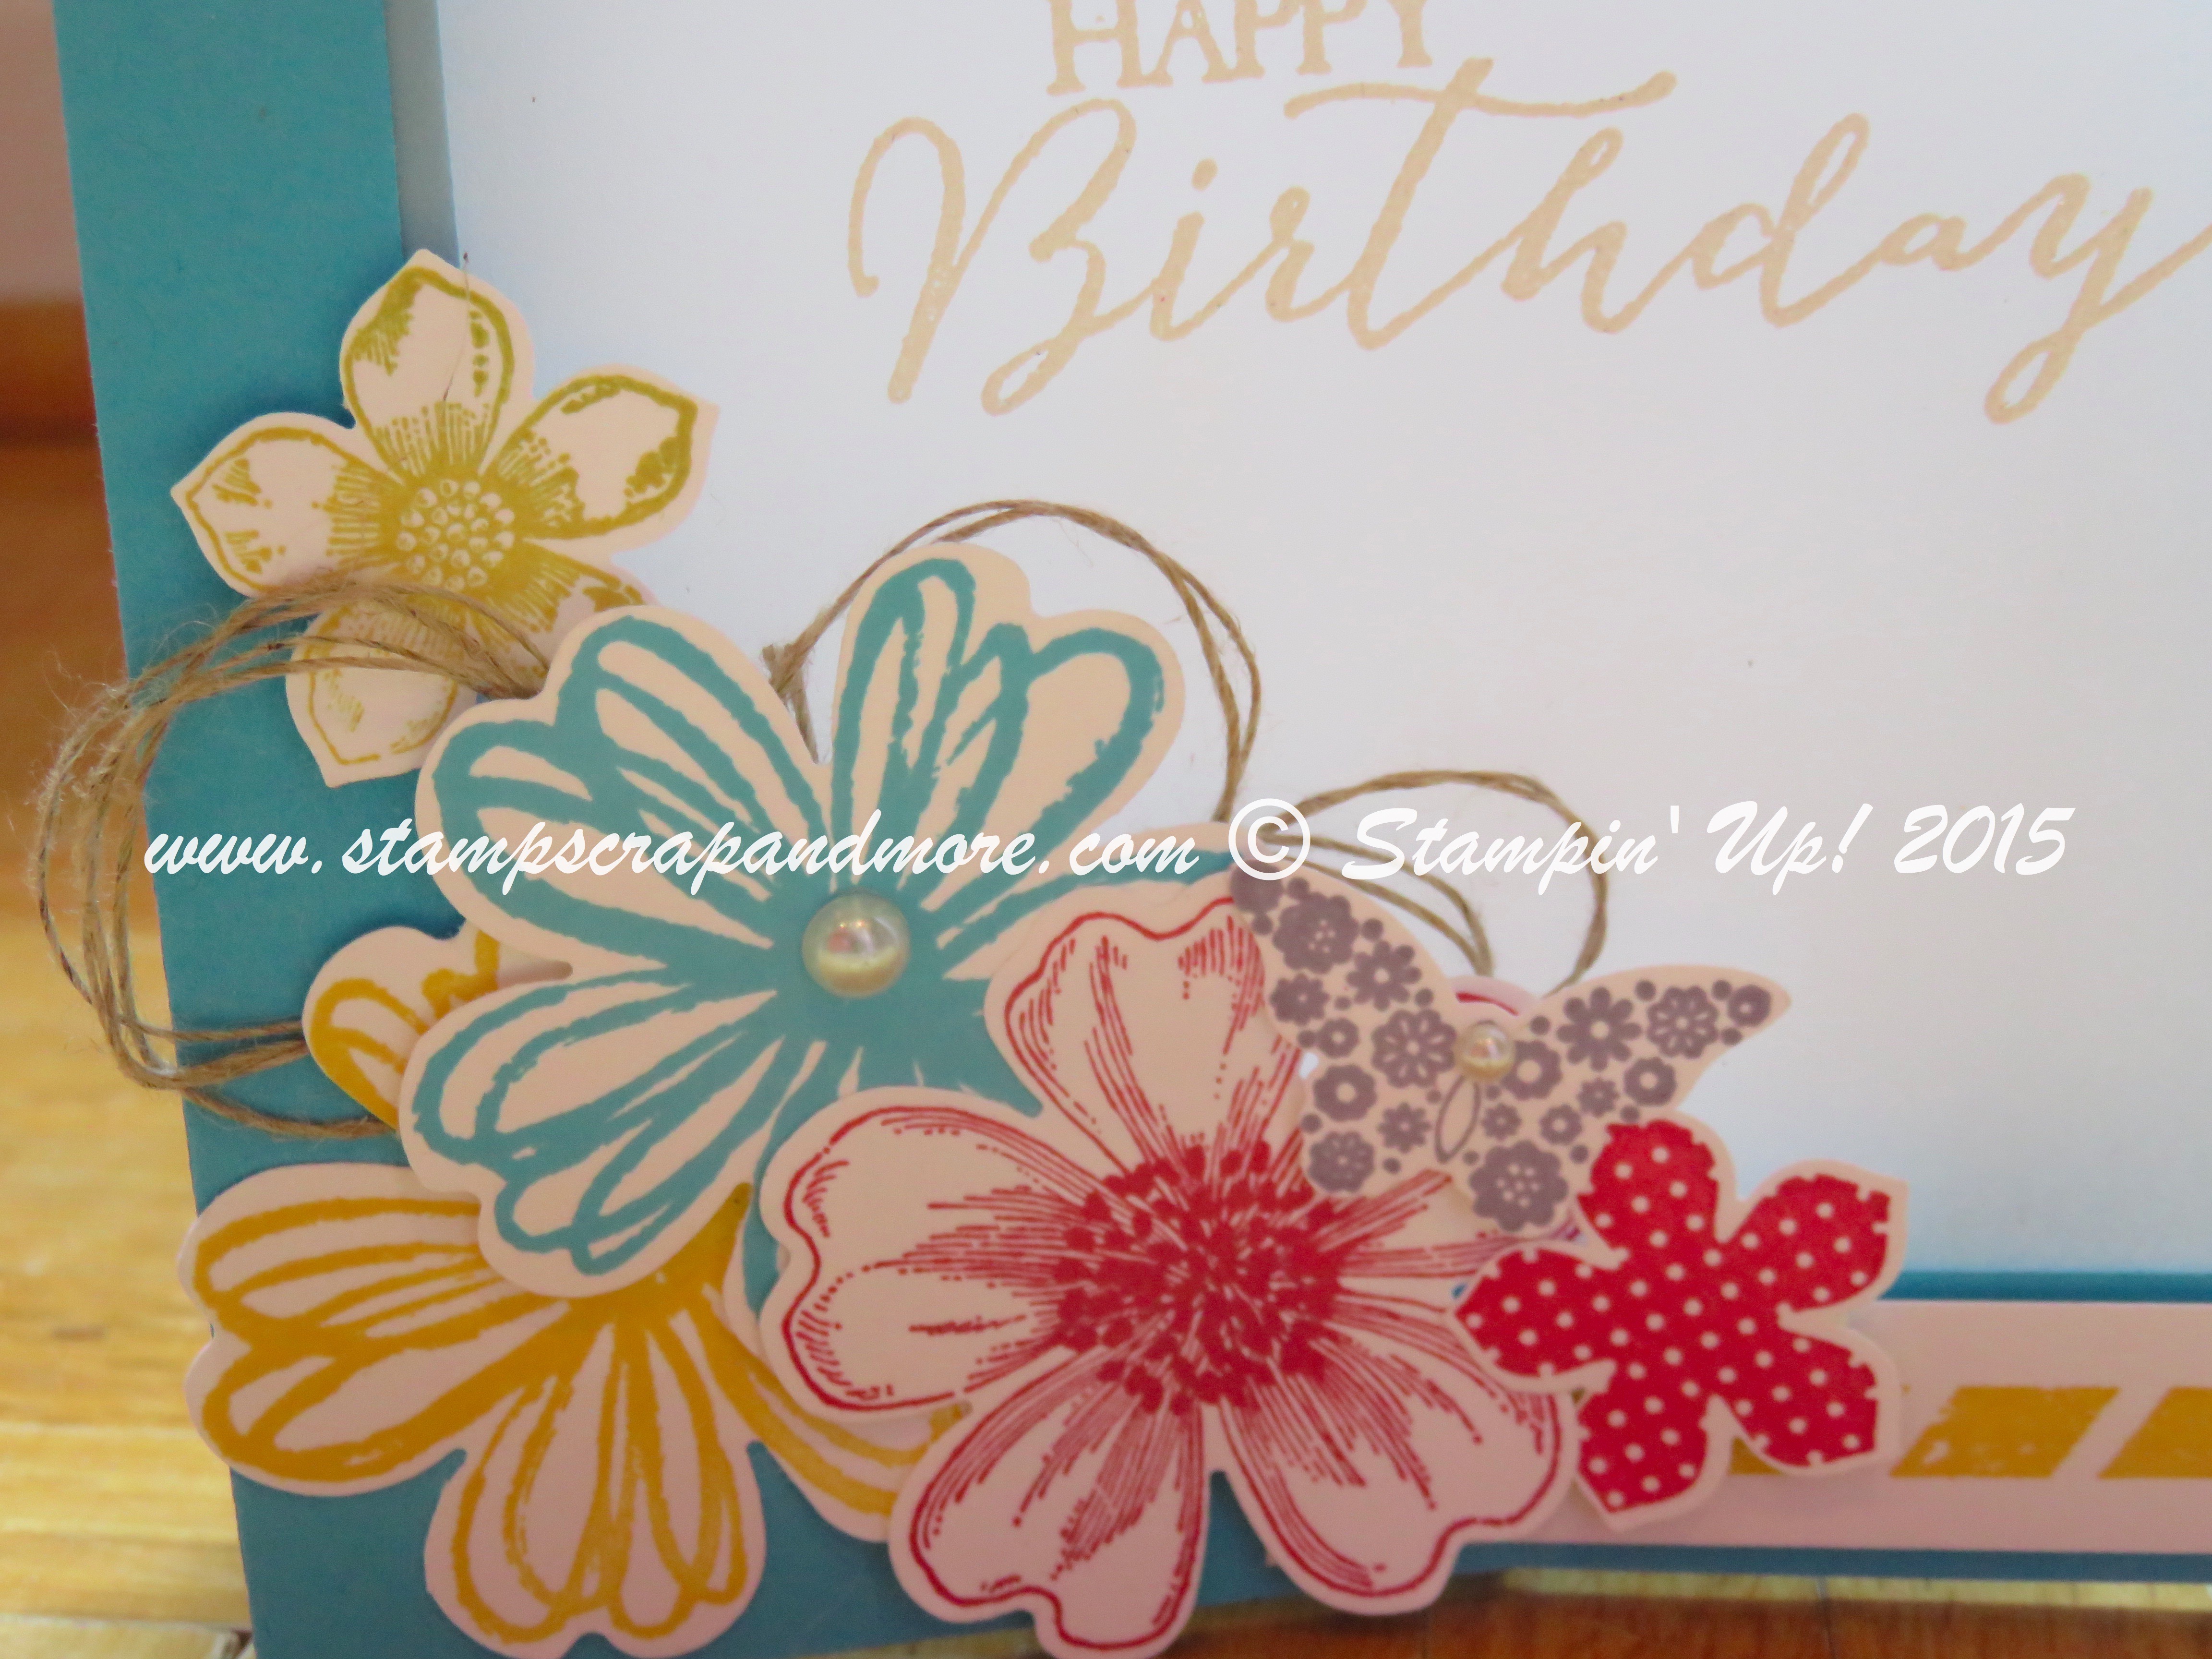
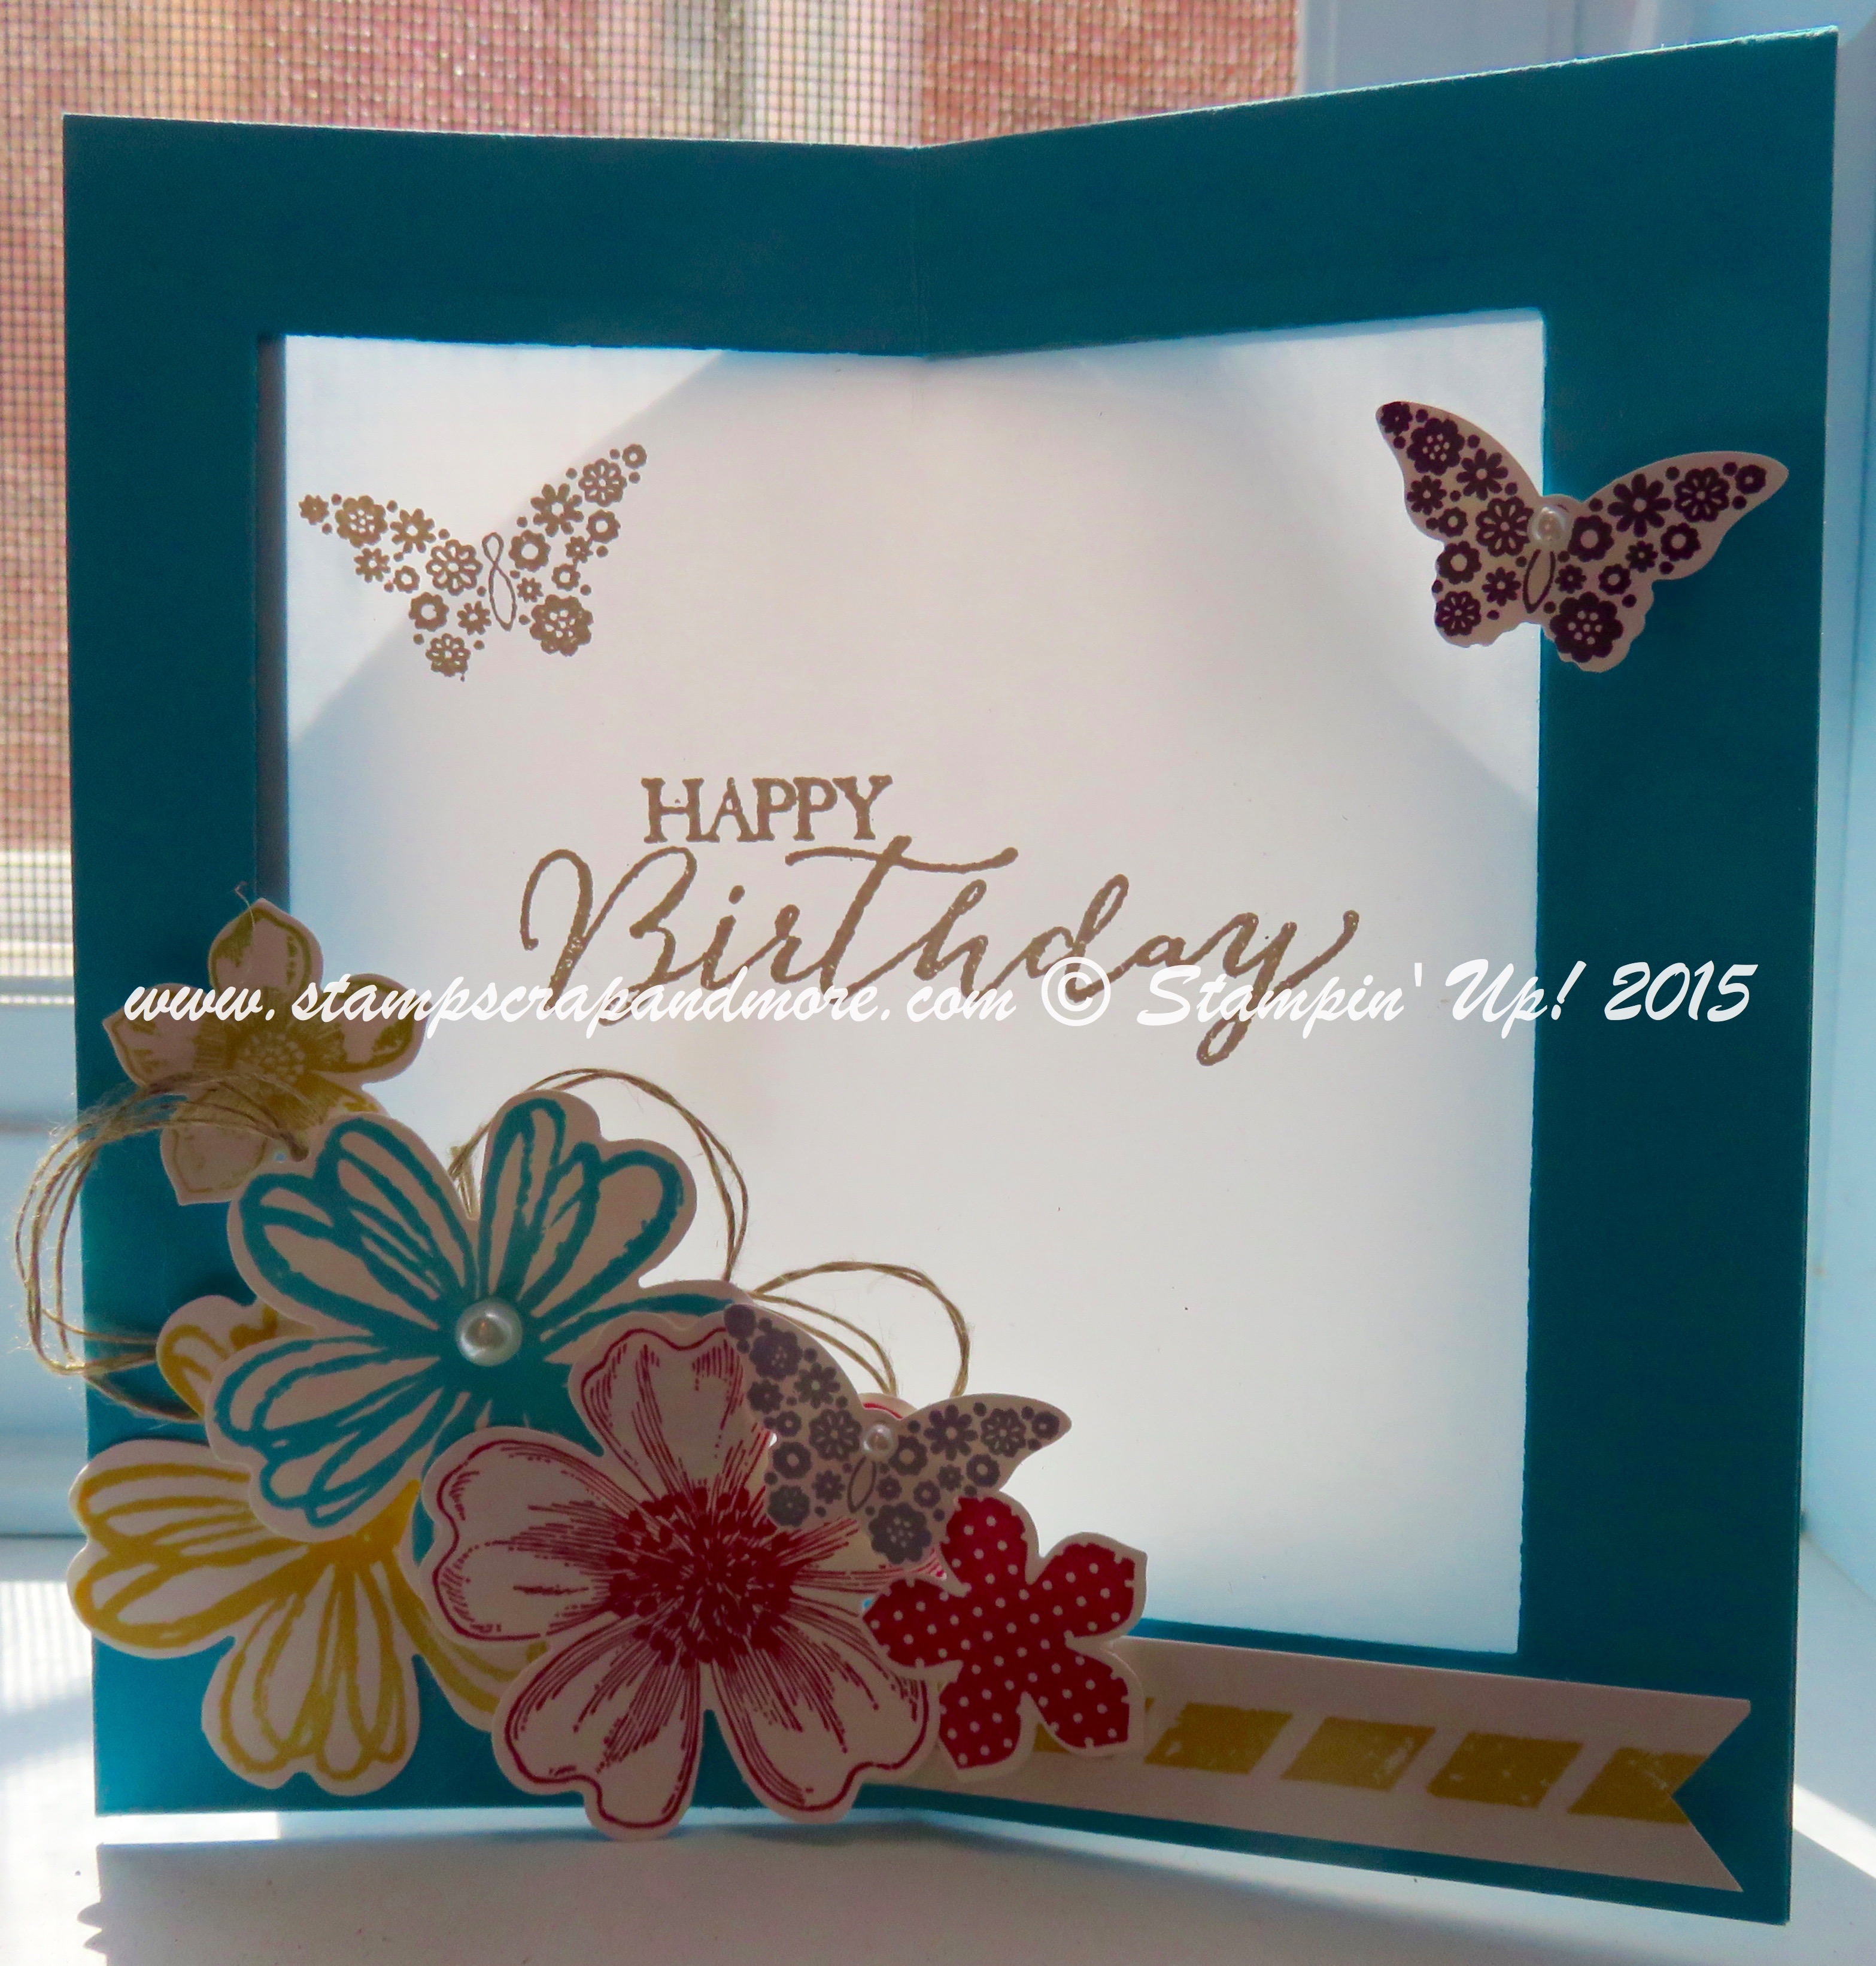
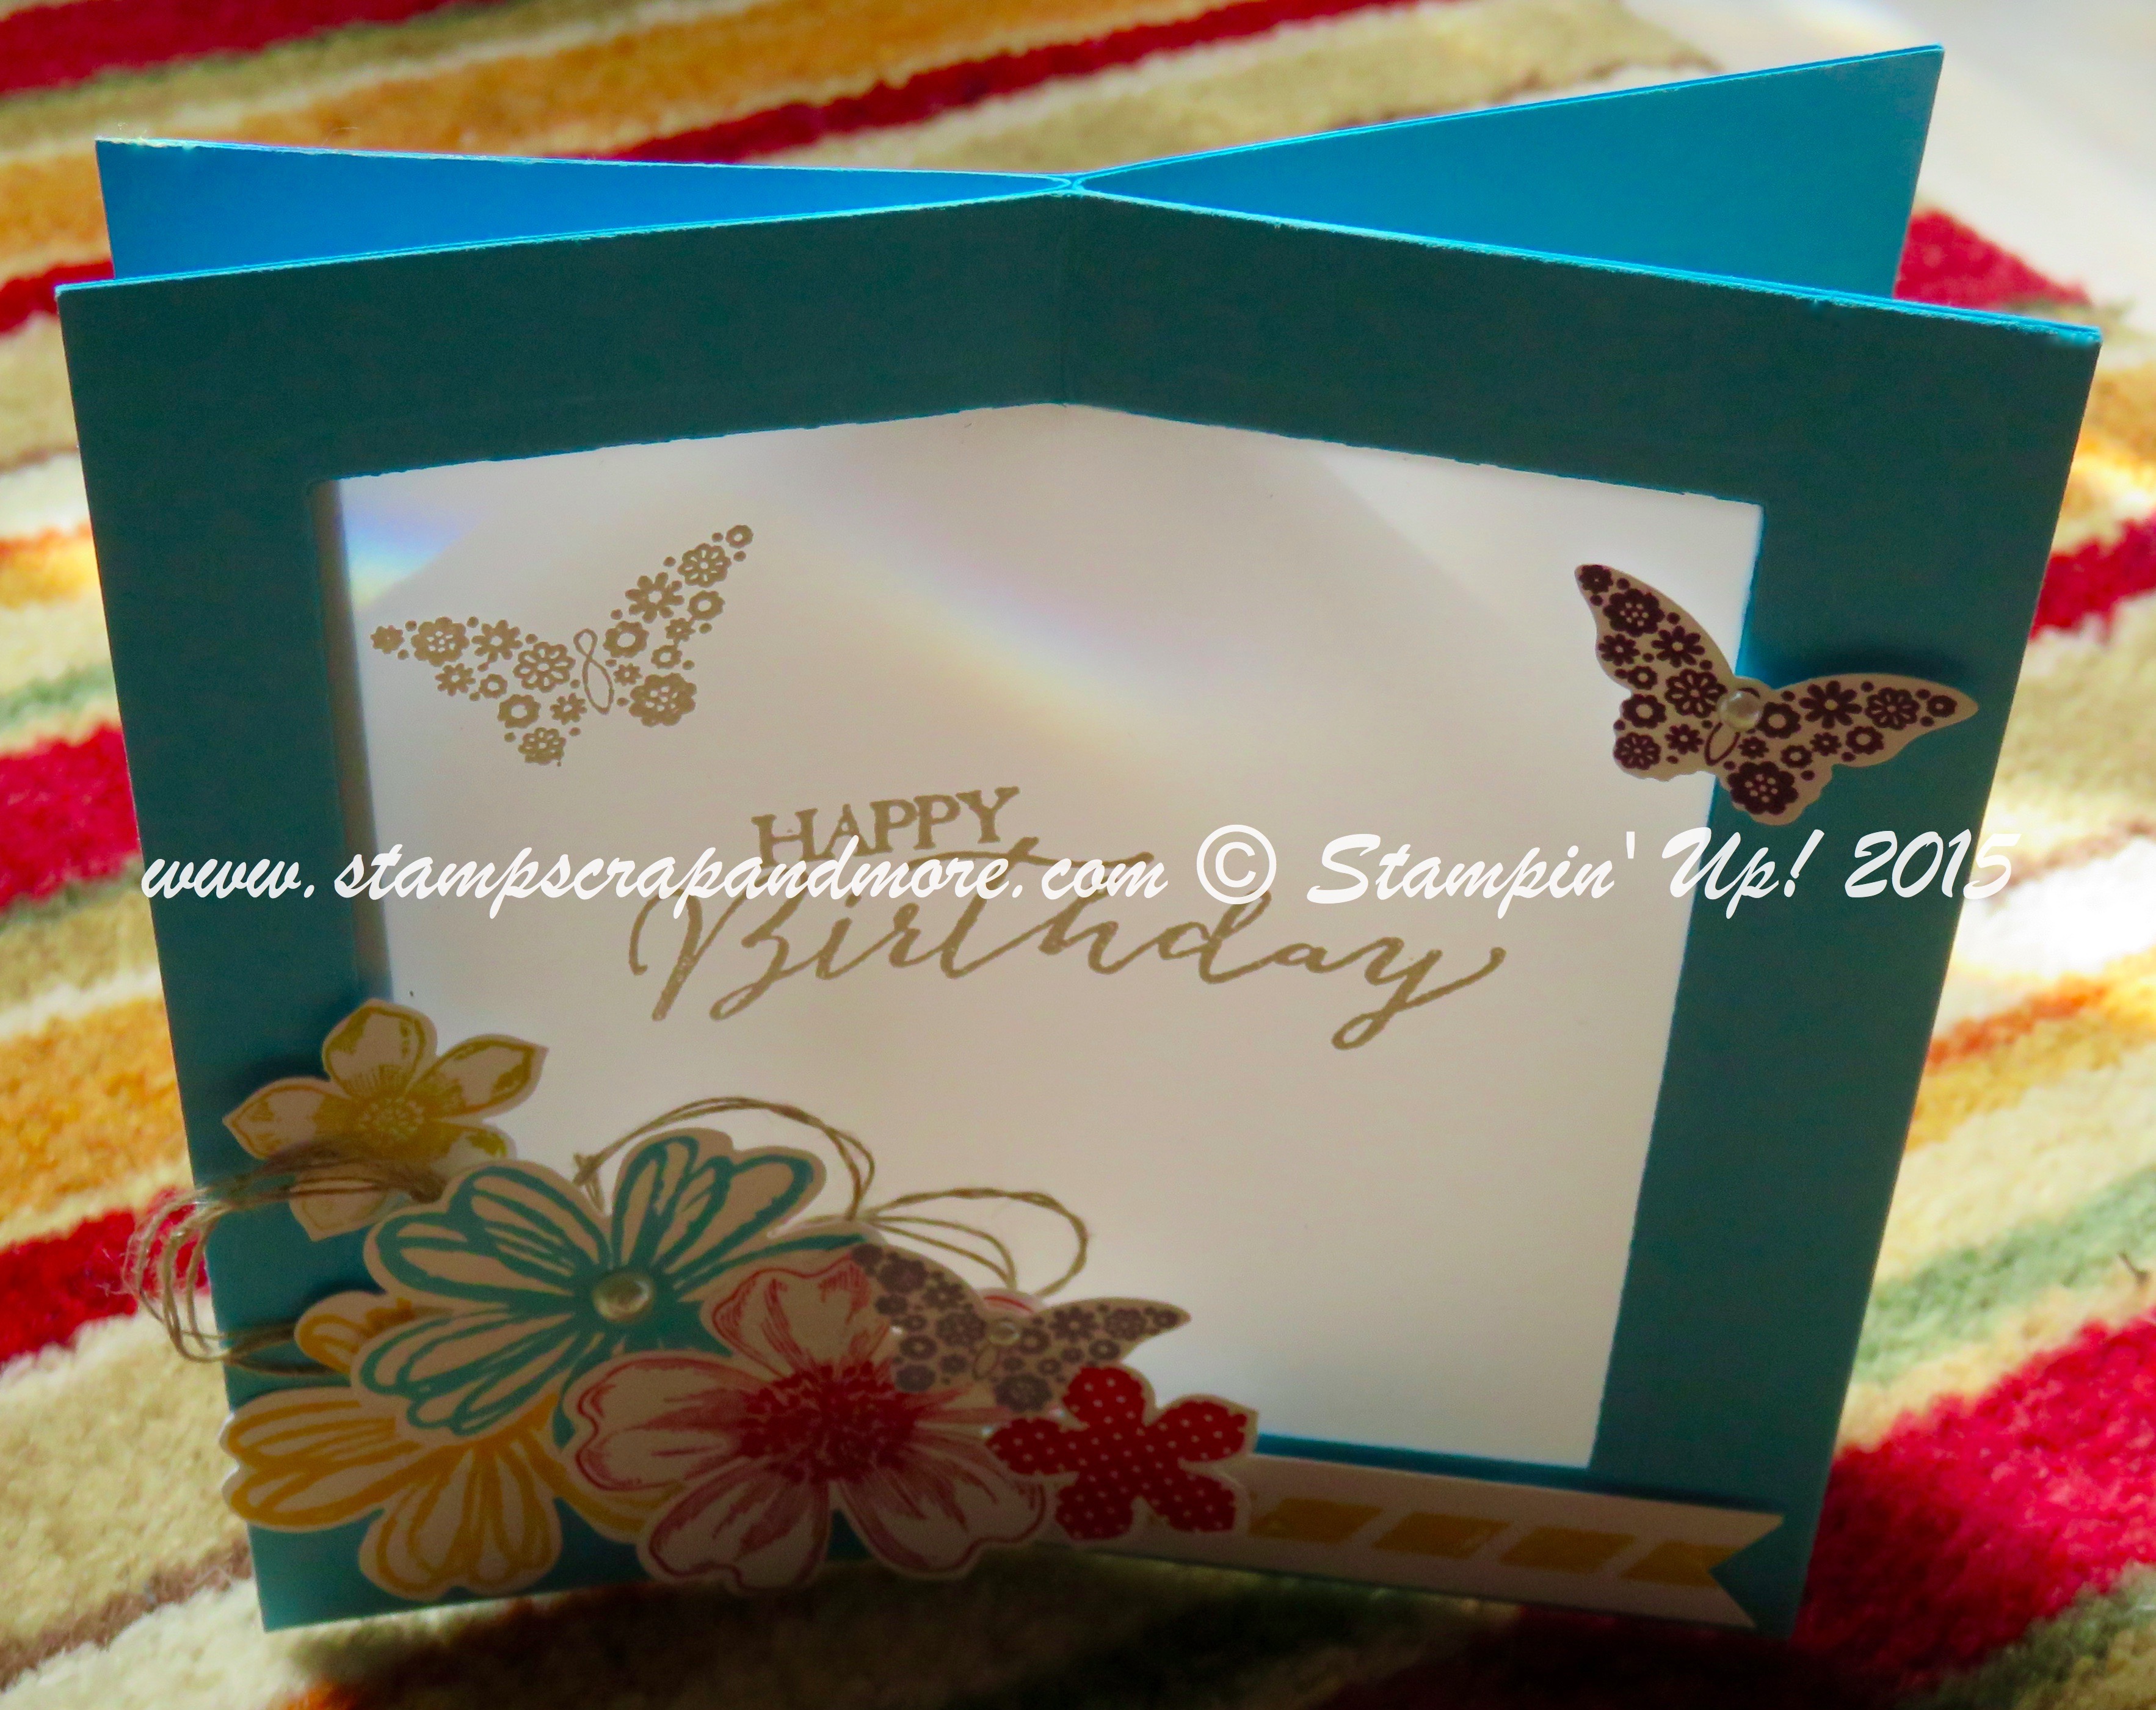
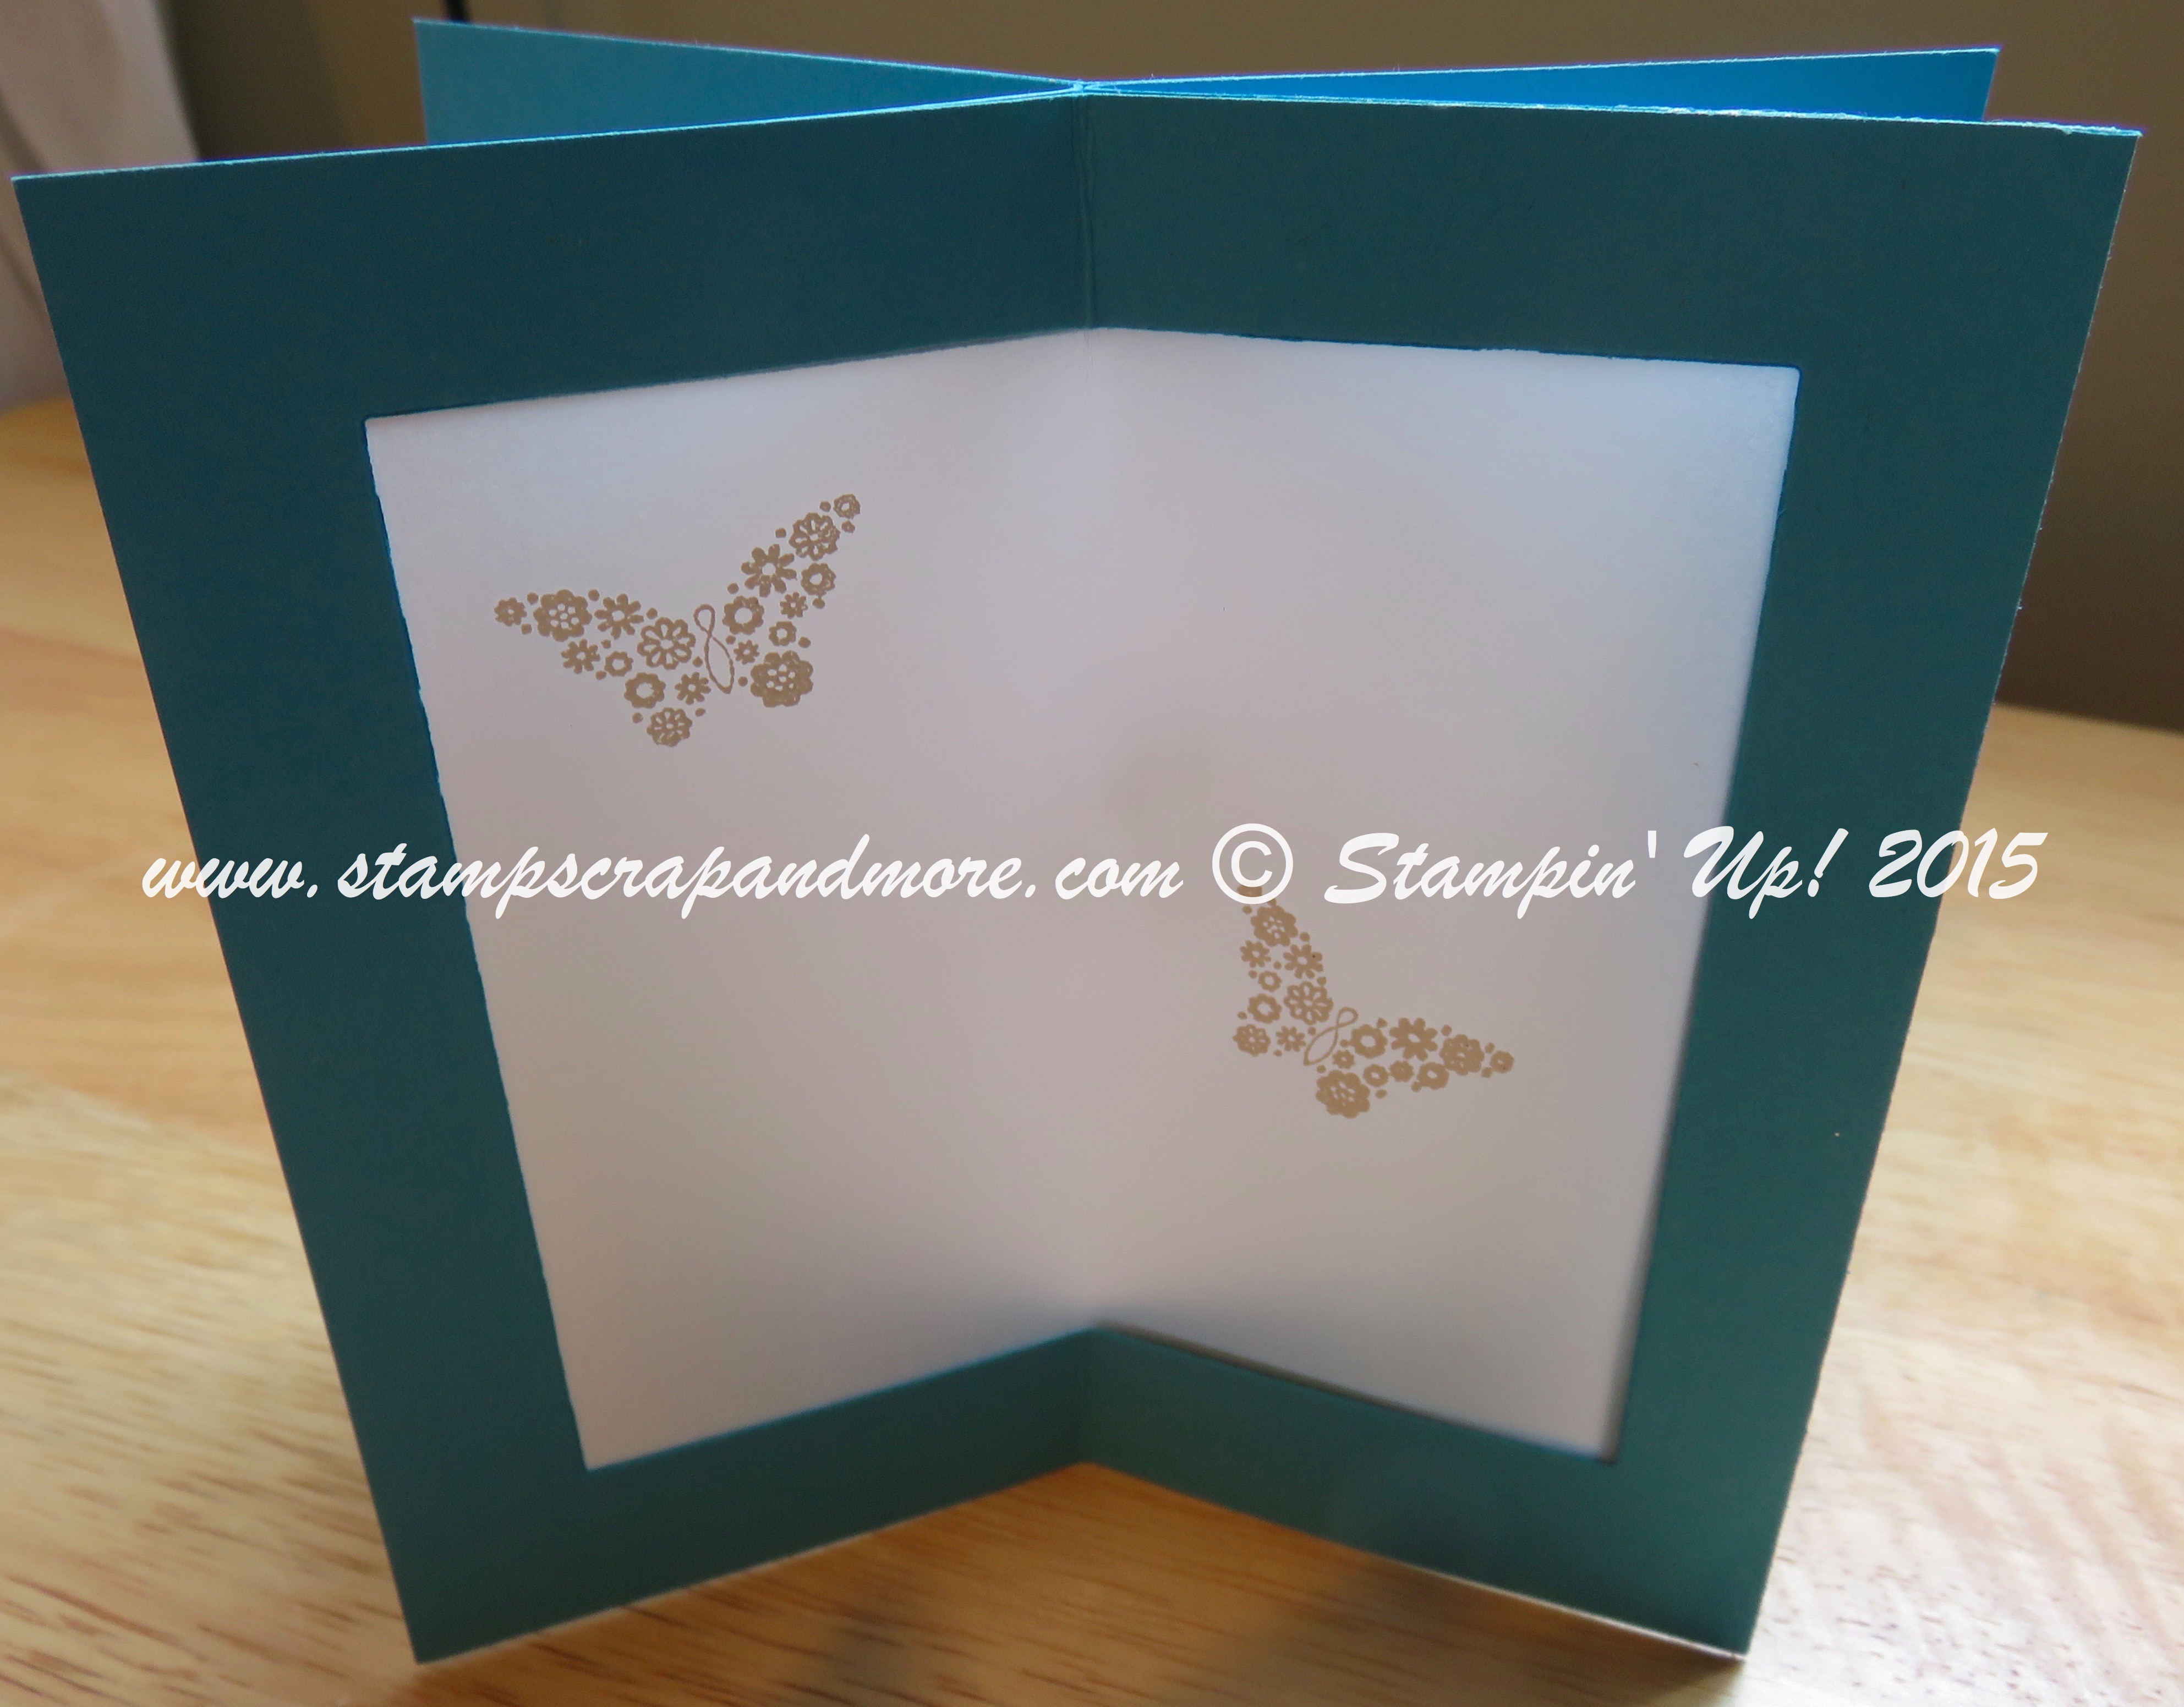
Check out this gorgeous card. It is a Vellum Window card and is definitely for someone special. You can make the cut out any shape you want, oval, circle, heart…. but to be honest square is definitely the easiest.
Here are the details on how to make this card.
Cut 4 pieces of the card stock 5″ x 5″.
Score each piece at 2.5″ (The picture is distorted… it is 5″x5″). 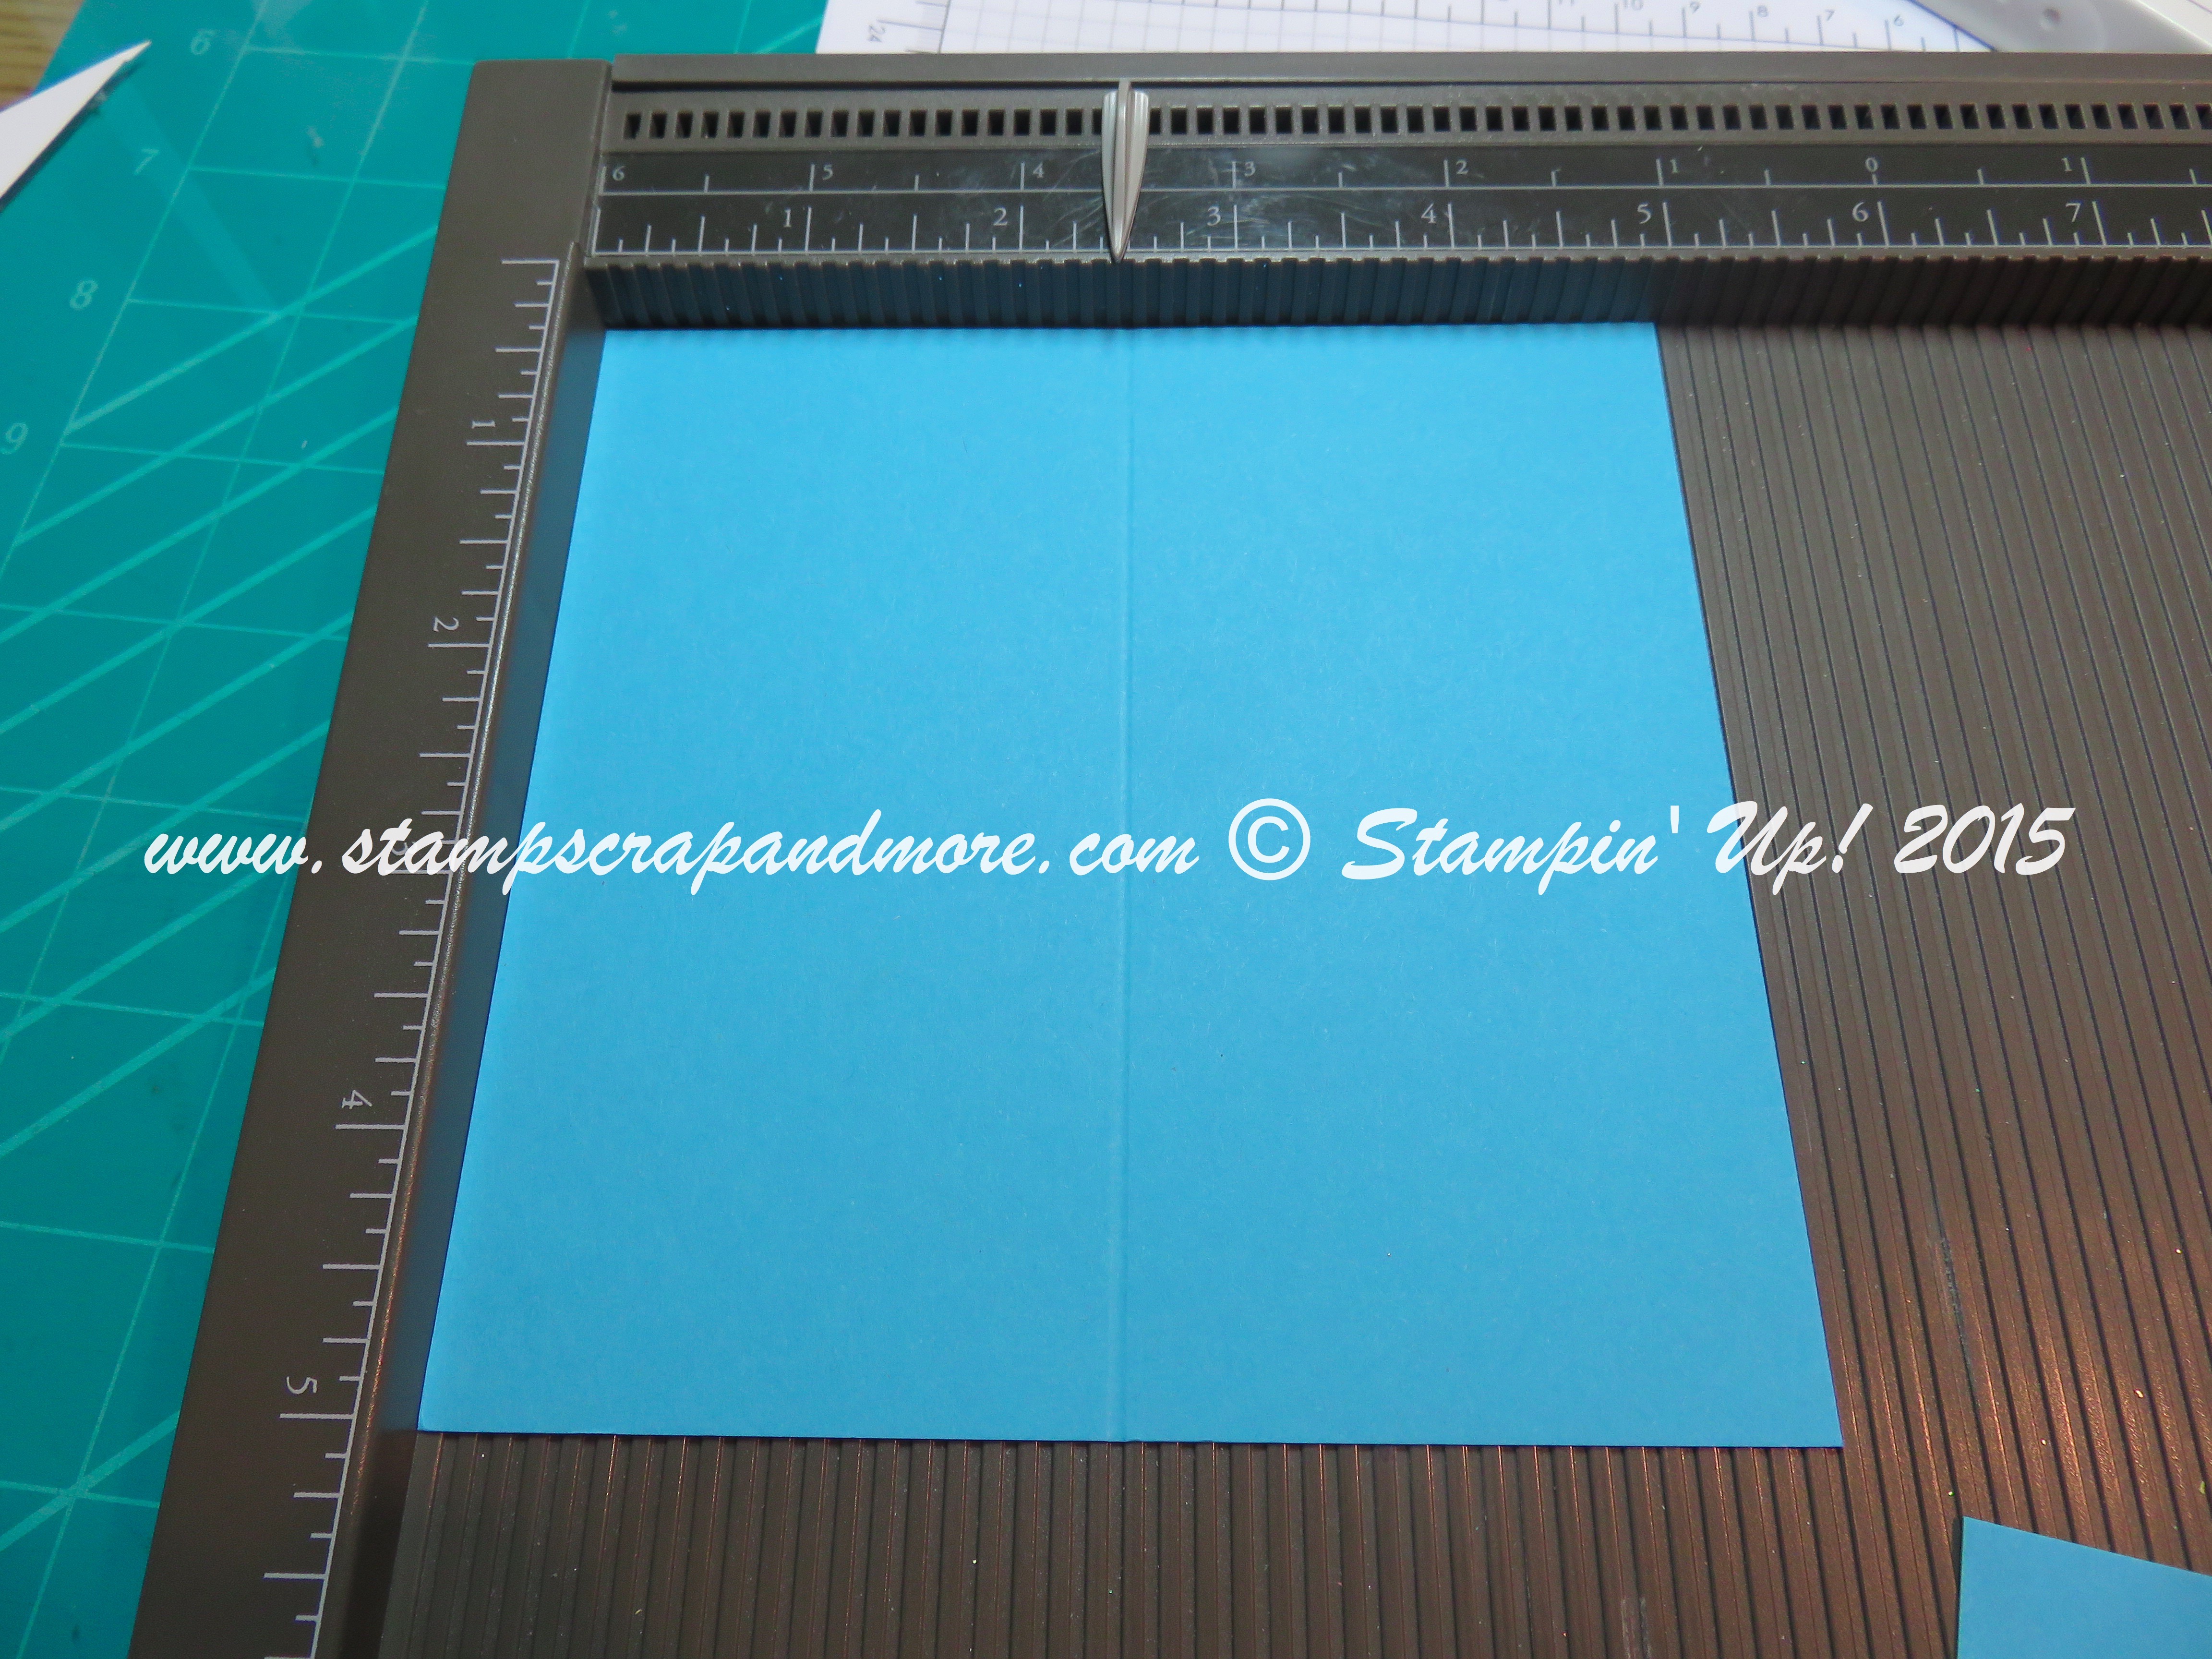
Using the largest square framelit (not the one with the scalloped border) – centre the framelit on the 5″ x 5 “- leaving a 1/2” space all around. To be honest I am a “wing it” kind of girl and eyeballed it. You can cut two layers at once.
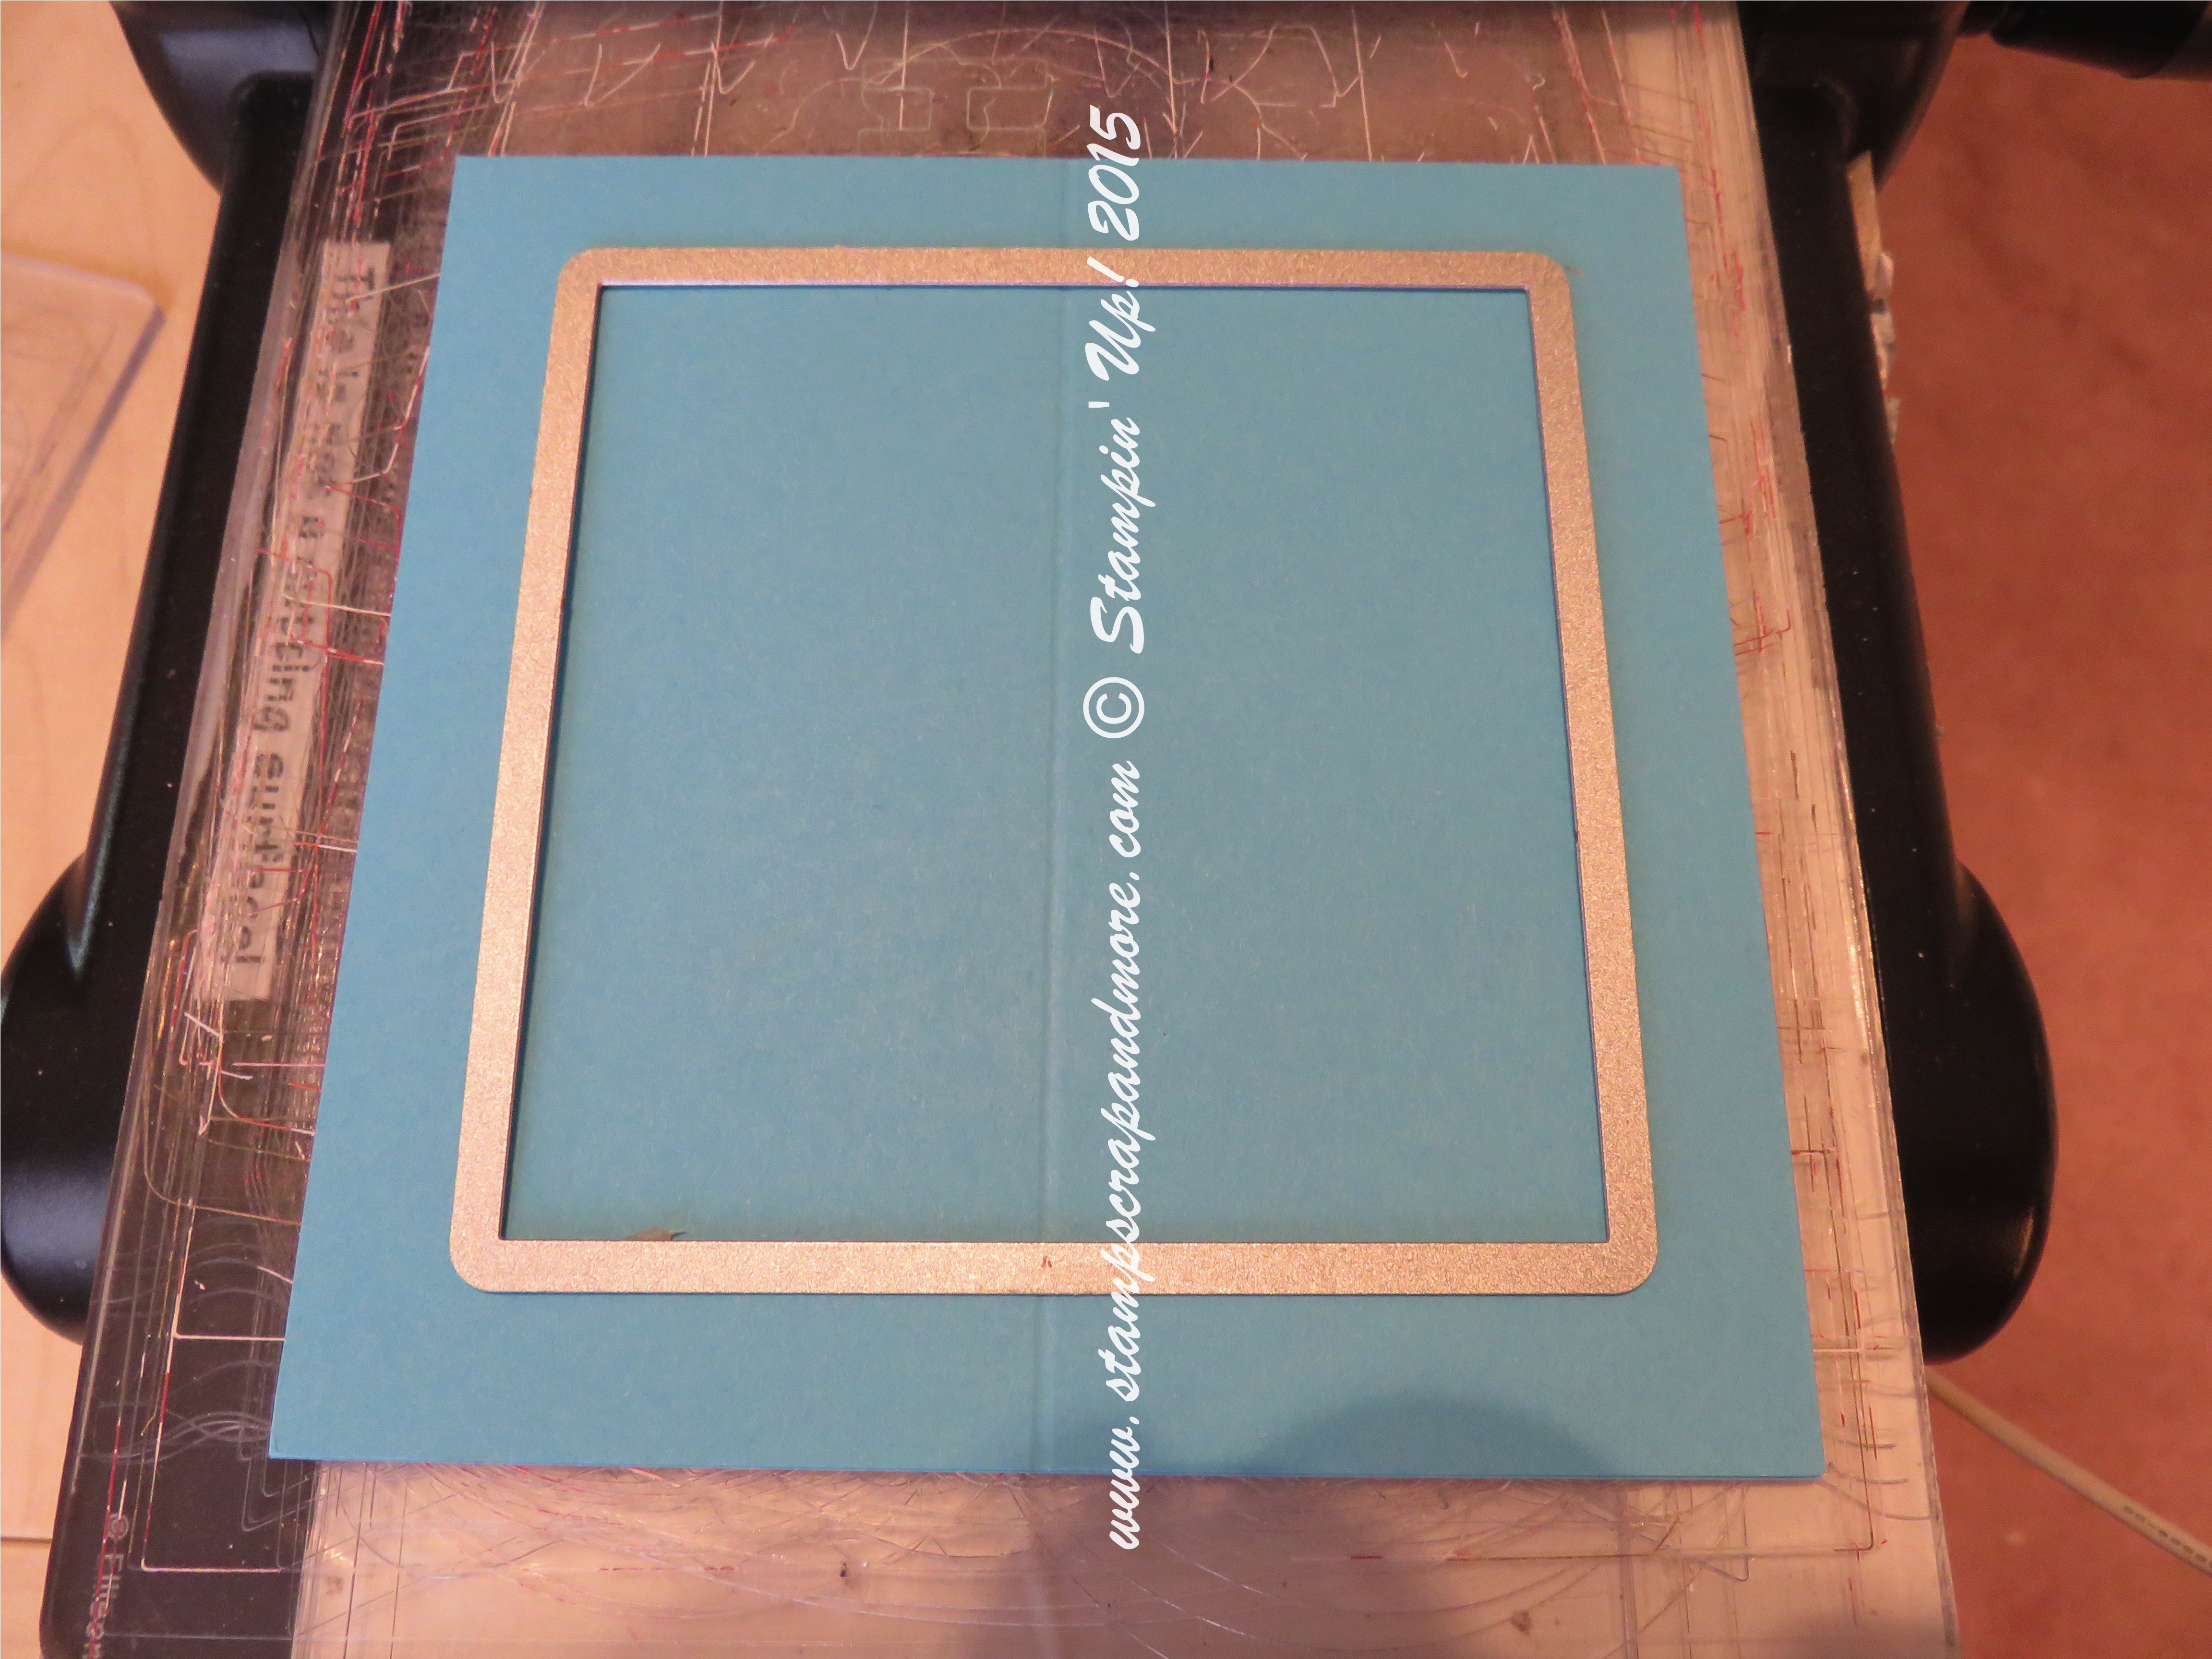
One of the keys to this card is to get everything even. Take the next two pieces of 5″ x 5″ card stock (should be scored at 2.5″) and place it on your cutting pad. I took one of the first pieces that I cut and layed it on top and made marks of where to place the square framelit. Keeping the 1/2″ area around the framelit should also work.
Cut two pieces of Stampin’ Up! Vellum Card Stock 4.5″ x 4.5″. You should do any embossing on the vellum now before assembling – remember to use your Embossing Buddy – very much needed when embossing on Vellum. I also embossed a couple of butterflies on the second piece of vellum that would be the back of the card.
Time to assemble
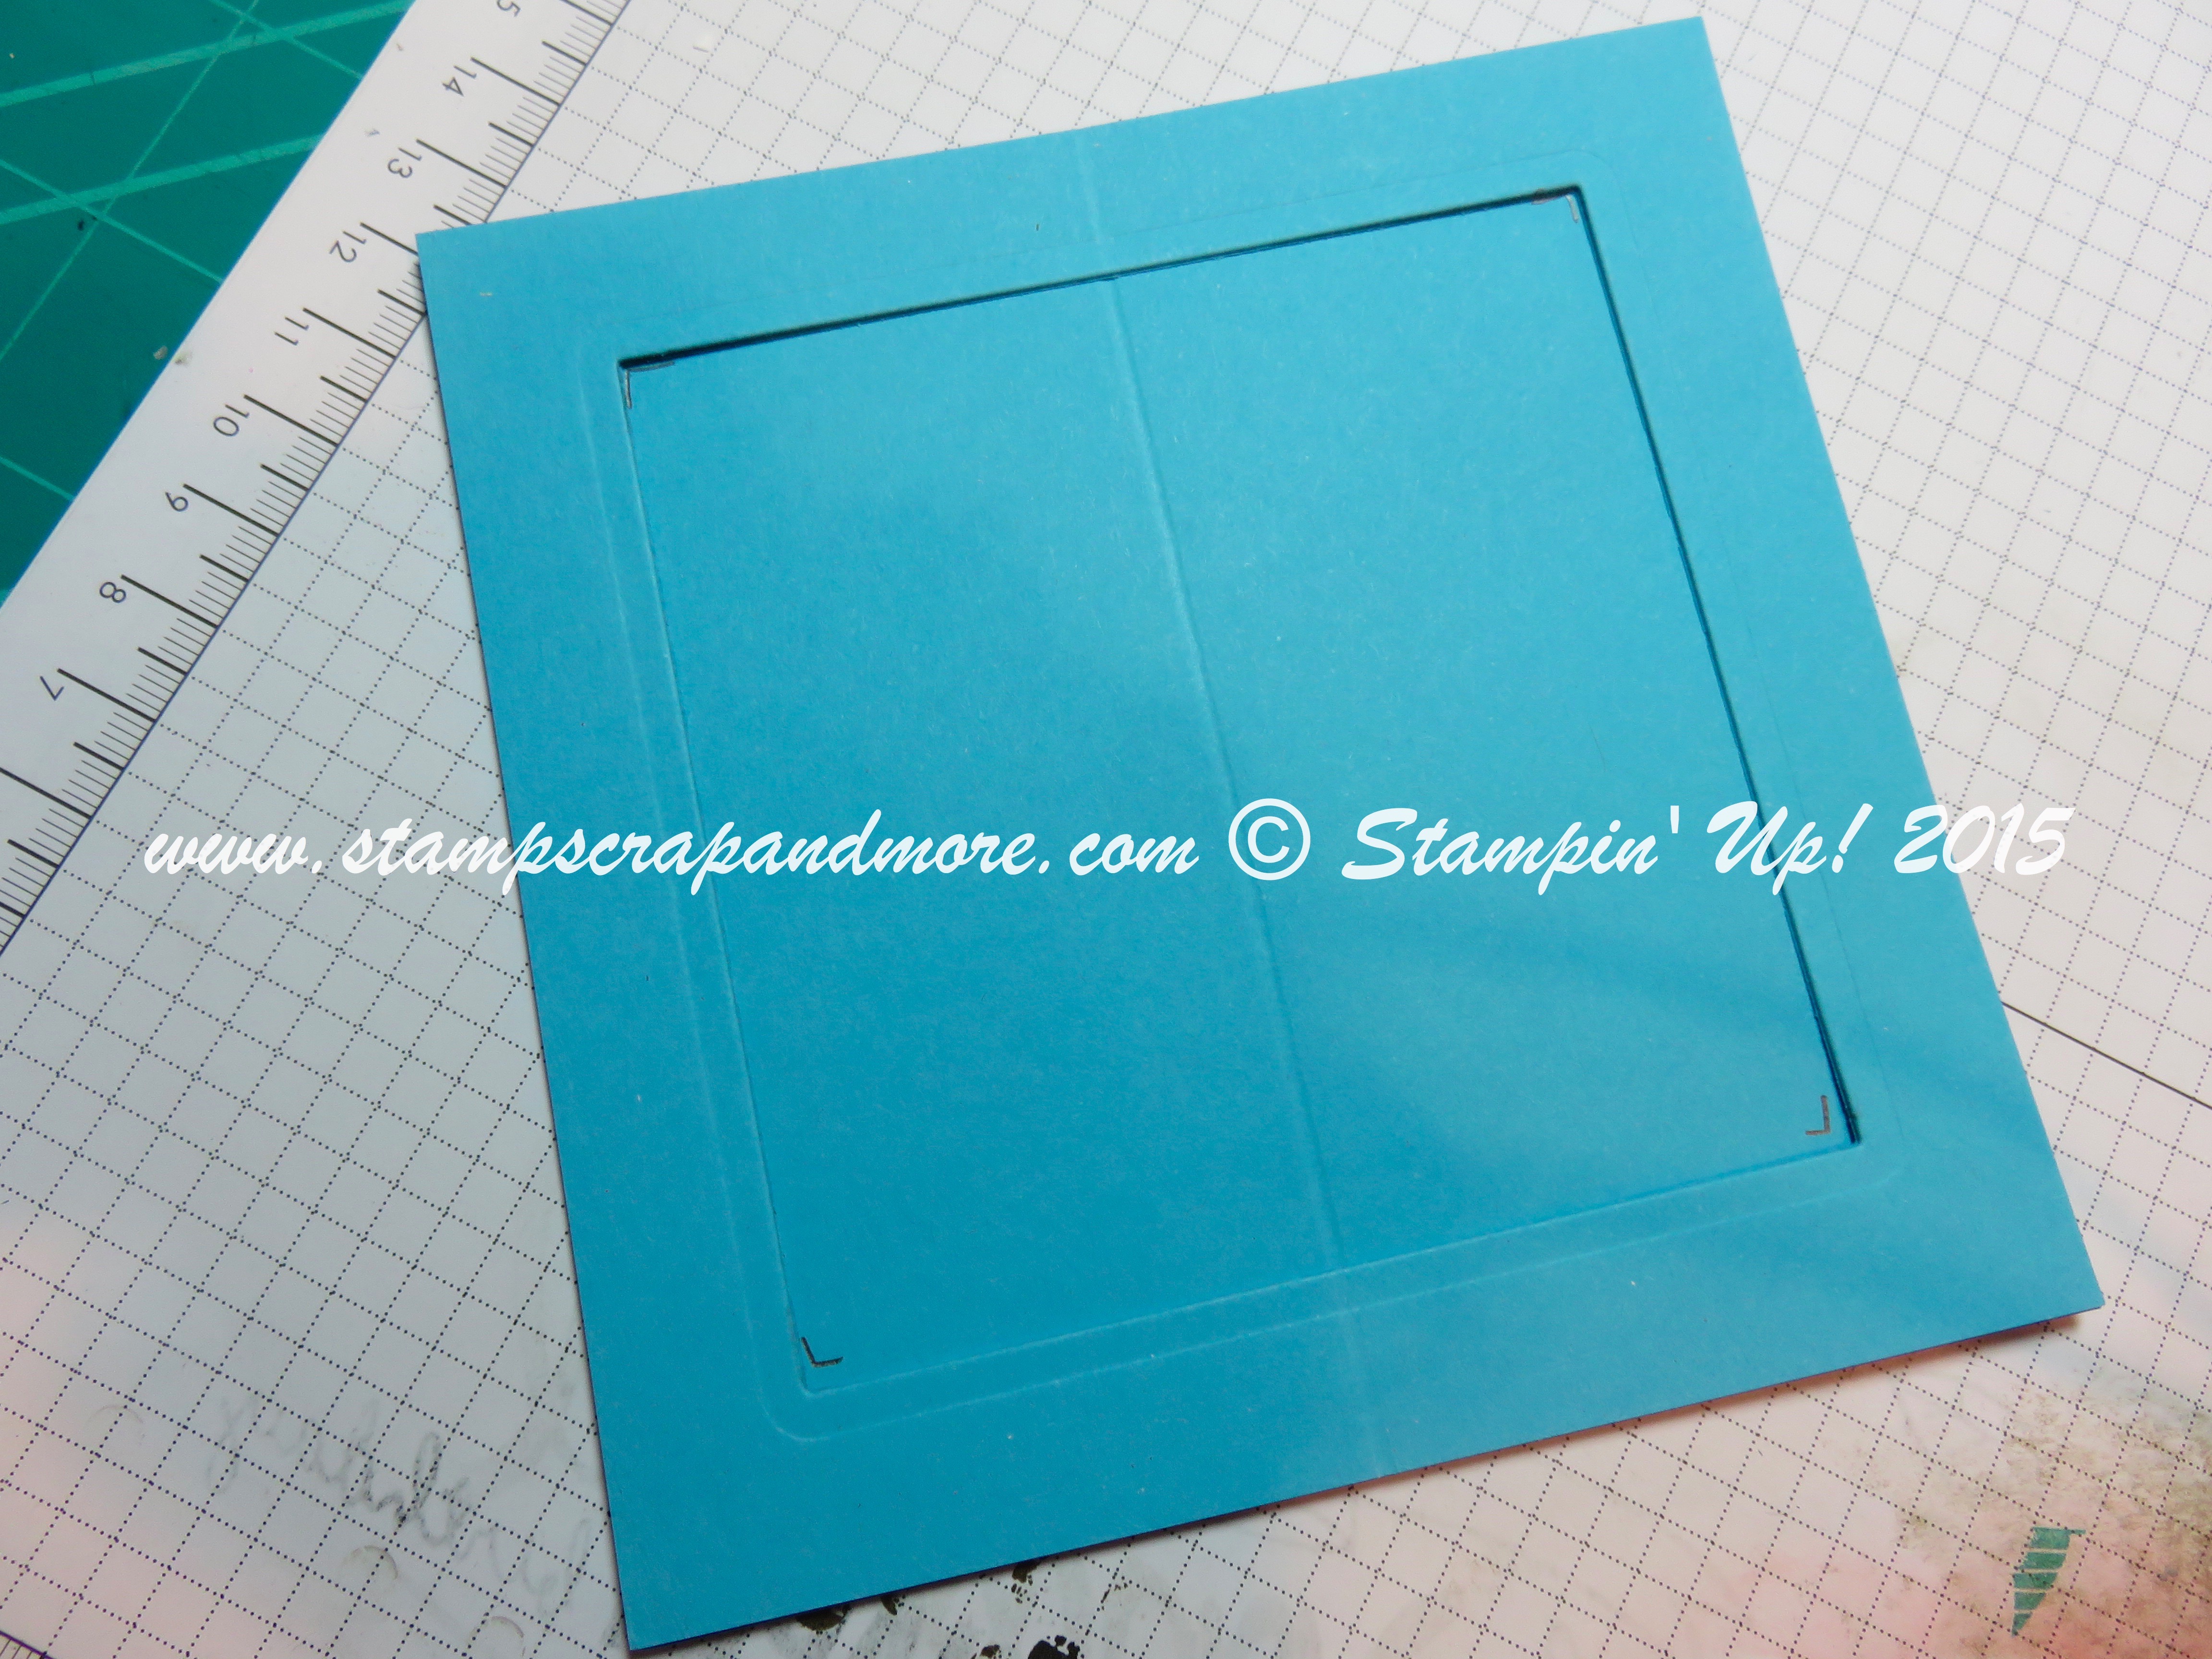
You should have 4 card stock frames that are scored and 2 pieces of vellum (not scored!)
Adhere each piece of vellum to one of the frames. You will now have 2 frames with vellum and 2 without. When adhering the vellum to the frame… do not put adhesive over the score line… take it right up to the line. You don’t want the extra bulk at the top and bottom of the card where the 4 pieces will meet.
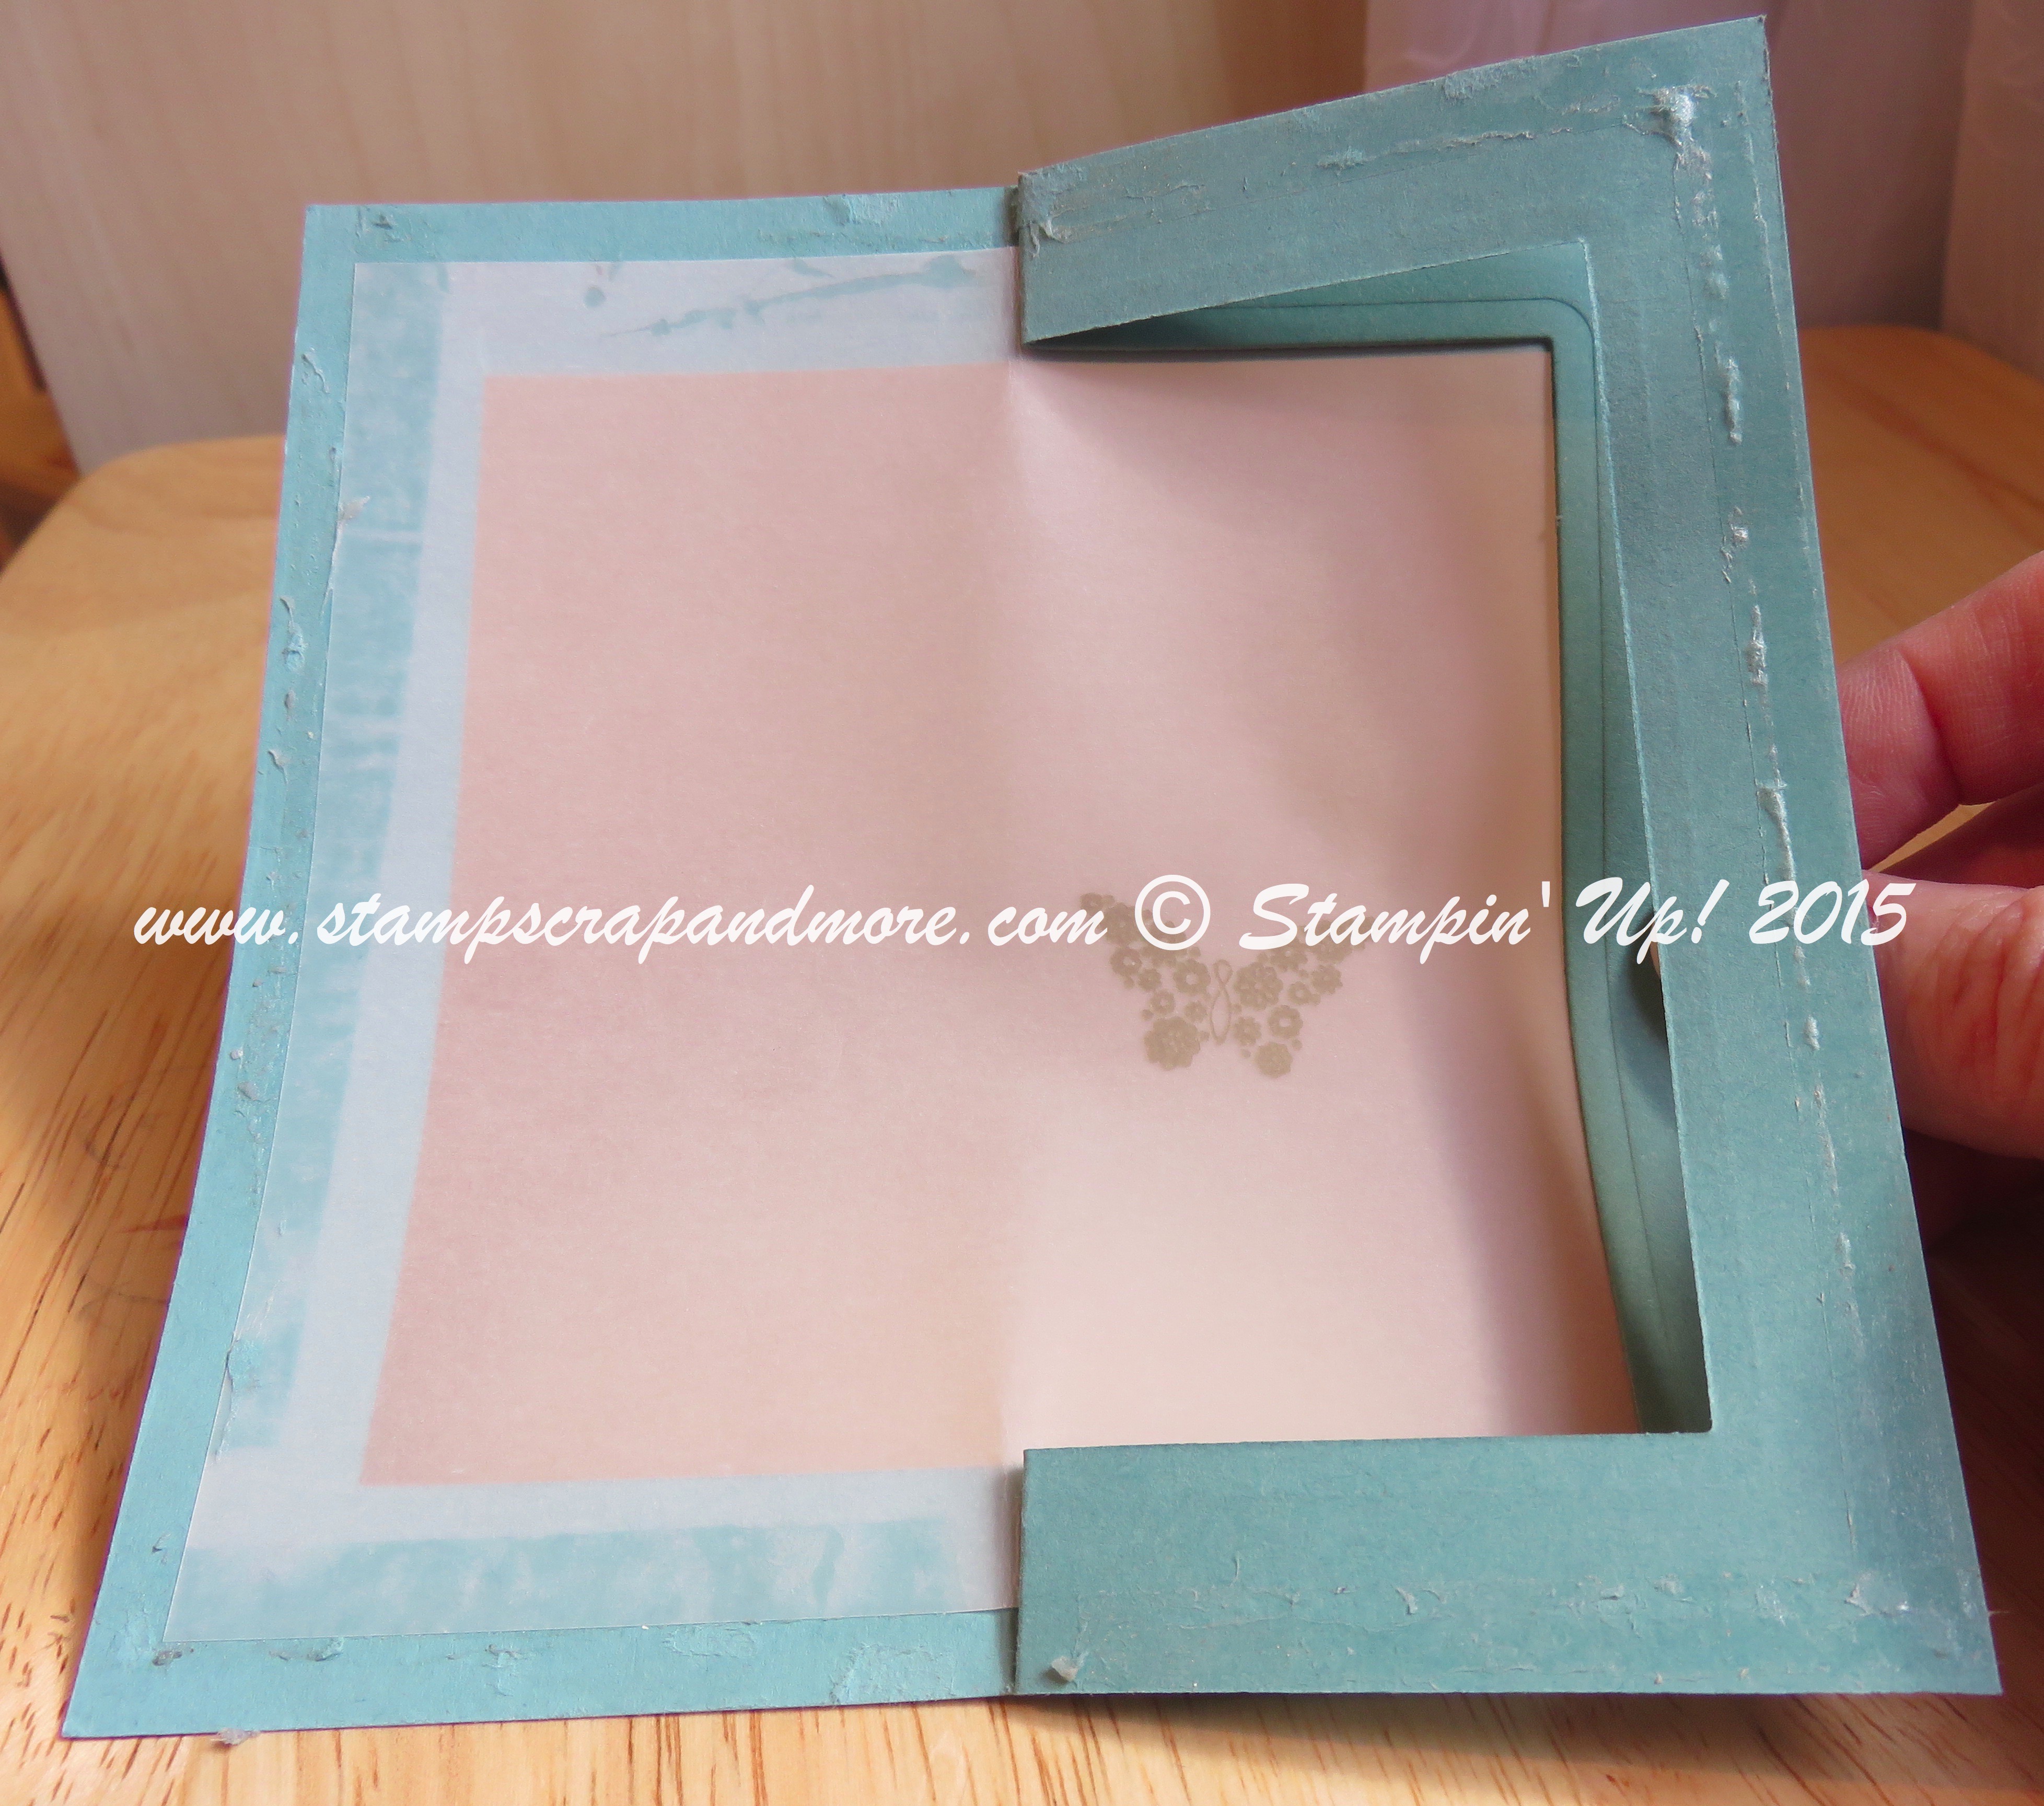
Fold the two frames without vellum in half – make sure the fold is straight and even and the score line is nice and clean.
Put adhesive on the right hand side of the piece with the vellum and match it up to the folded frame. Make sure the adhesive is on the edge of the card stock. You want the pieces to adhere together and look like one piece. Please ignore the tutorial pictures below… I took my “working sample” card apart to take the pictures.
At this point… if I had any uneven outside edges, I would trim them off with the paper trimmer… you want everything to be nice and even.
Now add adhesive to the right hand side of the folded over frame (see above).
Take the second piece of frame with vellum and line it up to the piece that has been folded over….. keep everything lined up – nice and even (are you tired of me saying that yet?)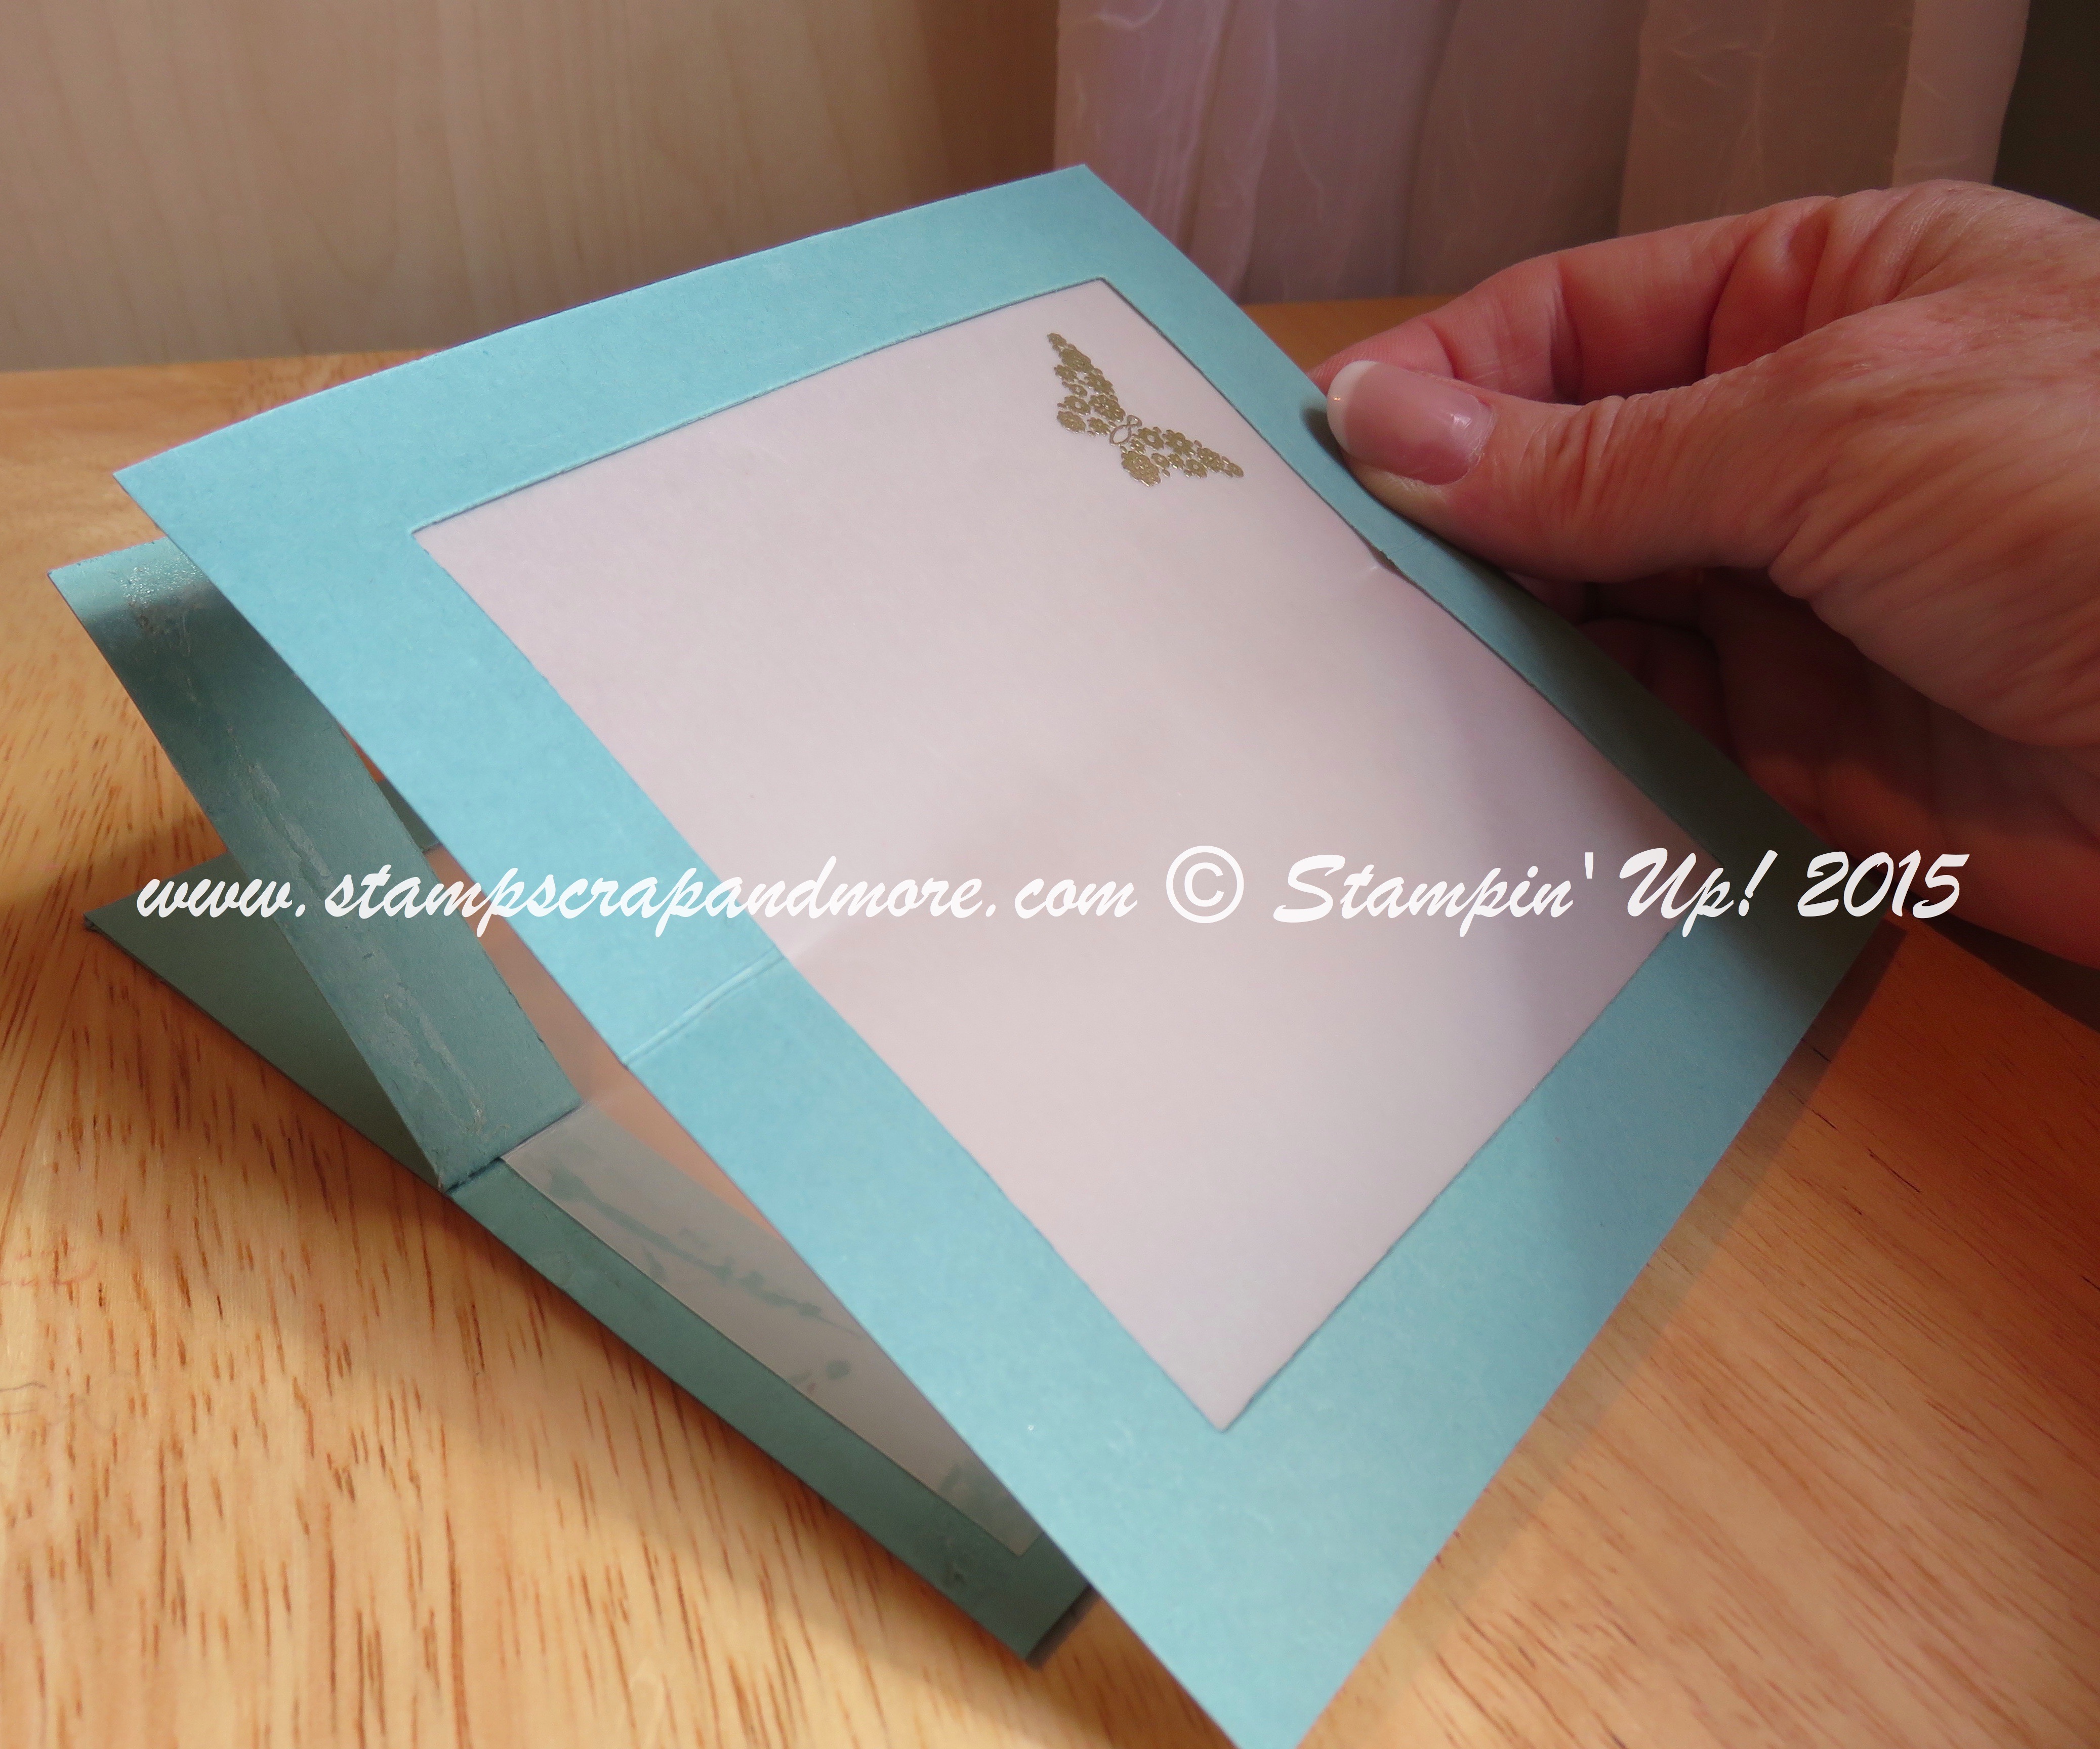
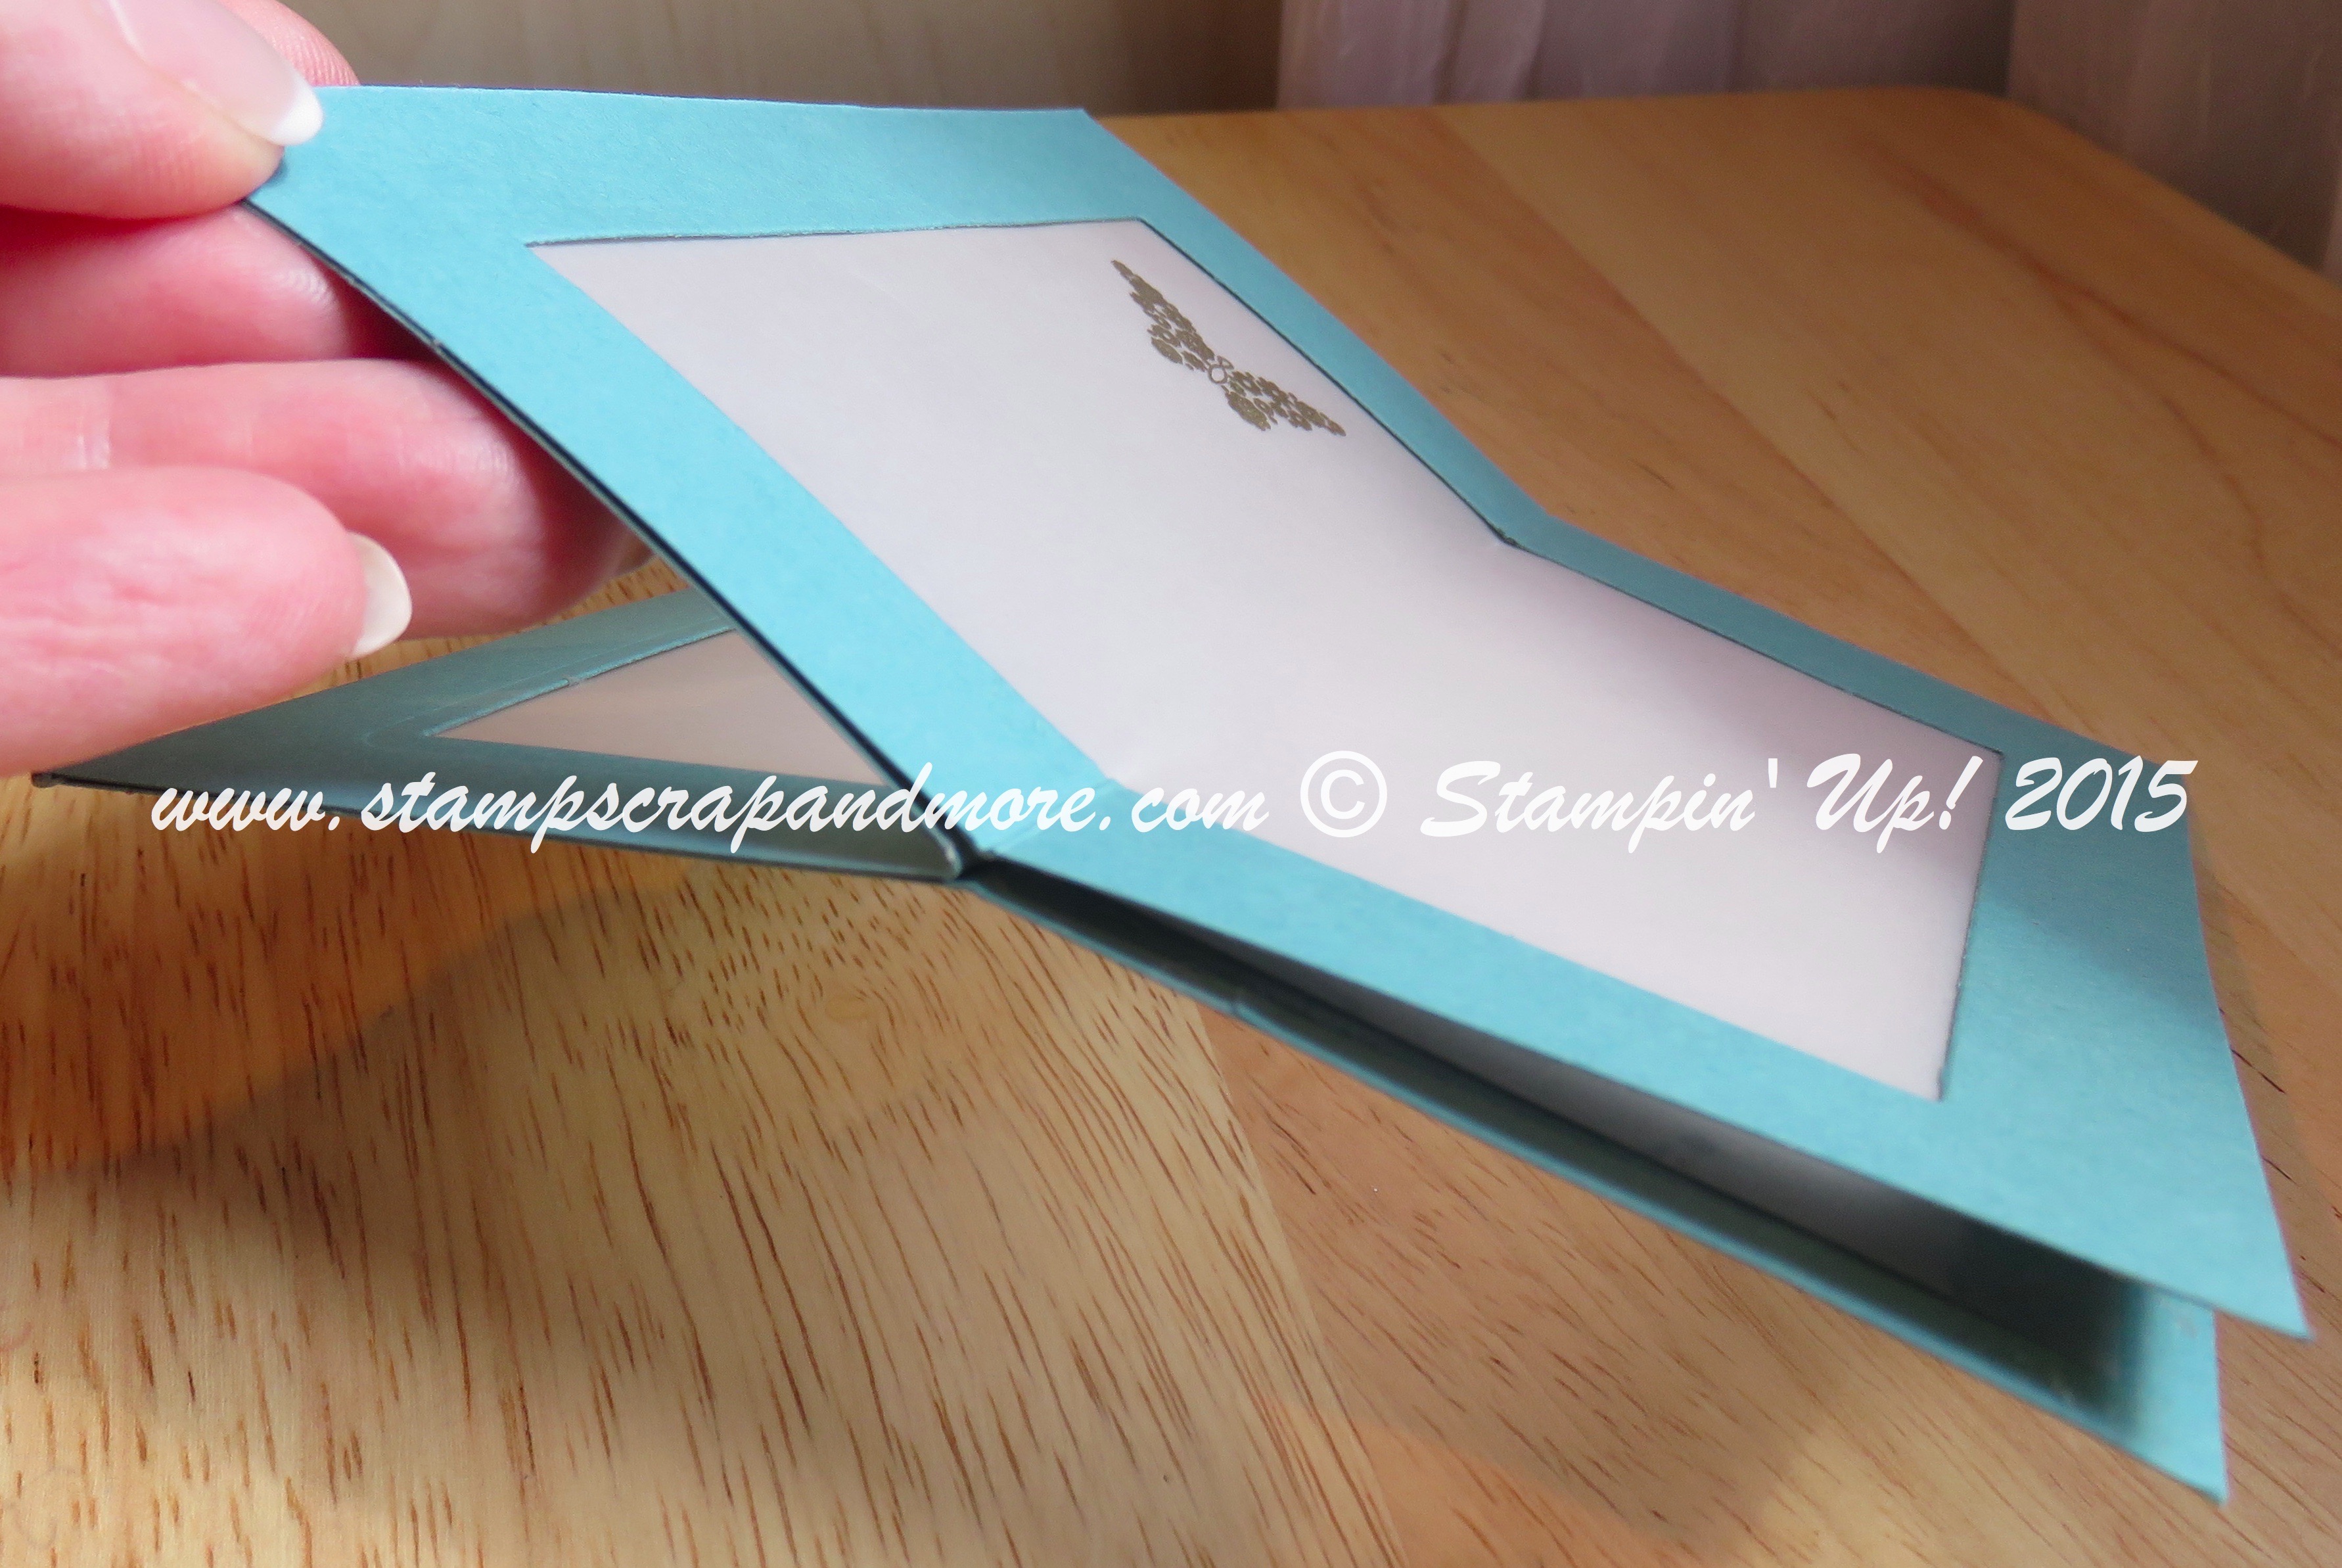
Now take the last piece of frame. Add adhesive to both sides (not going over the score line) and match it up to each side of the card. Try not to put a bend / fold into the vellum. You can enforce the score line at the top / bottom of the card without putting a fold in the vellum.
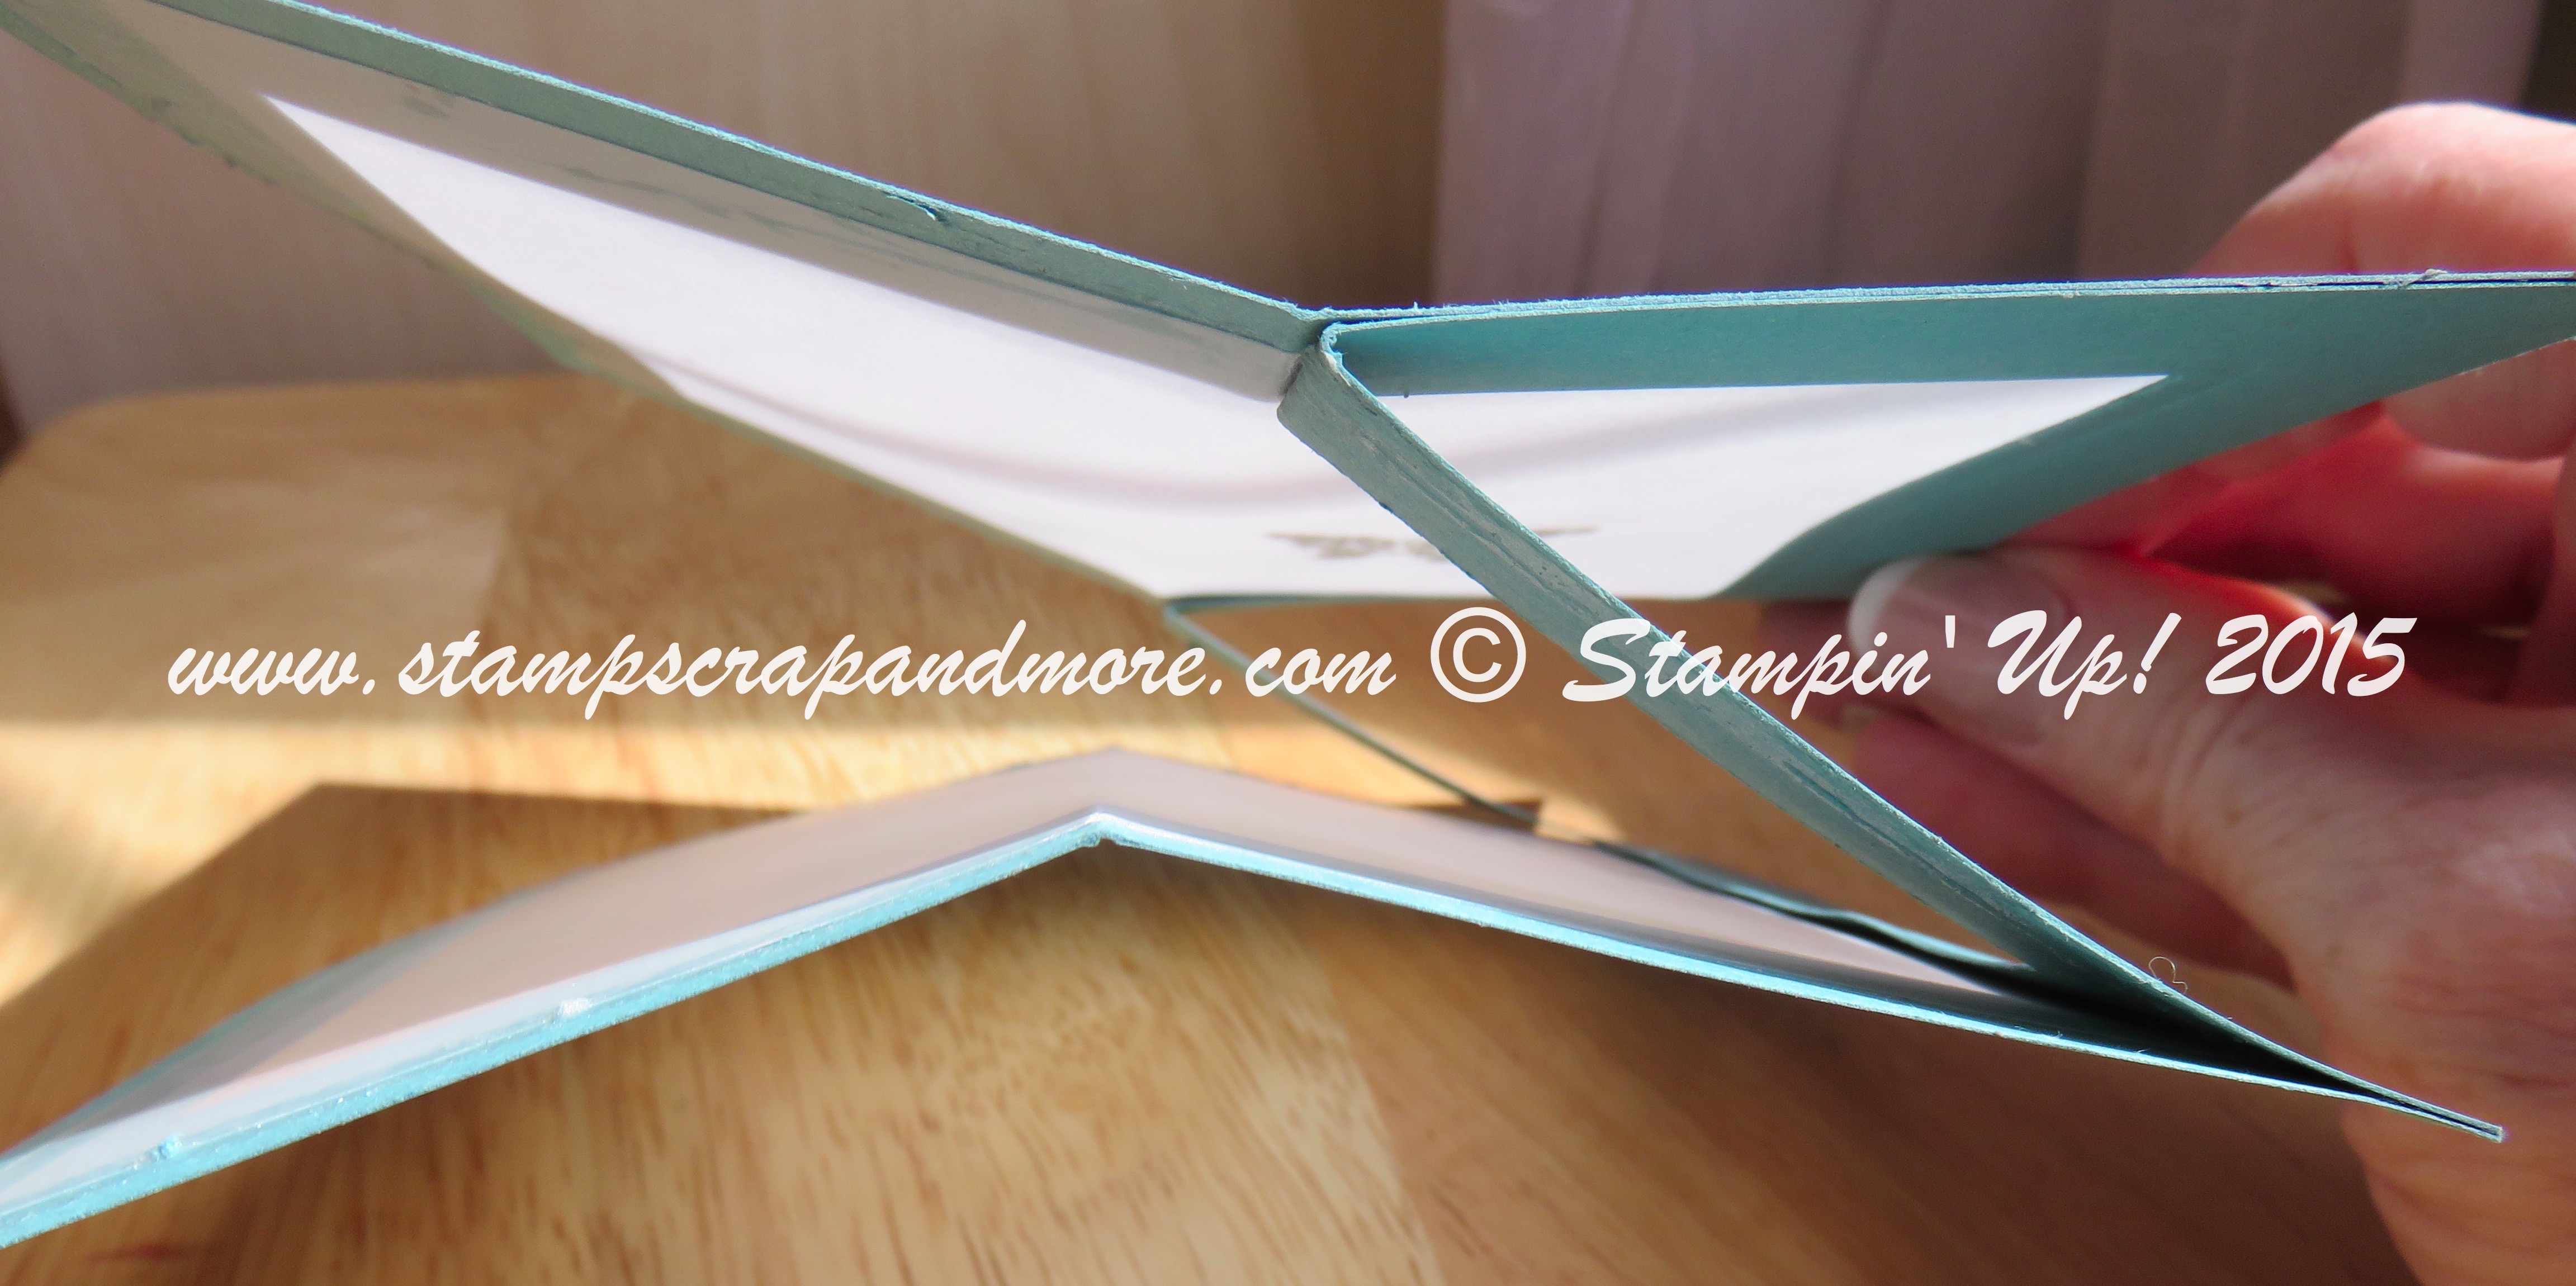
You may have to train the card to stand up by gently bending the card back and forth.
Again – if you need to trim off any of the excess edges gently put one side at a time into your trimmer and “sliver” off any excess.
Now you can go ahead and decorate your card as you like. I thought of where I would write my sentiment / sign the card…. you can put a banner or label punch on the bottom right hand corner so you can sign it.
If you have any questions or need clarification don’t hesitate to ask.
Thanks for stopping by,Elizabeth, Your Stampin' Up! Demonstrator
www.StampScrapAndMore.com