Hi Stampers
As promised, here are the instructions for the Swap I had for the Kitchener Conference last weekend. My swap was a Box Card. I altered it from an original design so that it fits into a standard A2 envelope. I love cards that are different, interactive, that have movement – and this fits the bill.
Now on to the instructions:
Cutting Guide
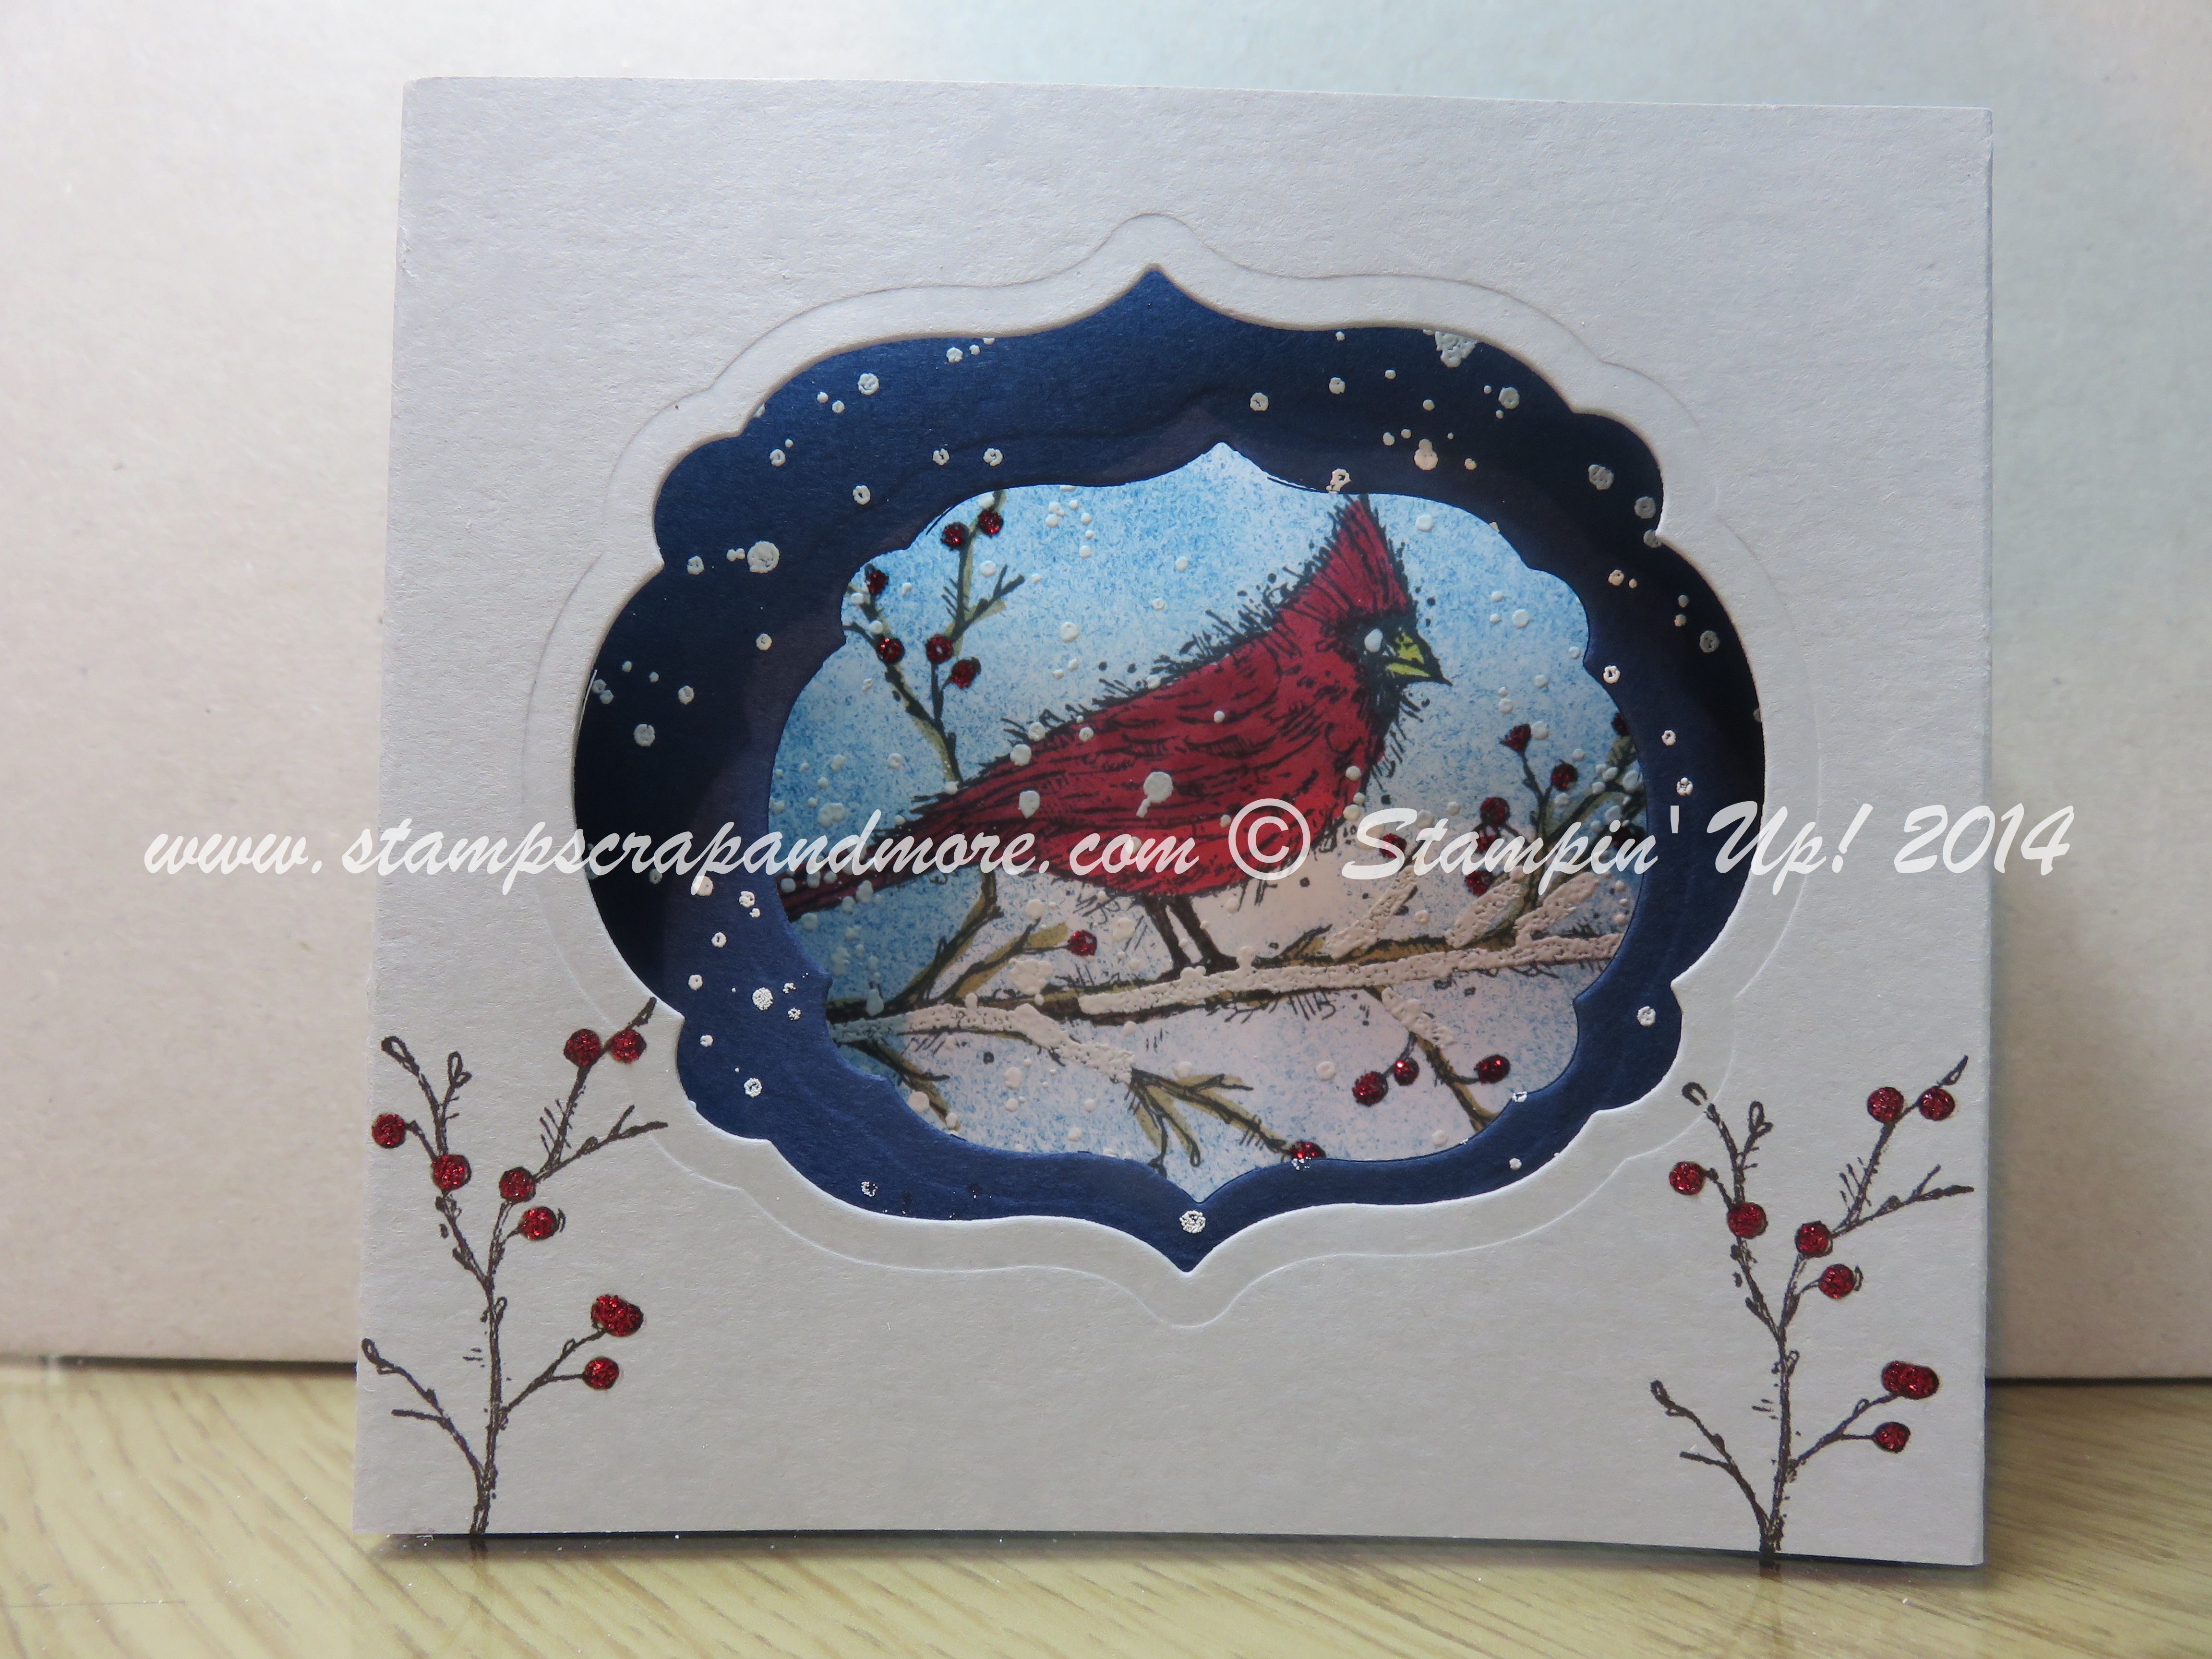
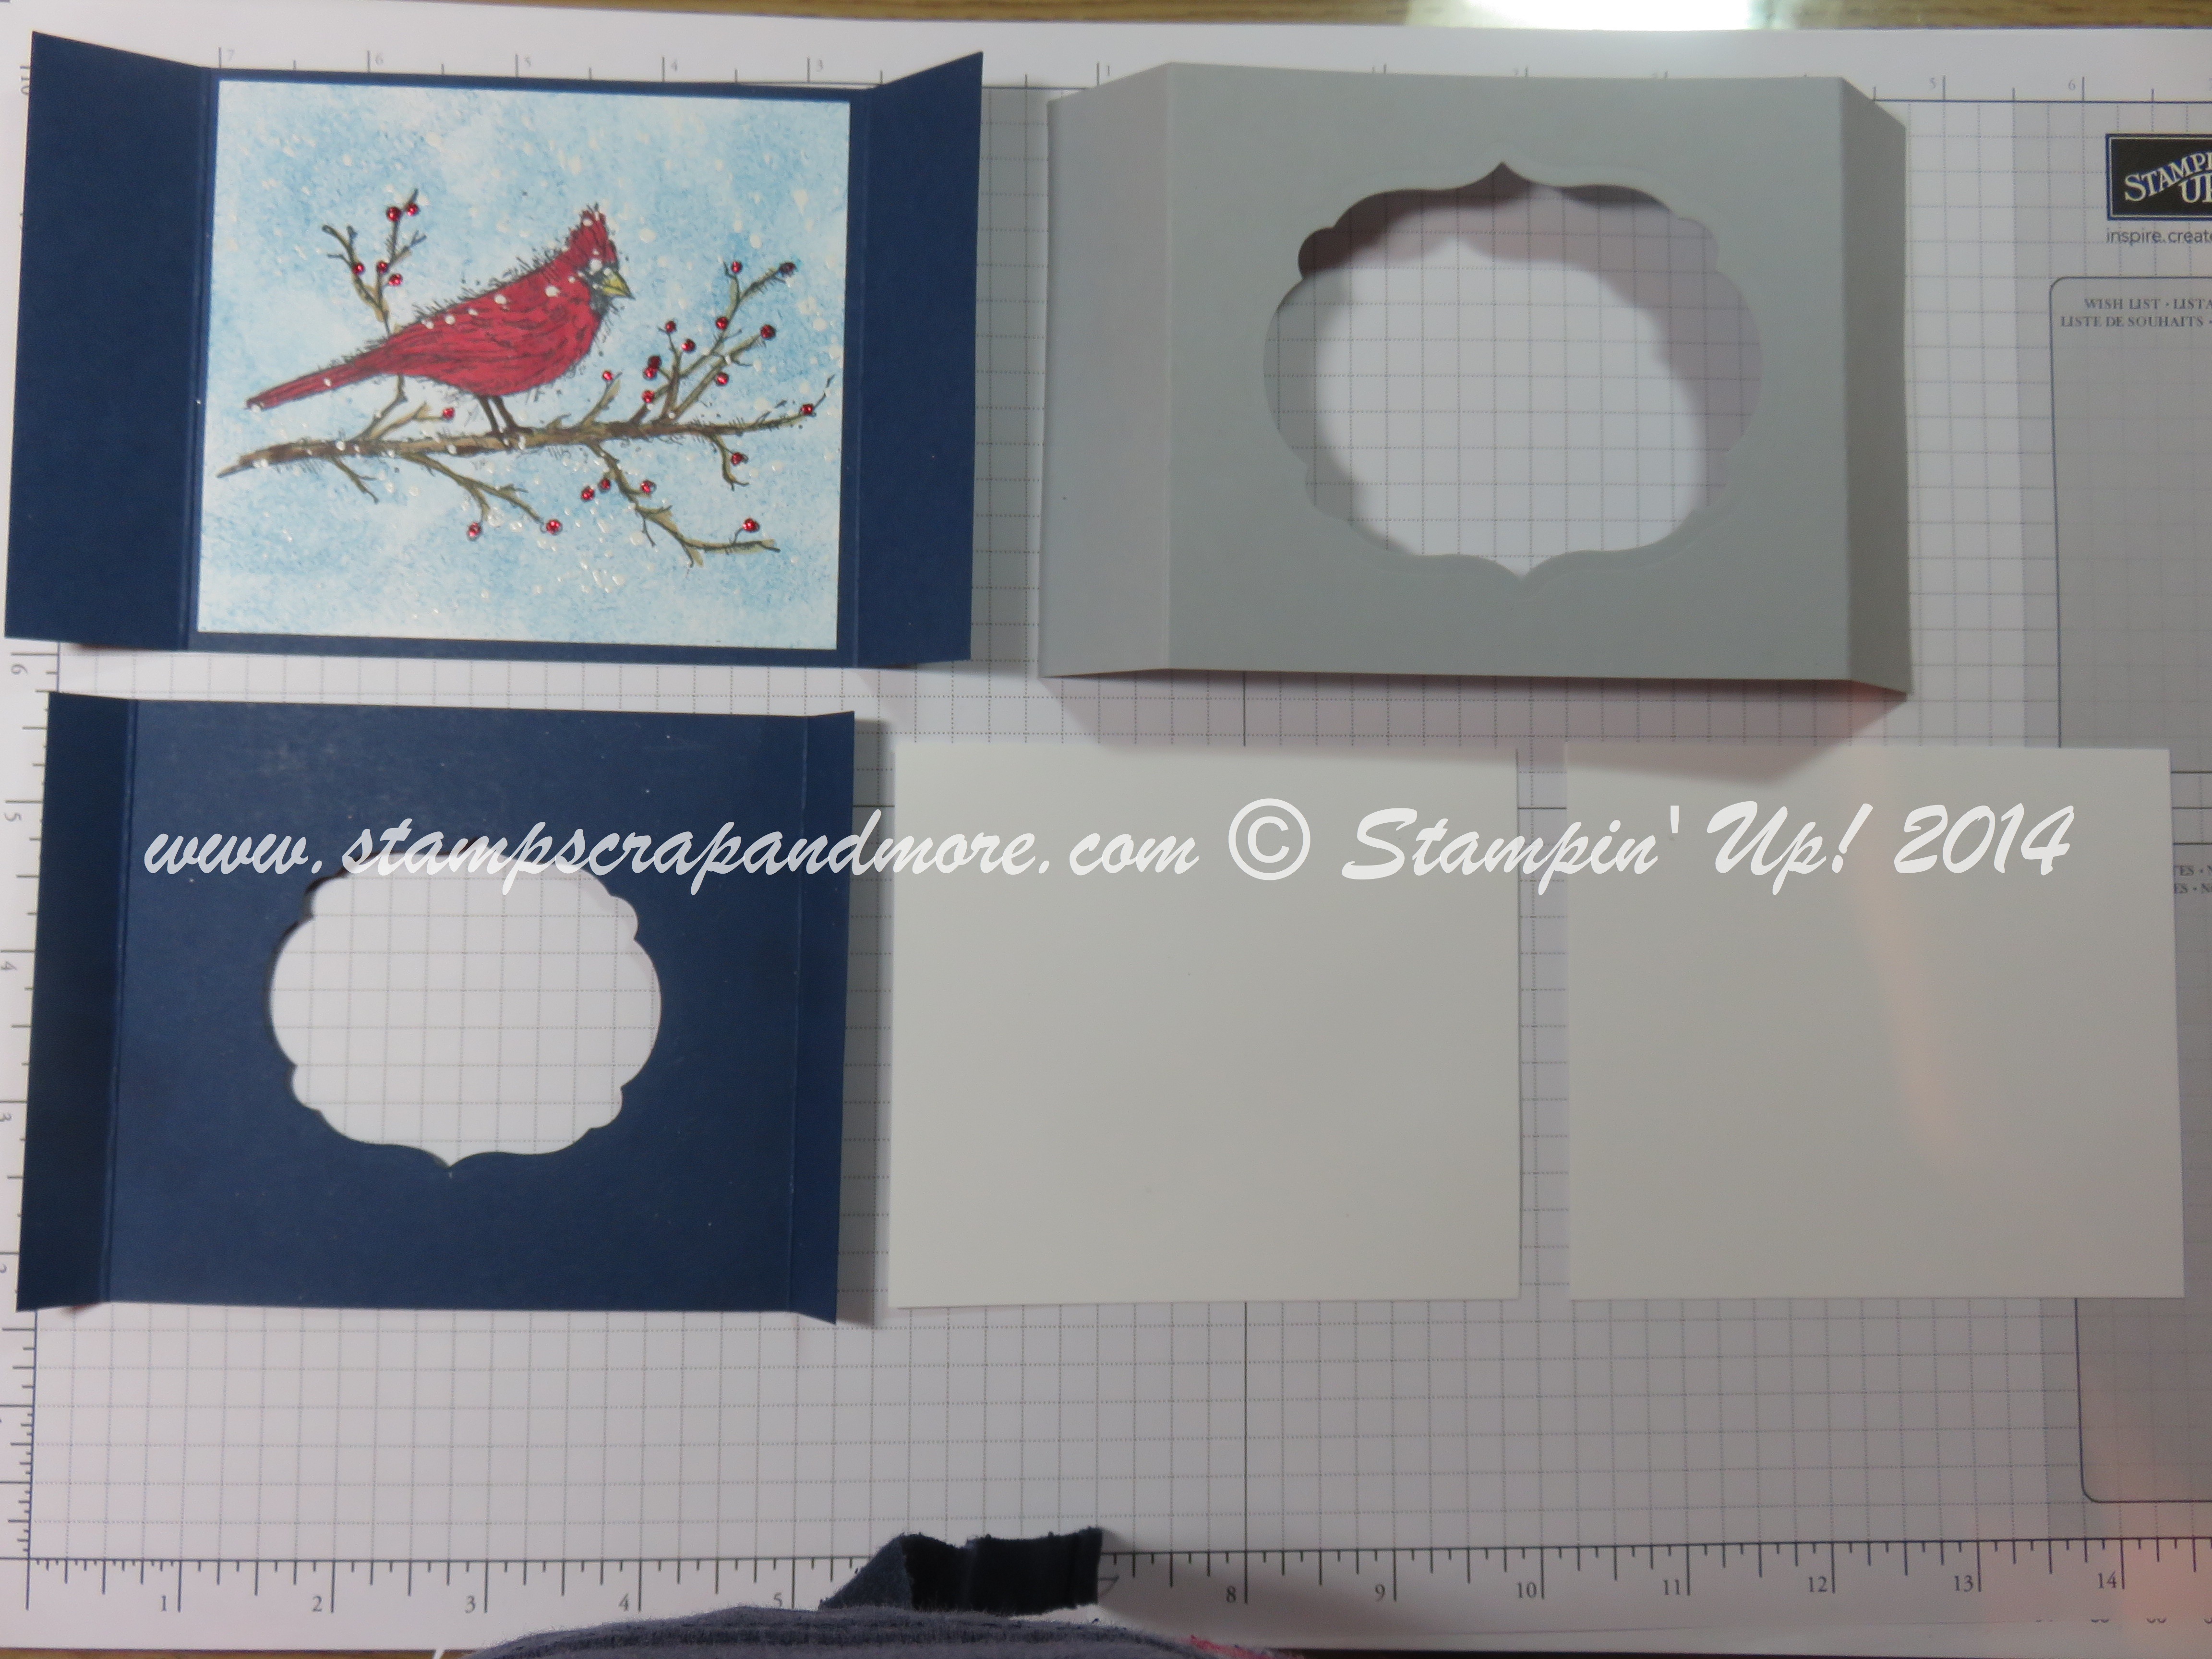
The card is a 3 layer box card that folds flat into a standard A2 envelope.
Layer 1 (Back) – Night of Navy – Cut at 4″ x 6 1/2″ – scored on the 6 1/2″ side at 1″ and 5 1/2 “.
Layer 2 (inside) – Night of Navy – Cut at 4″ x 5 1/2 “- scored on the 5 1/2″ side at 1/2″ and 5”
Layer 3 (top) – Smokey Slate (what I used on the swap for Kitchener Conference) – 4″ x 6 1/2″ – scored on the 6 1/2″ side at 1″ and 5 1/2″
Whisper White – 2 pieces (for sentiment and image) at 4 1/4″ x 3 3/4″.
(note – picture below is of the pieces needed – I had already mounted the image on to the inside of the card – you will only need 2 pieces (total) of the Whisper White).
Step #1
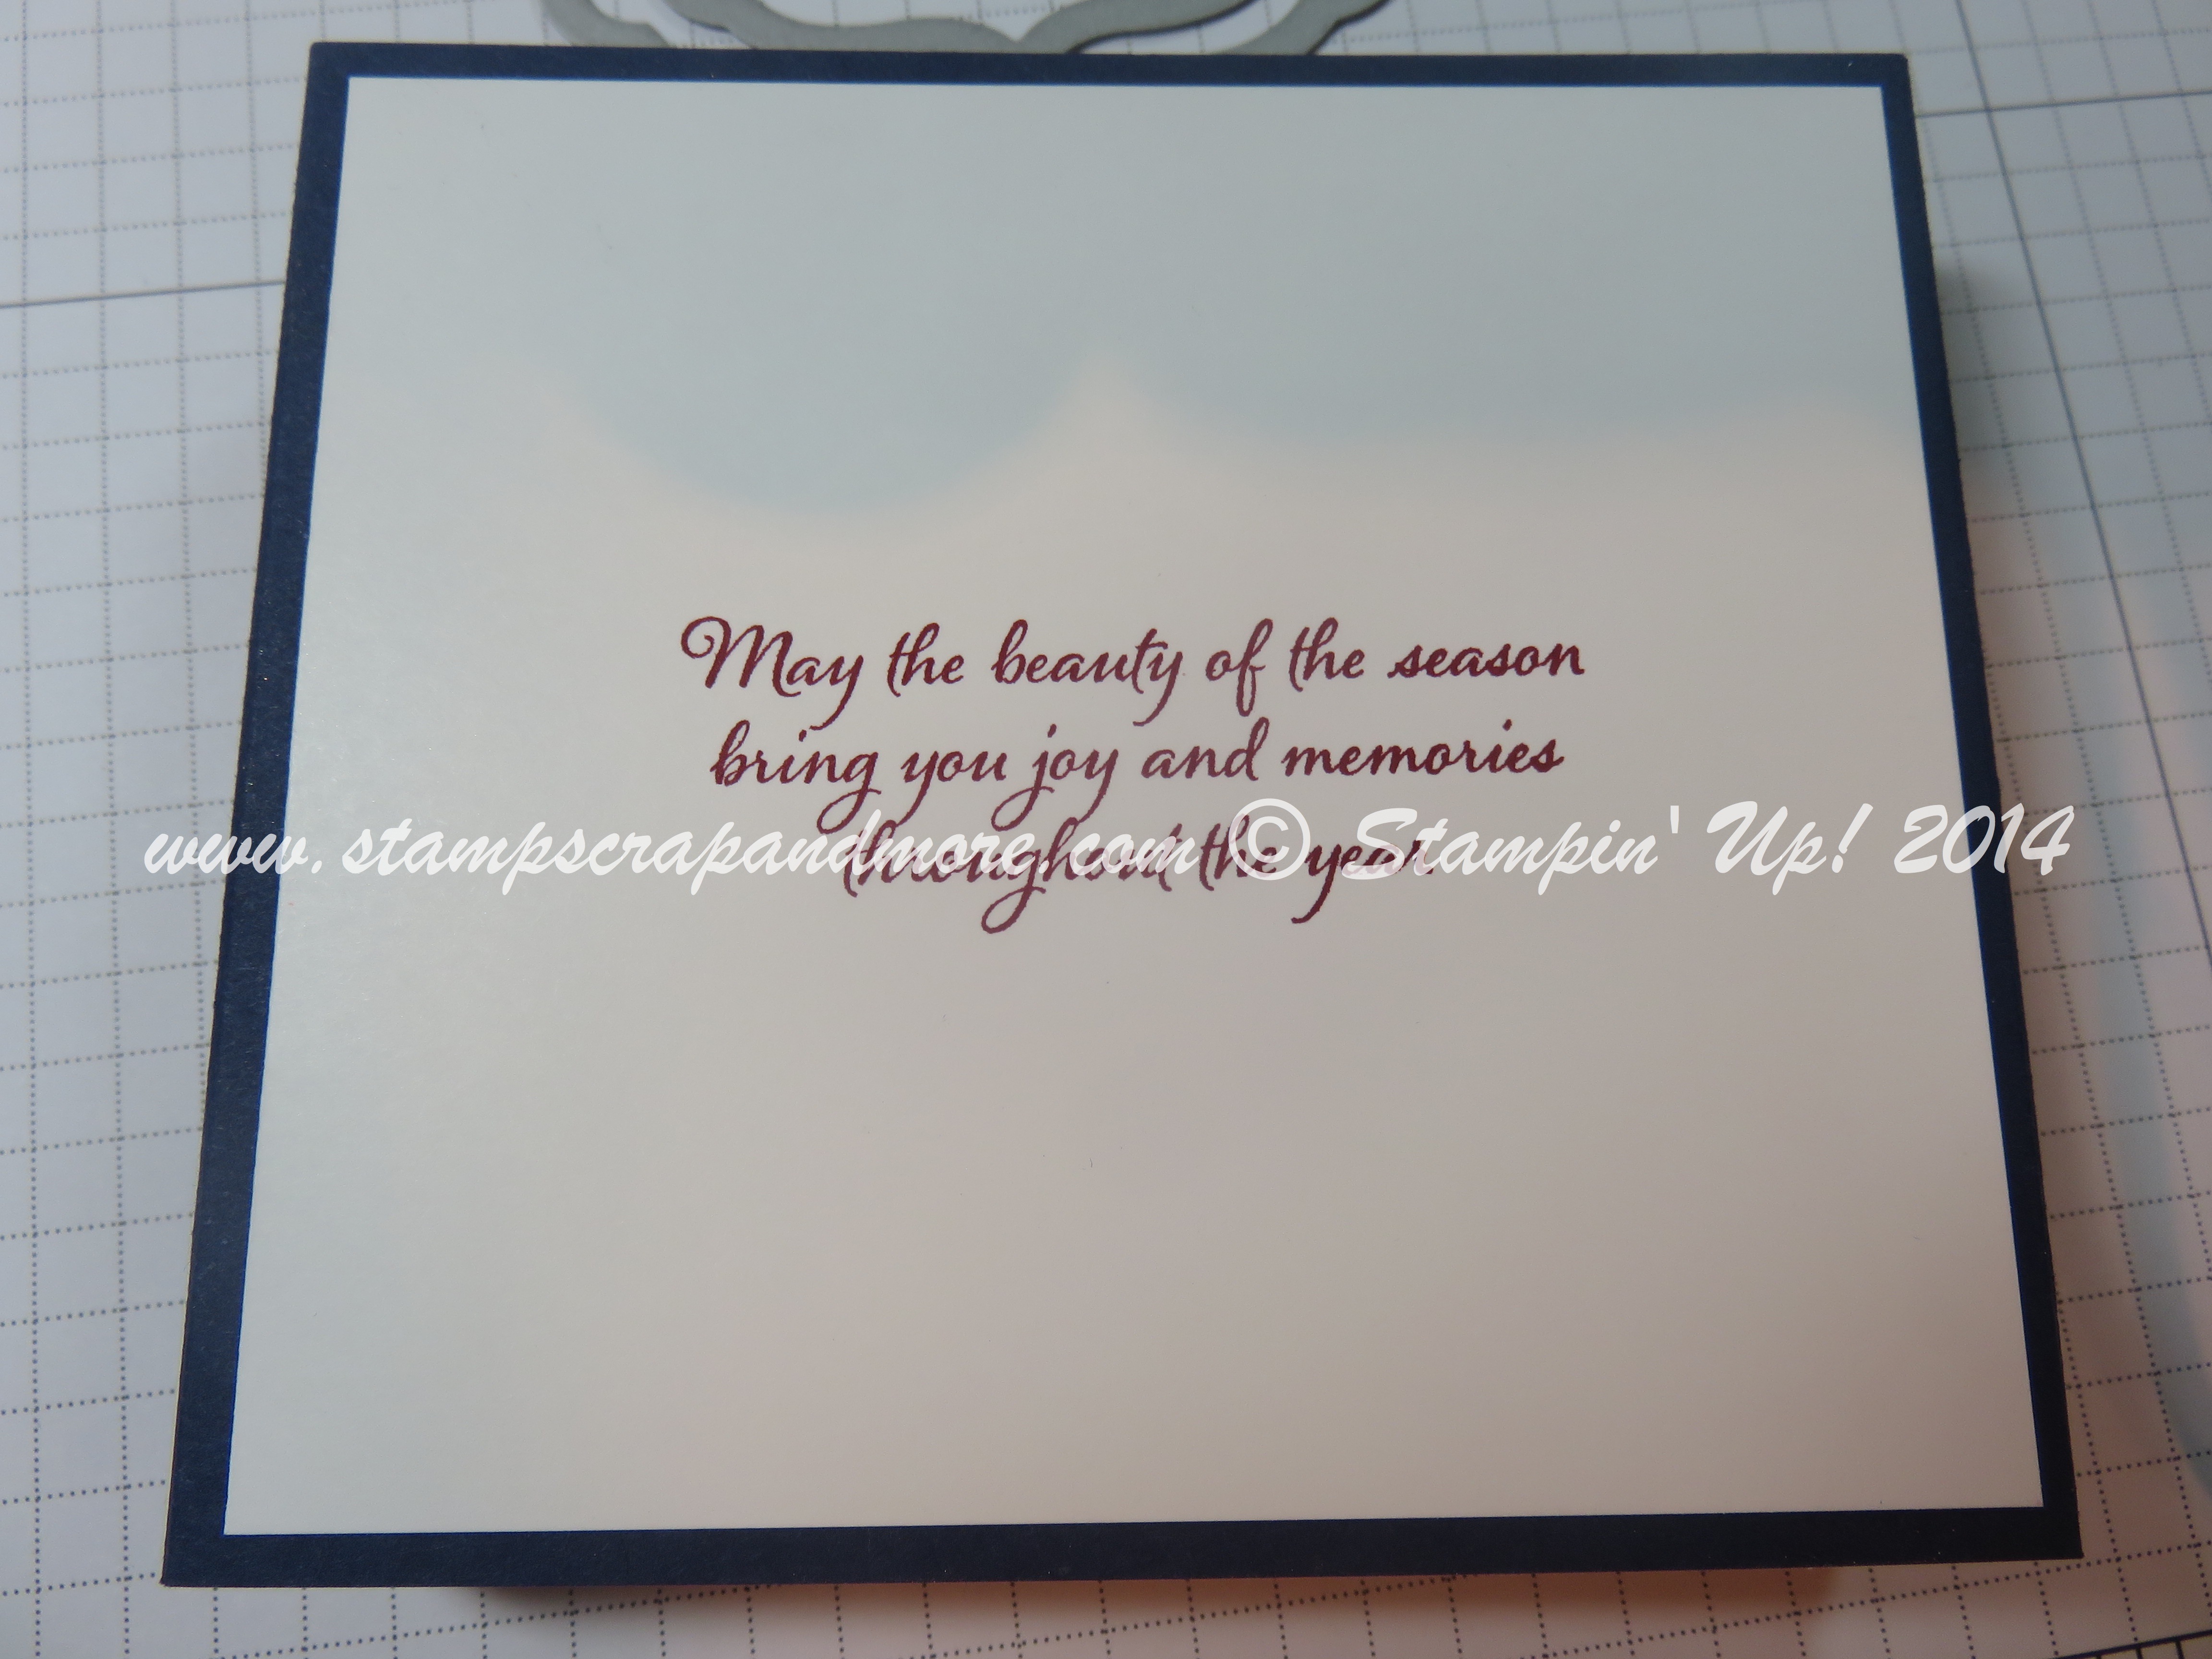
On one piece of the 4 1/4″ x 3 3/4″ Whisper White stamp your sentiment in Cherry Cobbler. I like to stamp the reds first and put them aside – they tend to take a bit longer to dry.
Step #2
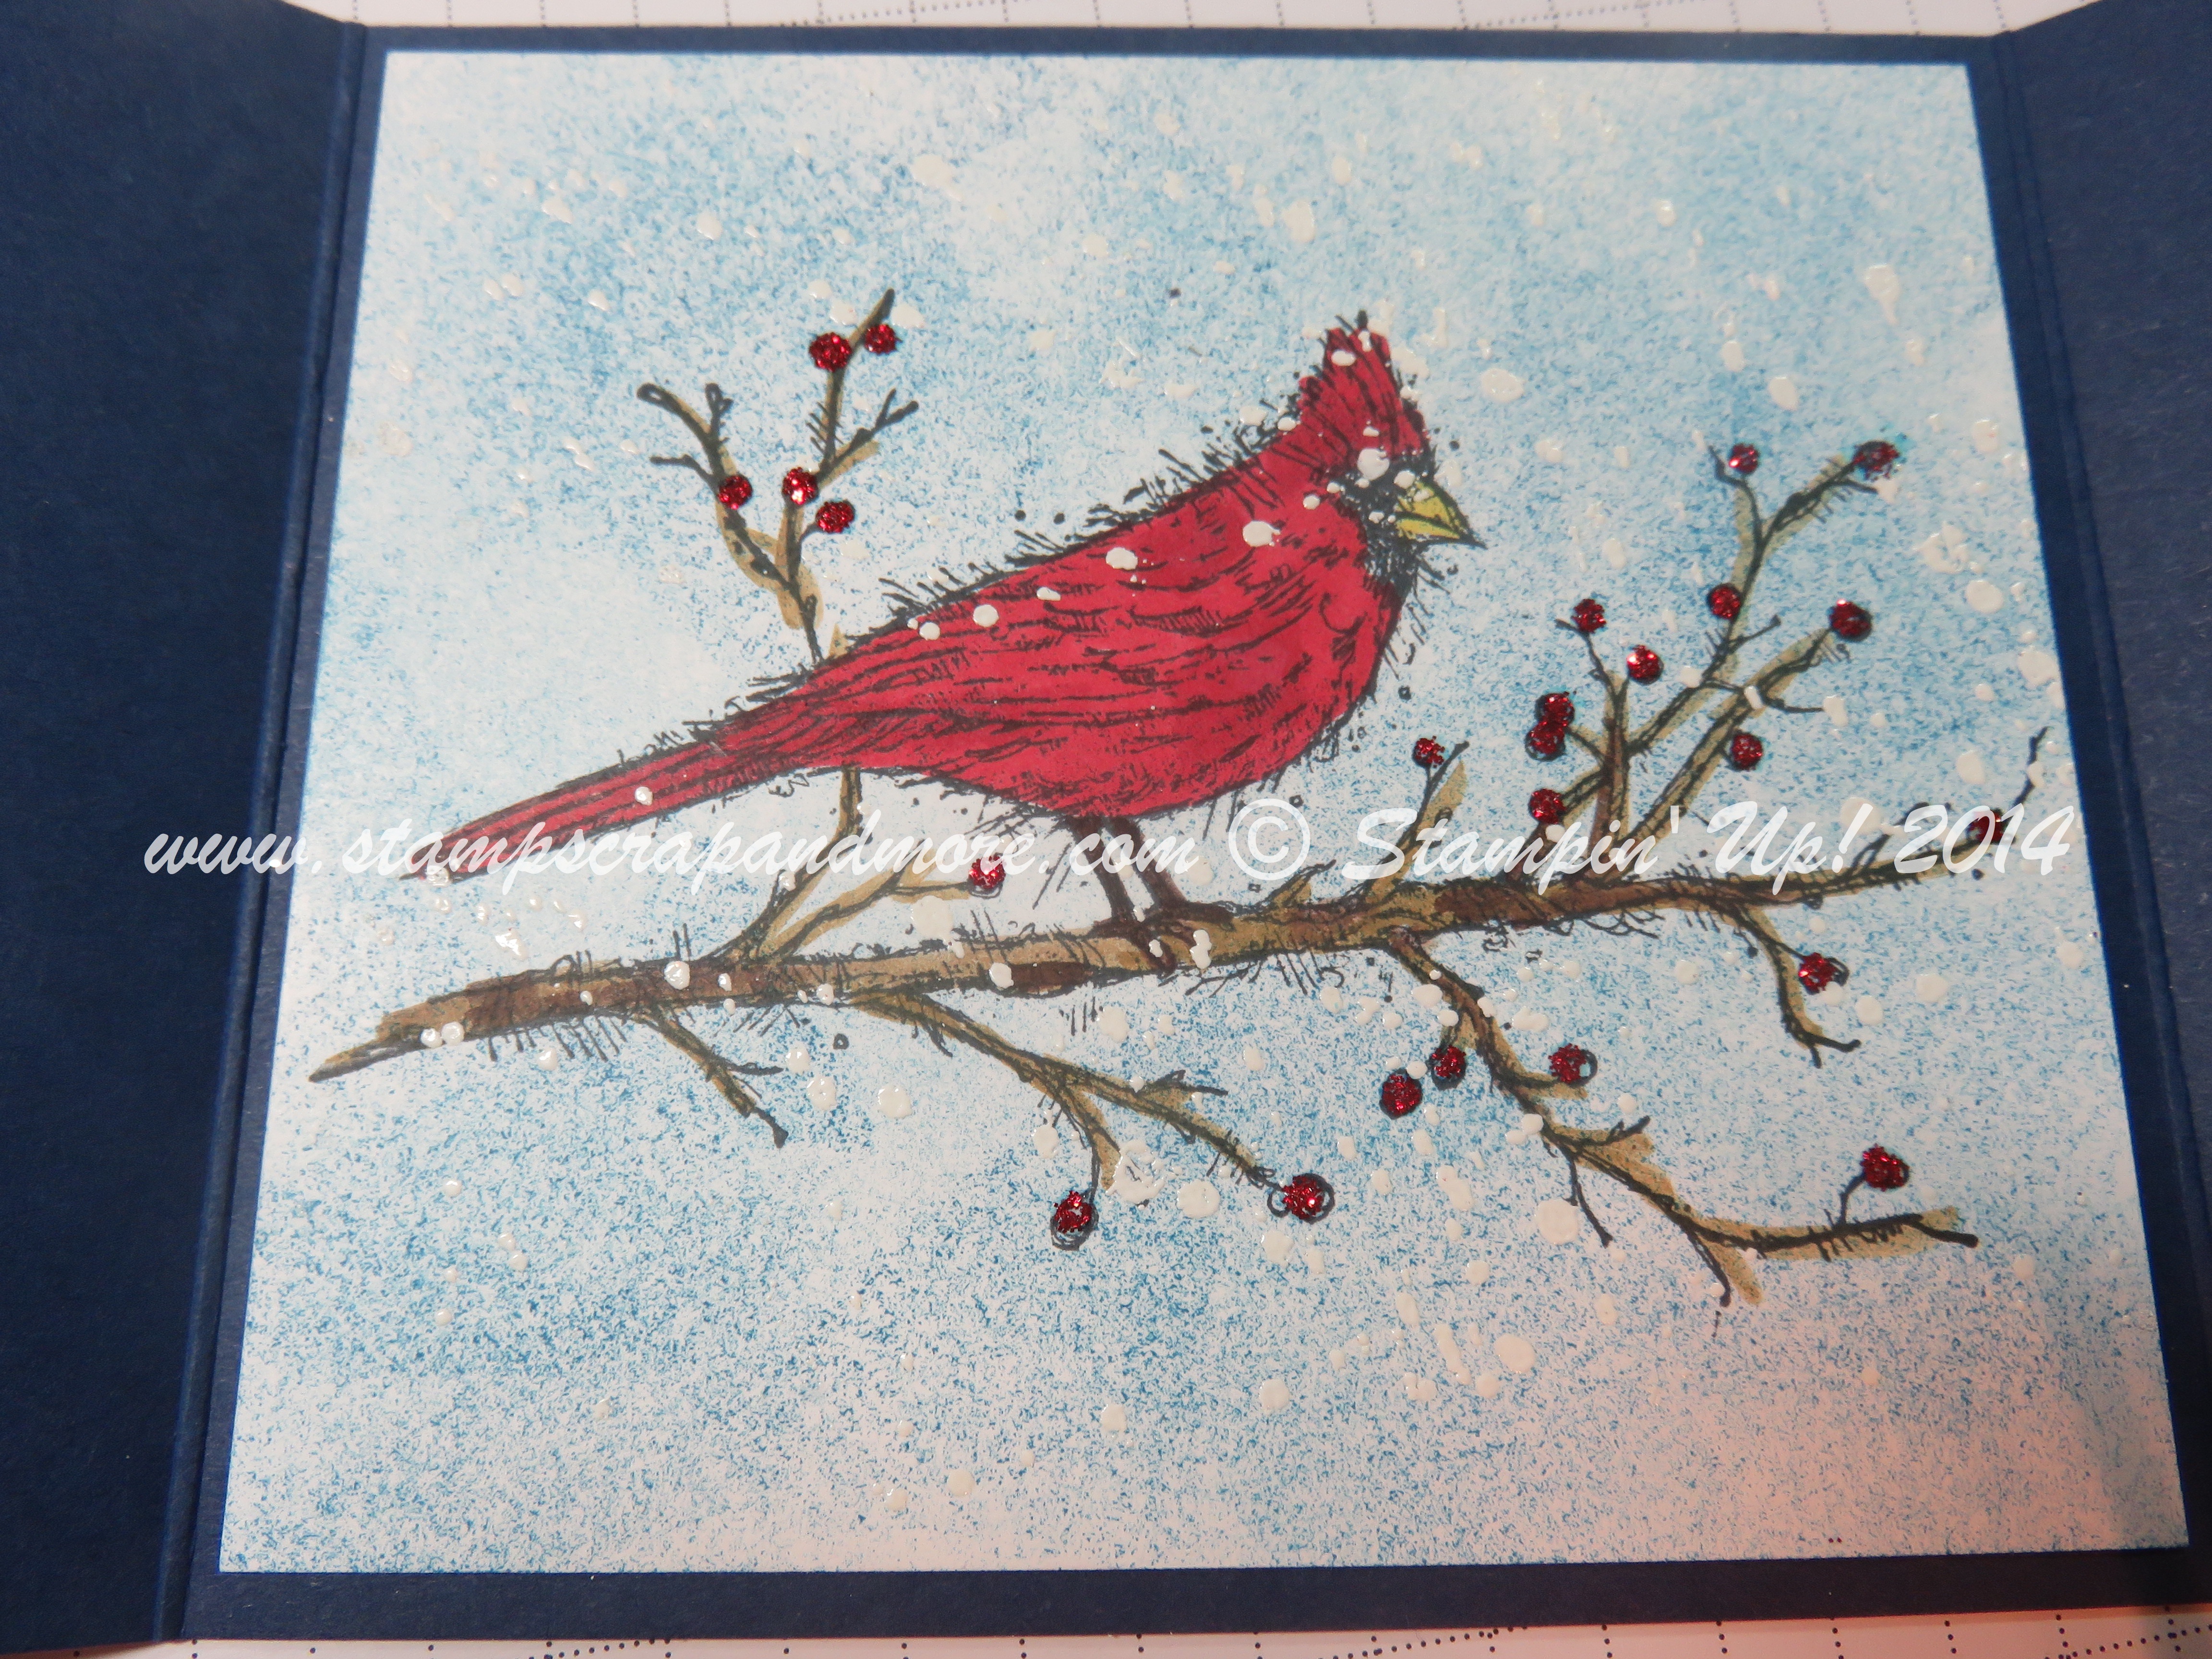
On the other piece of the 4 1/4″ x 3 3/4″ Whisper White stamp the bird from “Beauty of the Season” in Memento Black.
Colour the bird in the Cherry Cobbler Blendabilities.
Colour the beak in Daffodil Delight and a Blender Pen.
Colour the branches in Baked Brown Sugar and Chocolate Chip with a Blender Pen.
Sponge Pacific Point all over the image.
Using the small speckled stamp from Gorgeous Grunge and VersaMark, stamp all over the bird – try to keep away from the head of the bird. Emboss with White Embossing Powder.
I find that the birds eye disappears in this stamp set. I use a white Gel Pen to put the eye back on the bird.
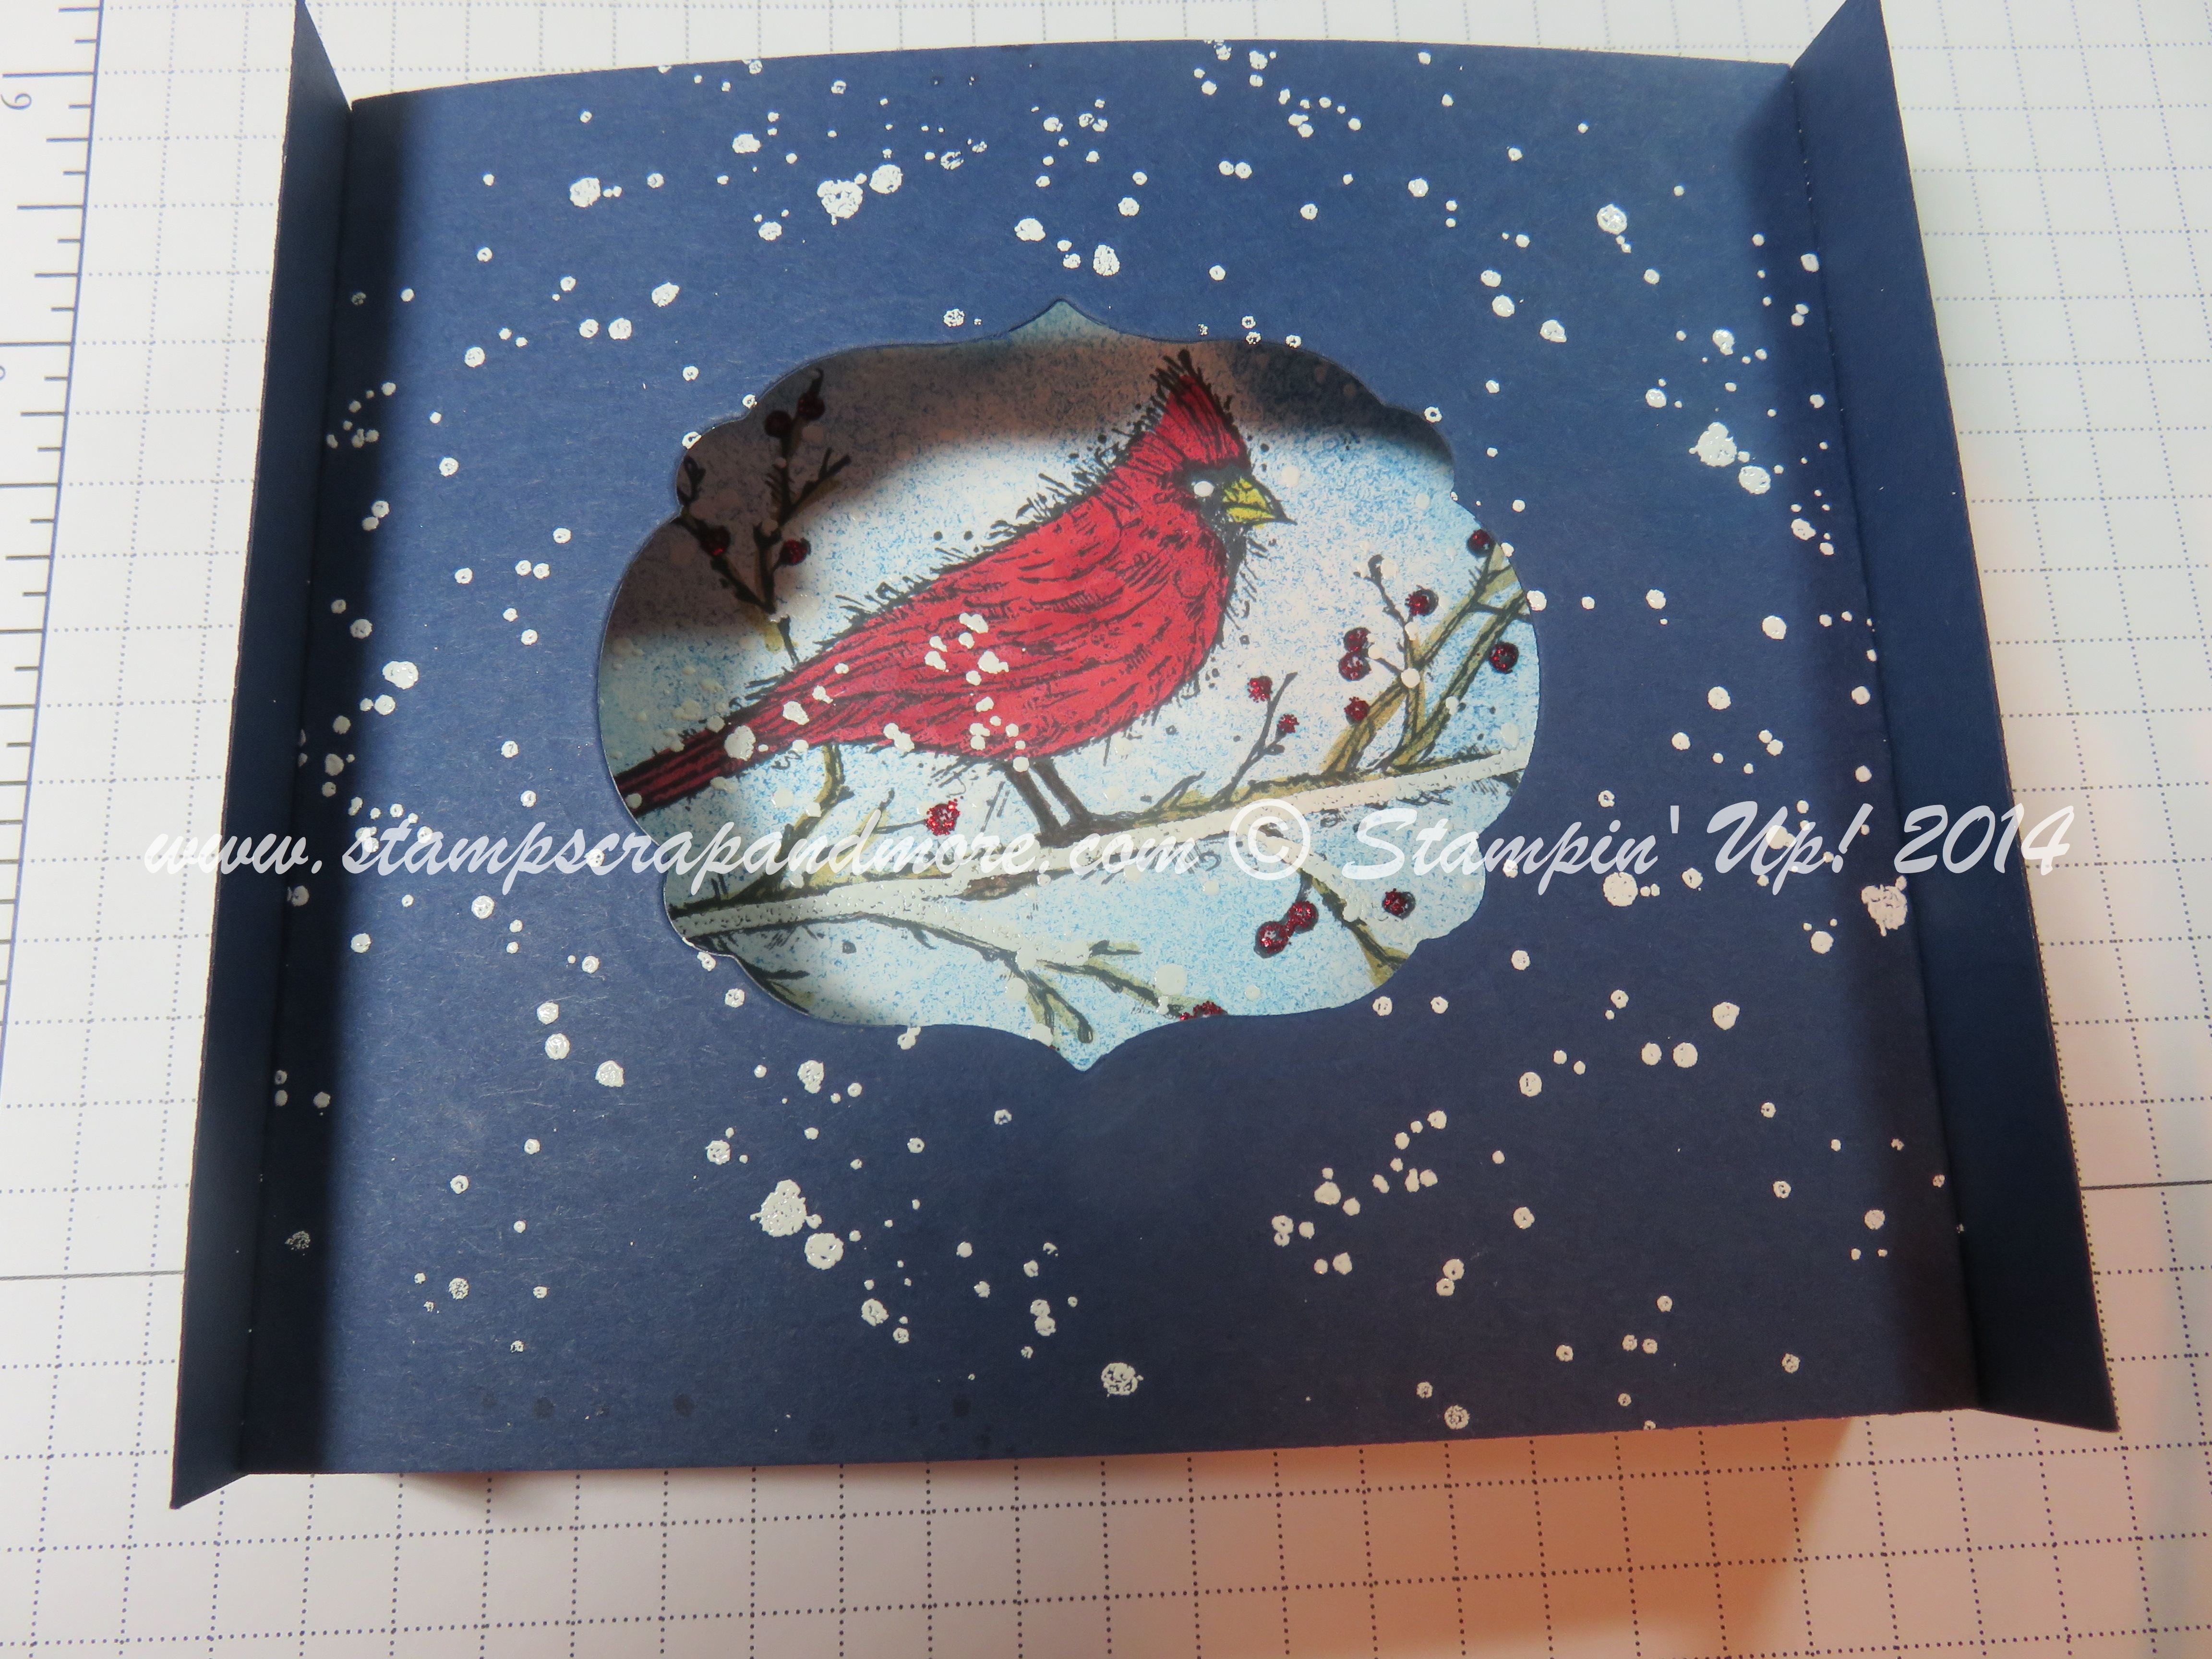
You can mount the image onto the inside of the 4″ x 6 1/2″ piece of Night of Navy. At this point, you can add the Cherry Cobbler Dazzling Details to the branches. You will need to set this aside to let it dry – preferably overnight.
Step #3
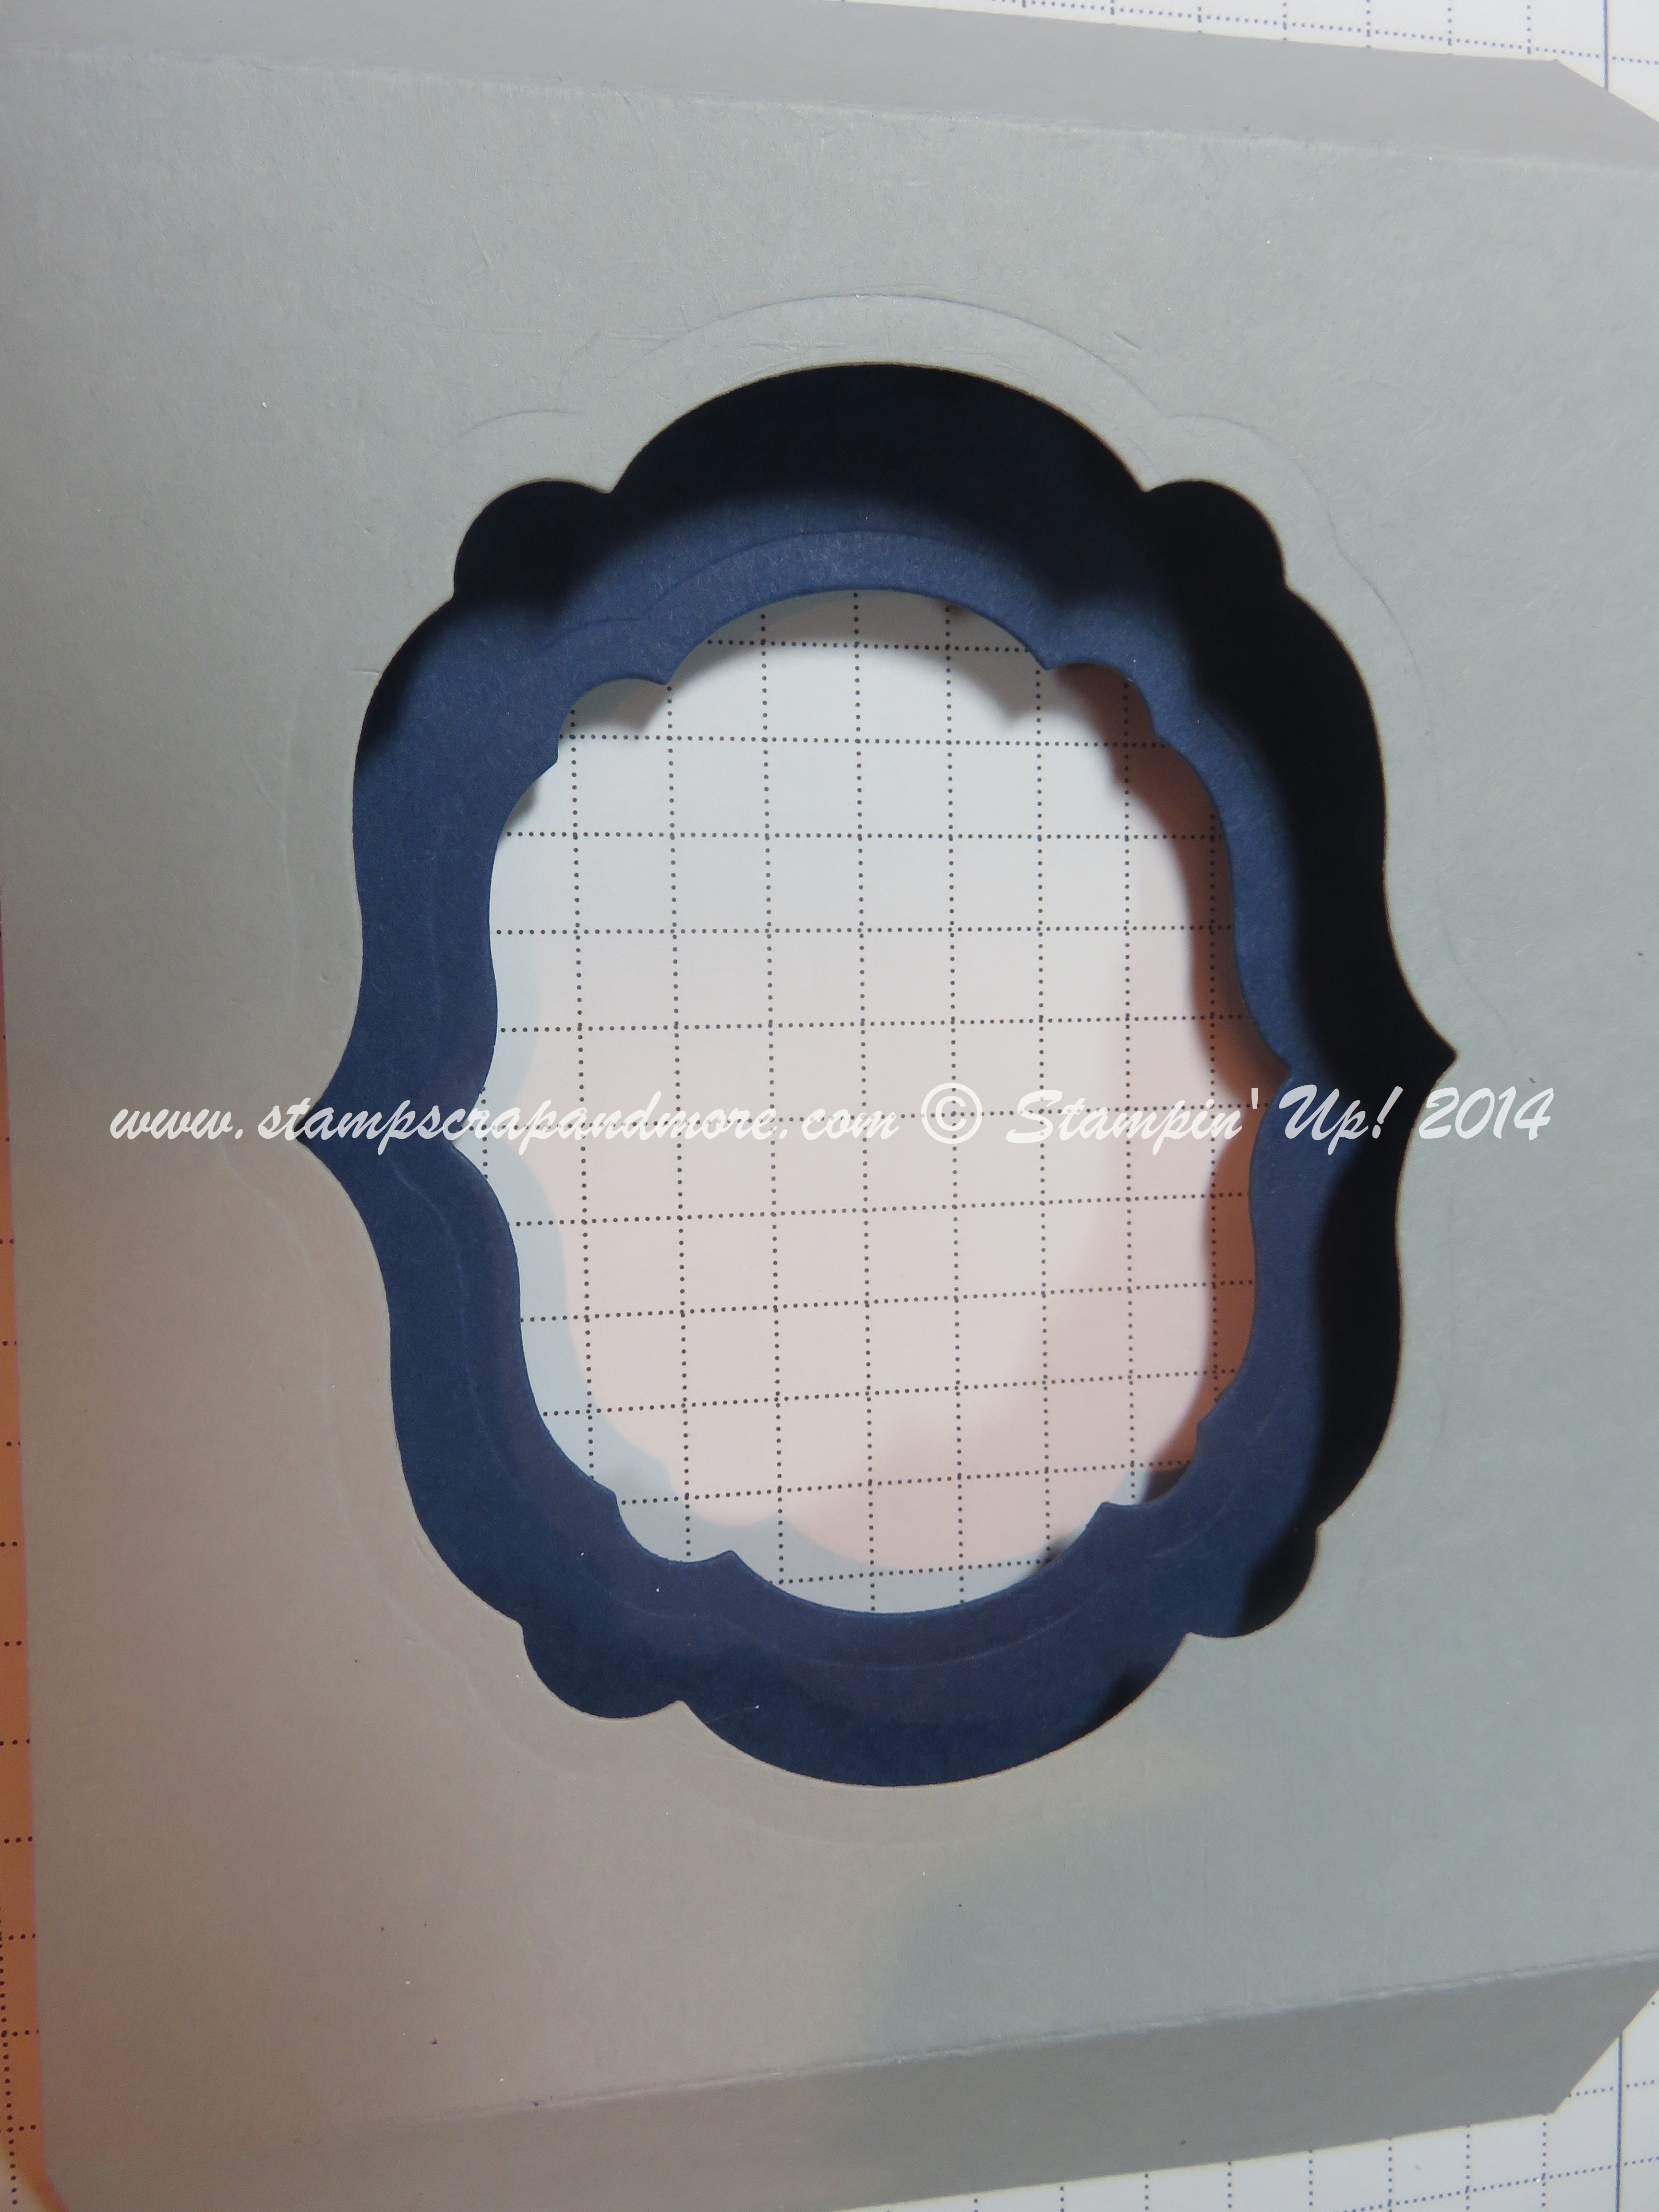
Use the Labels Collection Framelits (the second and third ones from the smallest size). On the top layer – use the largest of the two Framelits and run it through the Big Shot. Nest the middle layer under the top layer (that you just cut out), then using the smaller of the two framelits run it through the Big Shot. If you nest the two pieces together when you cut out the middle section your cut images will be evenly spaced.
Using the small speckled stamp from the Gorgeous Grunge stamp set, stamp the inside layer (Night of Navy) with Versamark and heat emboss with white embossing powder.
Step #4
Using Chocolate Chip and the branch from the Beauty of the Season, stamp 4 branches on the outside of the card.
Step #5
Time to assemble the card.
On the insider layer, fold the score lines towards the back and put a piece of sticky strip or score tape each end.
Butt the edge up against the score line of the back piece of the card. Pull off the adhesive and seal. Do the same for the other side.
Rotate the card left / right / left / right to get the fold crisp.
Step #6
On the top layer, put sticky strip right up against the fold line and on the edge (depending on how thick your sticky strip is).
Mount the top layer to the bottom layer. The top layer will cover the sides on the bottom layer.
If you would like you can add a sentiment (I used Peace & Joy from Good Greetings). Put a half dimensional on the bottom of the banner so the adhesive doesn’t stick up past the card stock.
Finish off by adding some Cherry Cobbler Dazzling Details to the outside of the card.
Some additional tips and hints.
The eye on the bird disappears when stamped – put it back in with a white gel pen.
Don’t stamp the bird image too high on the Whisper White. I put a little pencil mark on the Whisper White as to where I wanted the top of his crown to be. If it is too high up you won’t see it properly in the window.
When you nest the top and middle layers together – keep them together. If you inadvertently flip one of them upside down – the two may not line up correctly.
When stamping with the Versamark and Gorgeous Grunge on the bird, try to keep the image (snowflakes) away from the head of the bird – it is too much detail on the bird when embossed.
That is is. Clear as mud.. right? Any questions let me know. I would be happy to answer them.
Thanks for stopping by,Elizabeth, Your Stampin' Up! Demonstrator
www.StampScrapAndMore.com