Hi Stampers
Thanks for stopping by this evening.
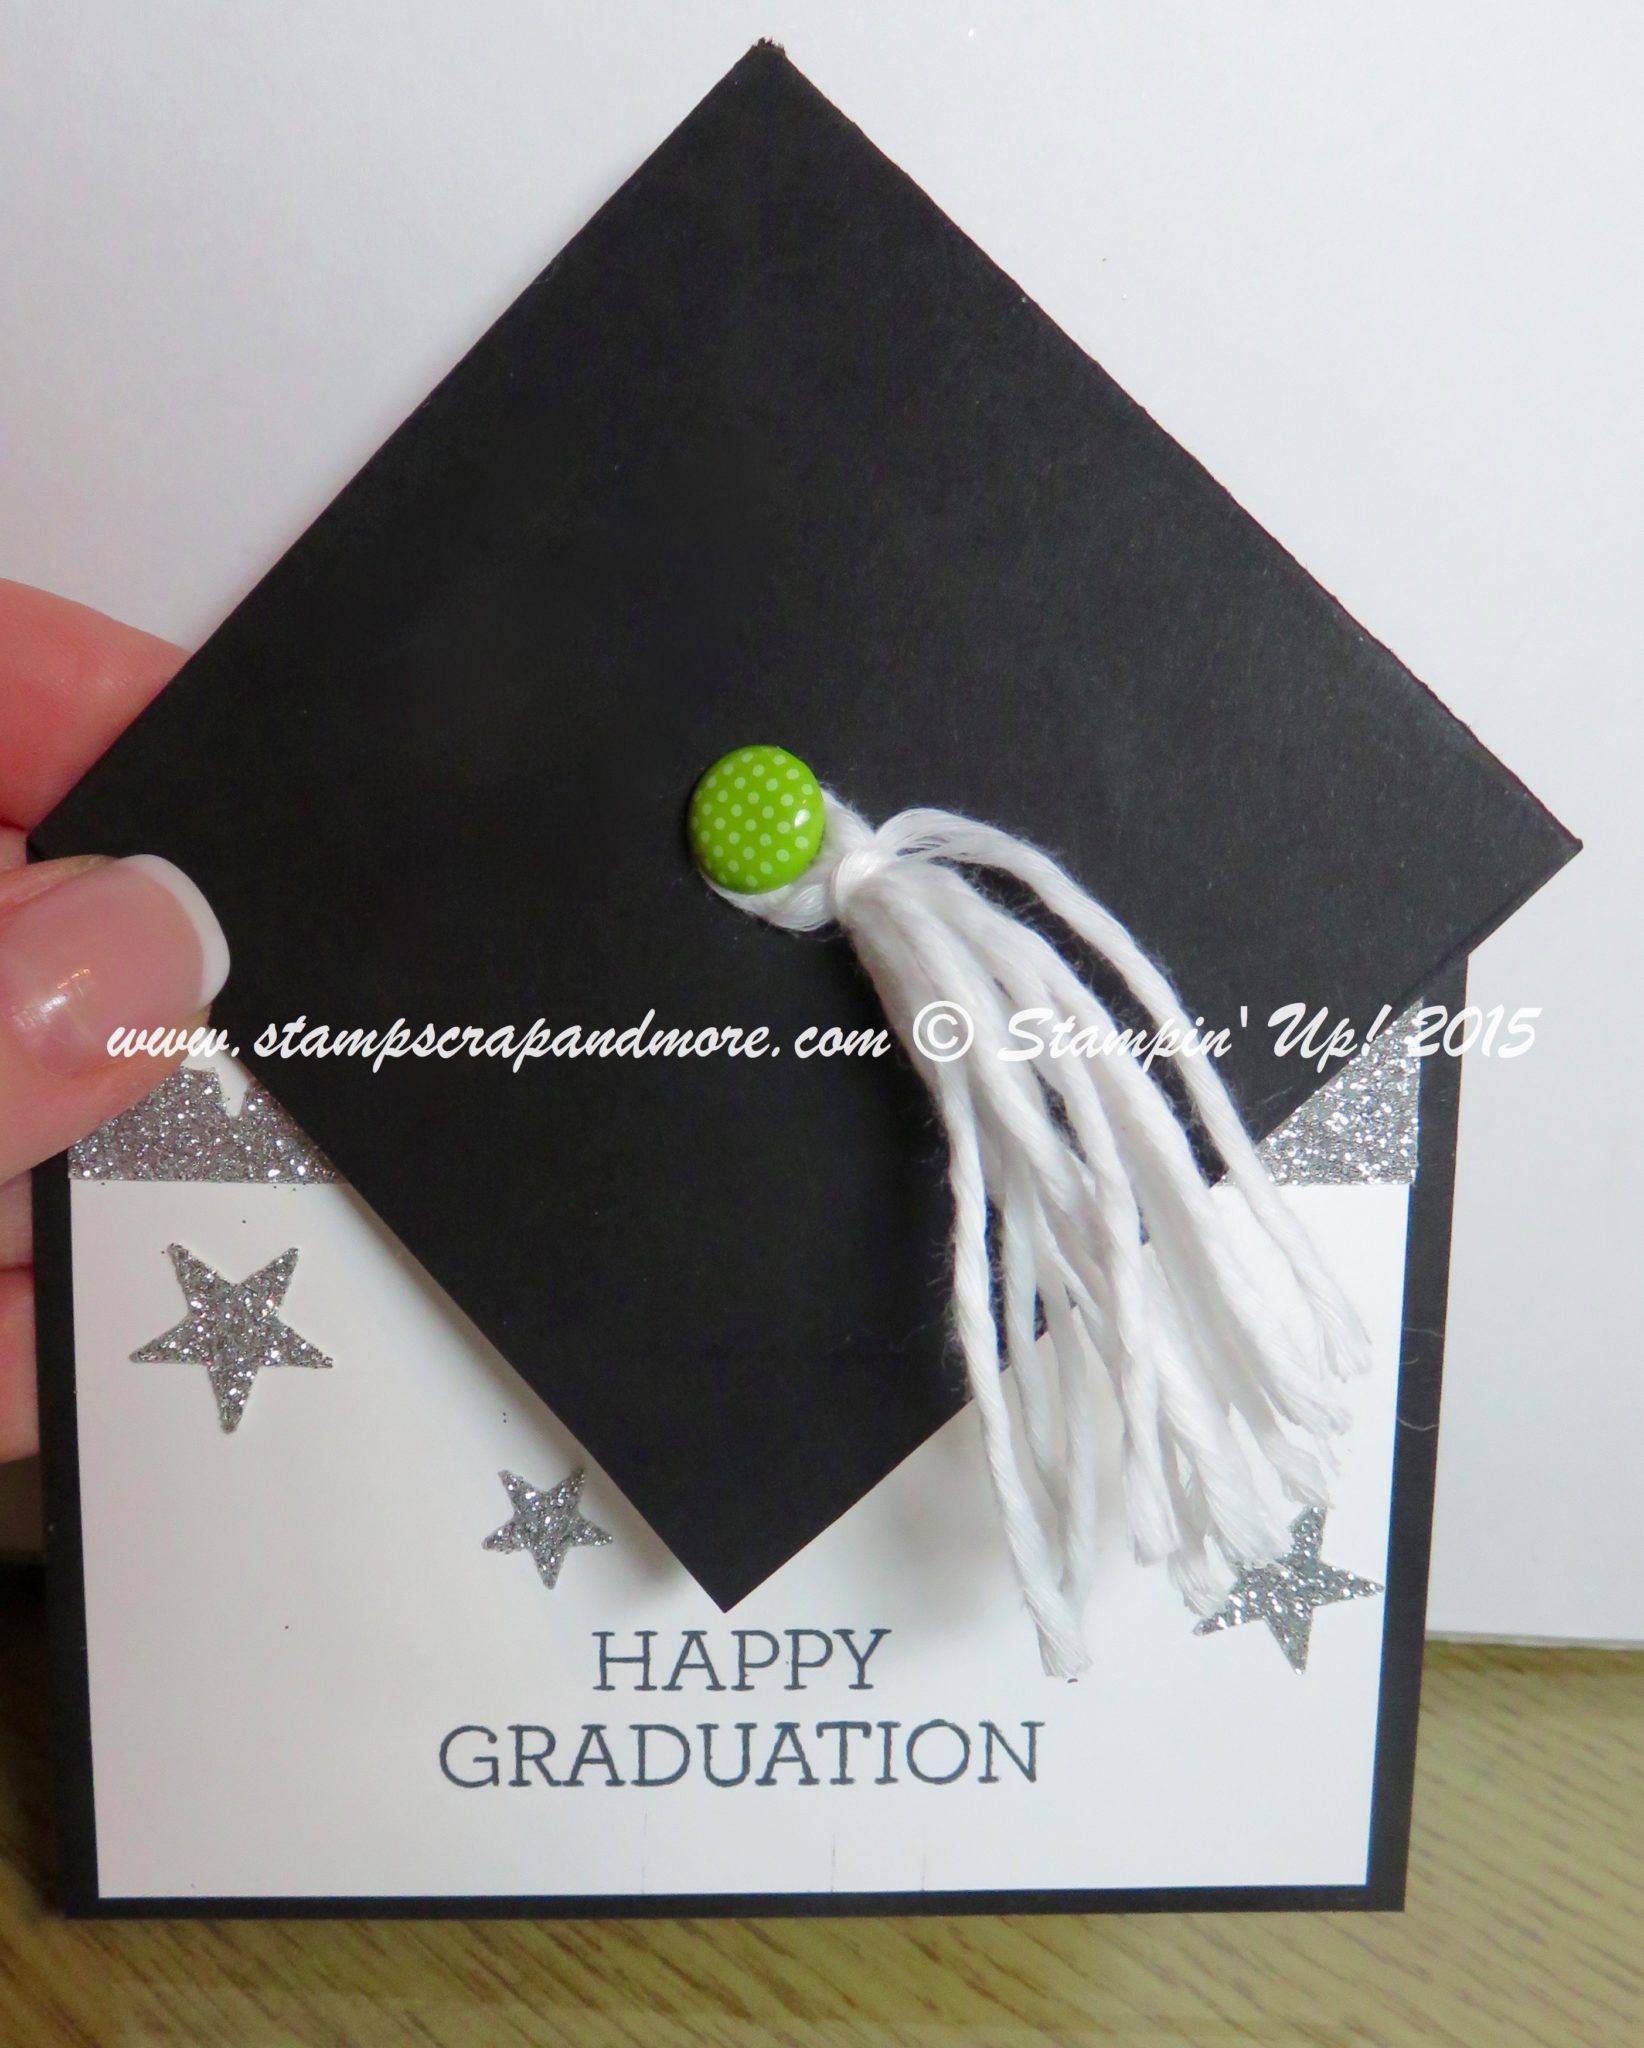
I have a super cute Graduation Gift Card Holder to share with you tonight. 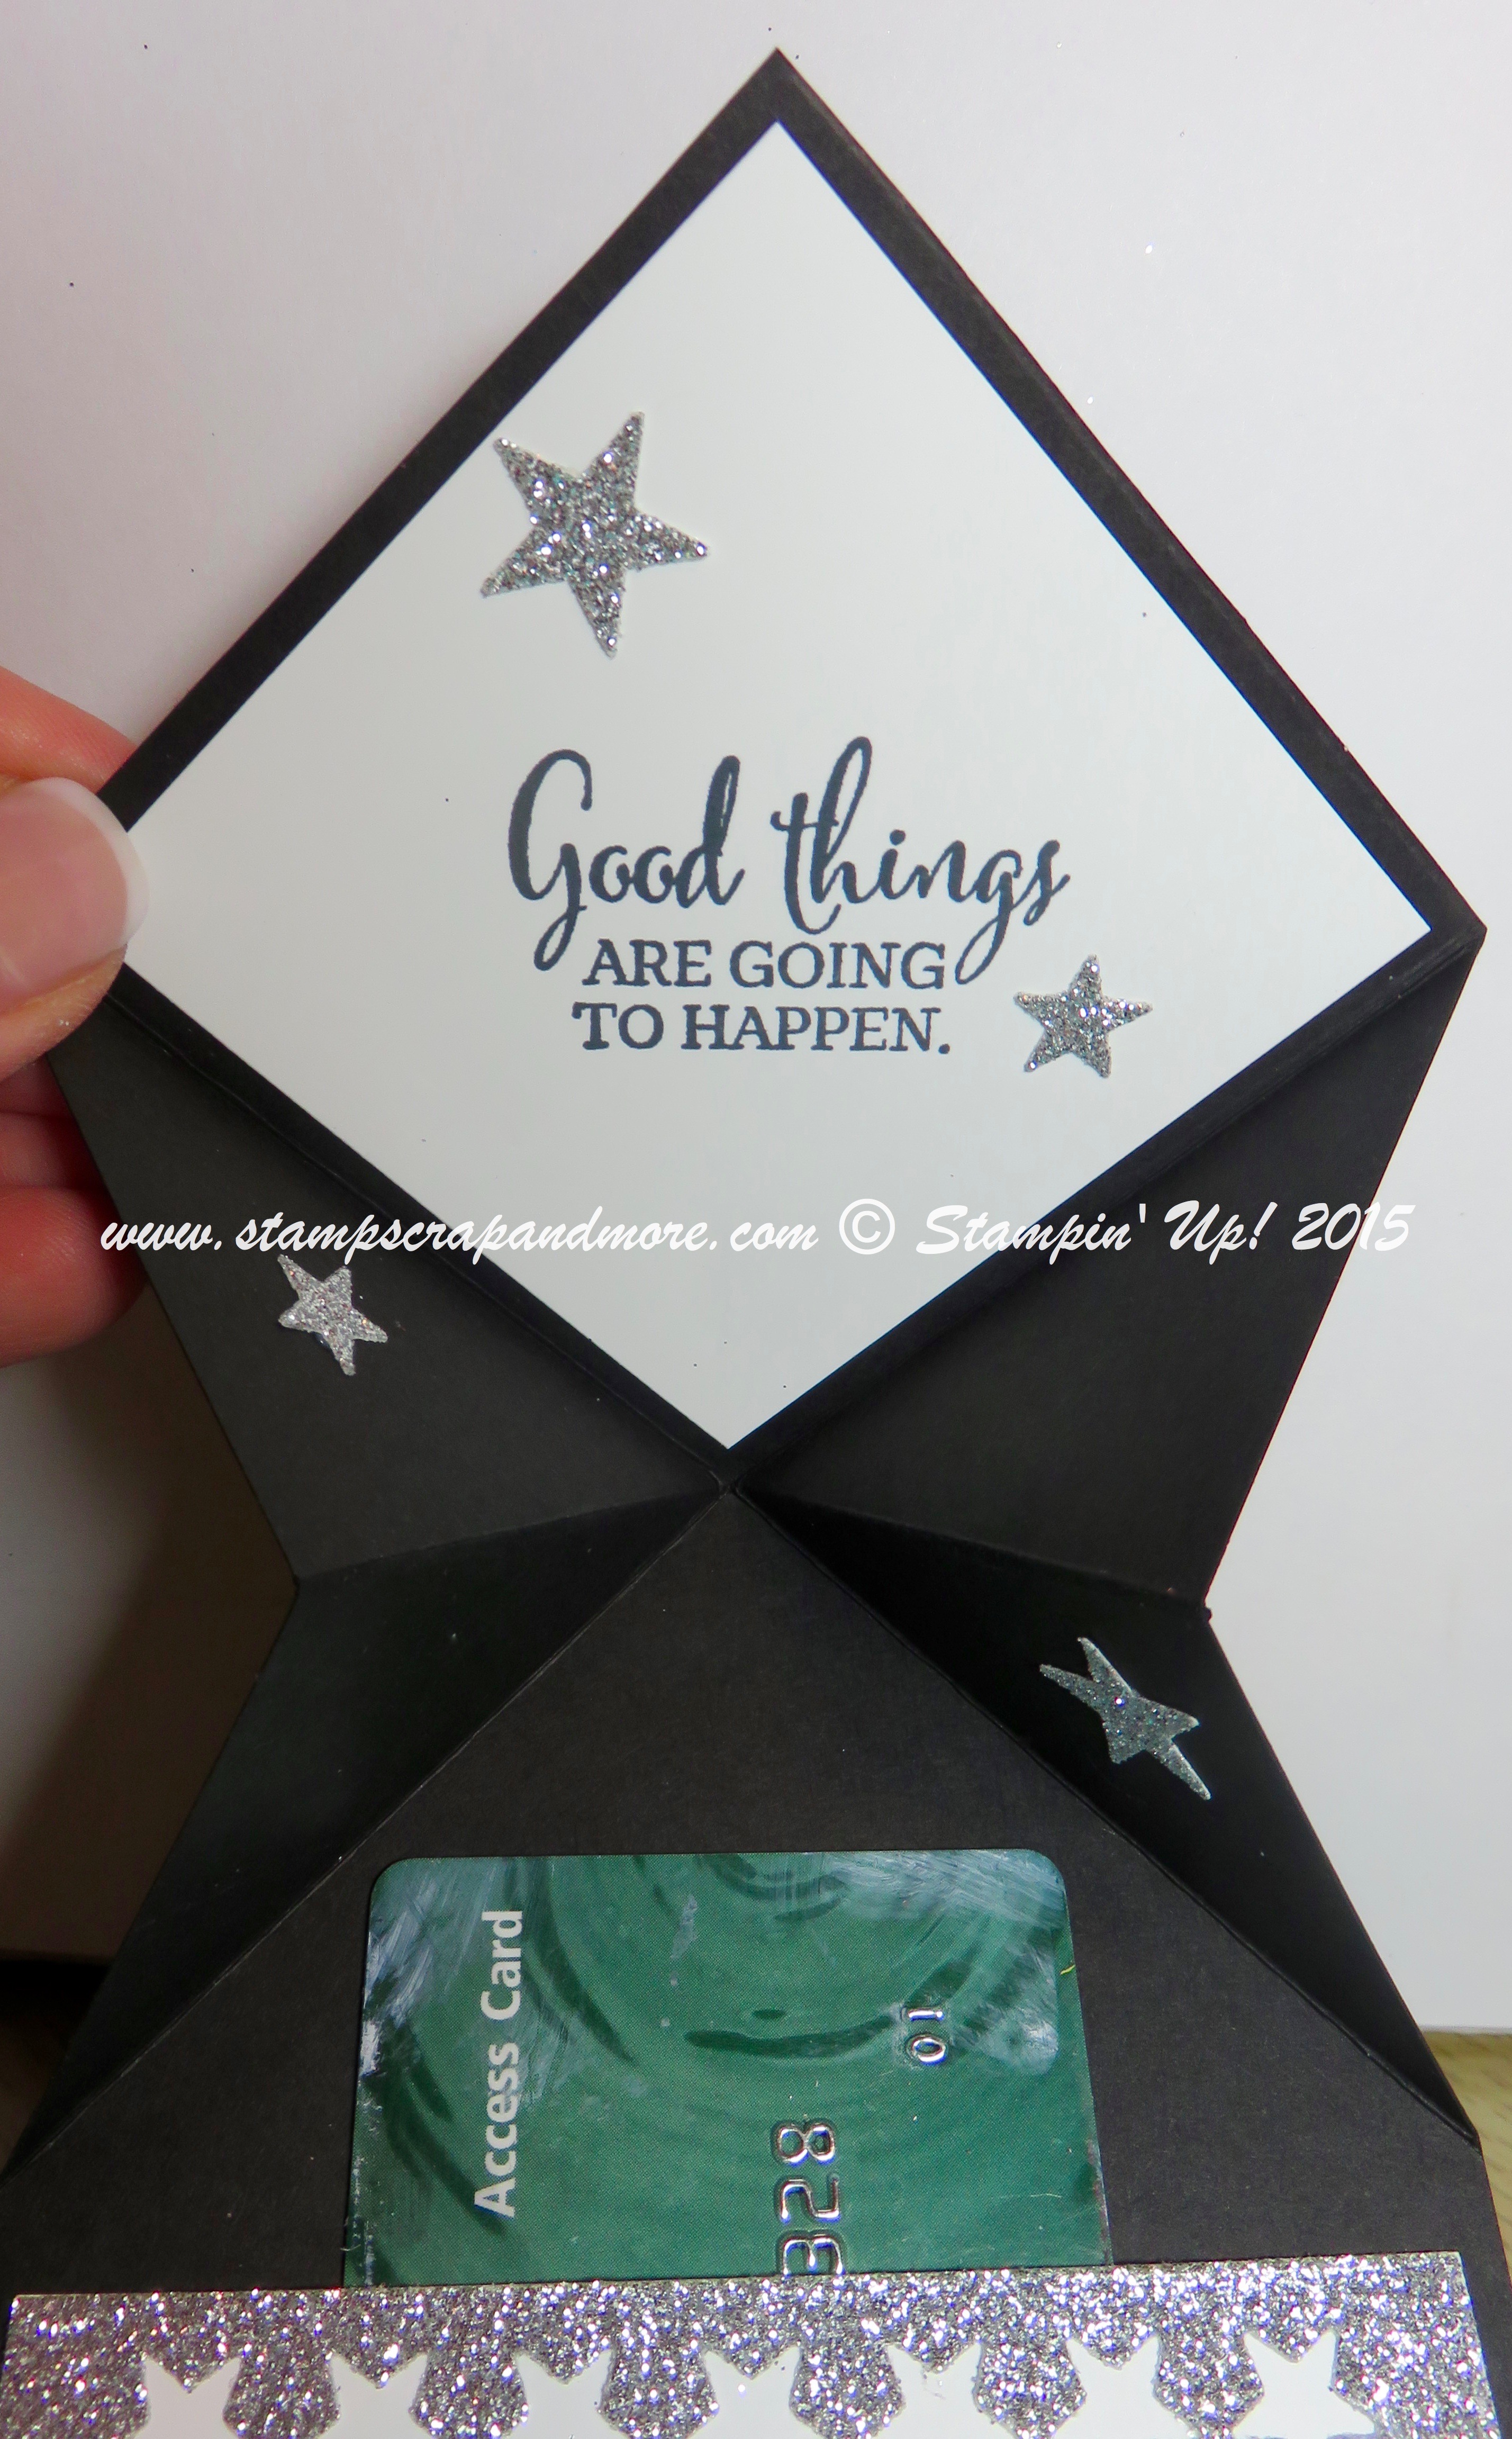
It is that time of year and we all know that “Cash is King” for students. What a better way to celebrate their success with a Grad Cap Card that can hold either cash or a gift card.
I am not recreating the wheel, there are loads of tutorials out there that you can follow… it is super simple and with the right tools that Stampin’ Up! sells, it is easy peasy to recreate.
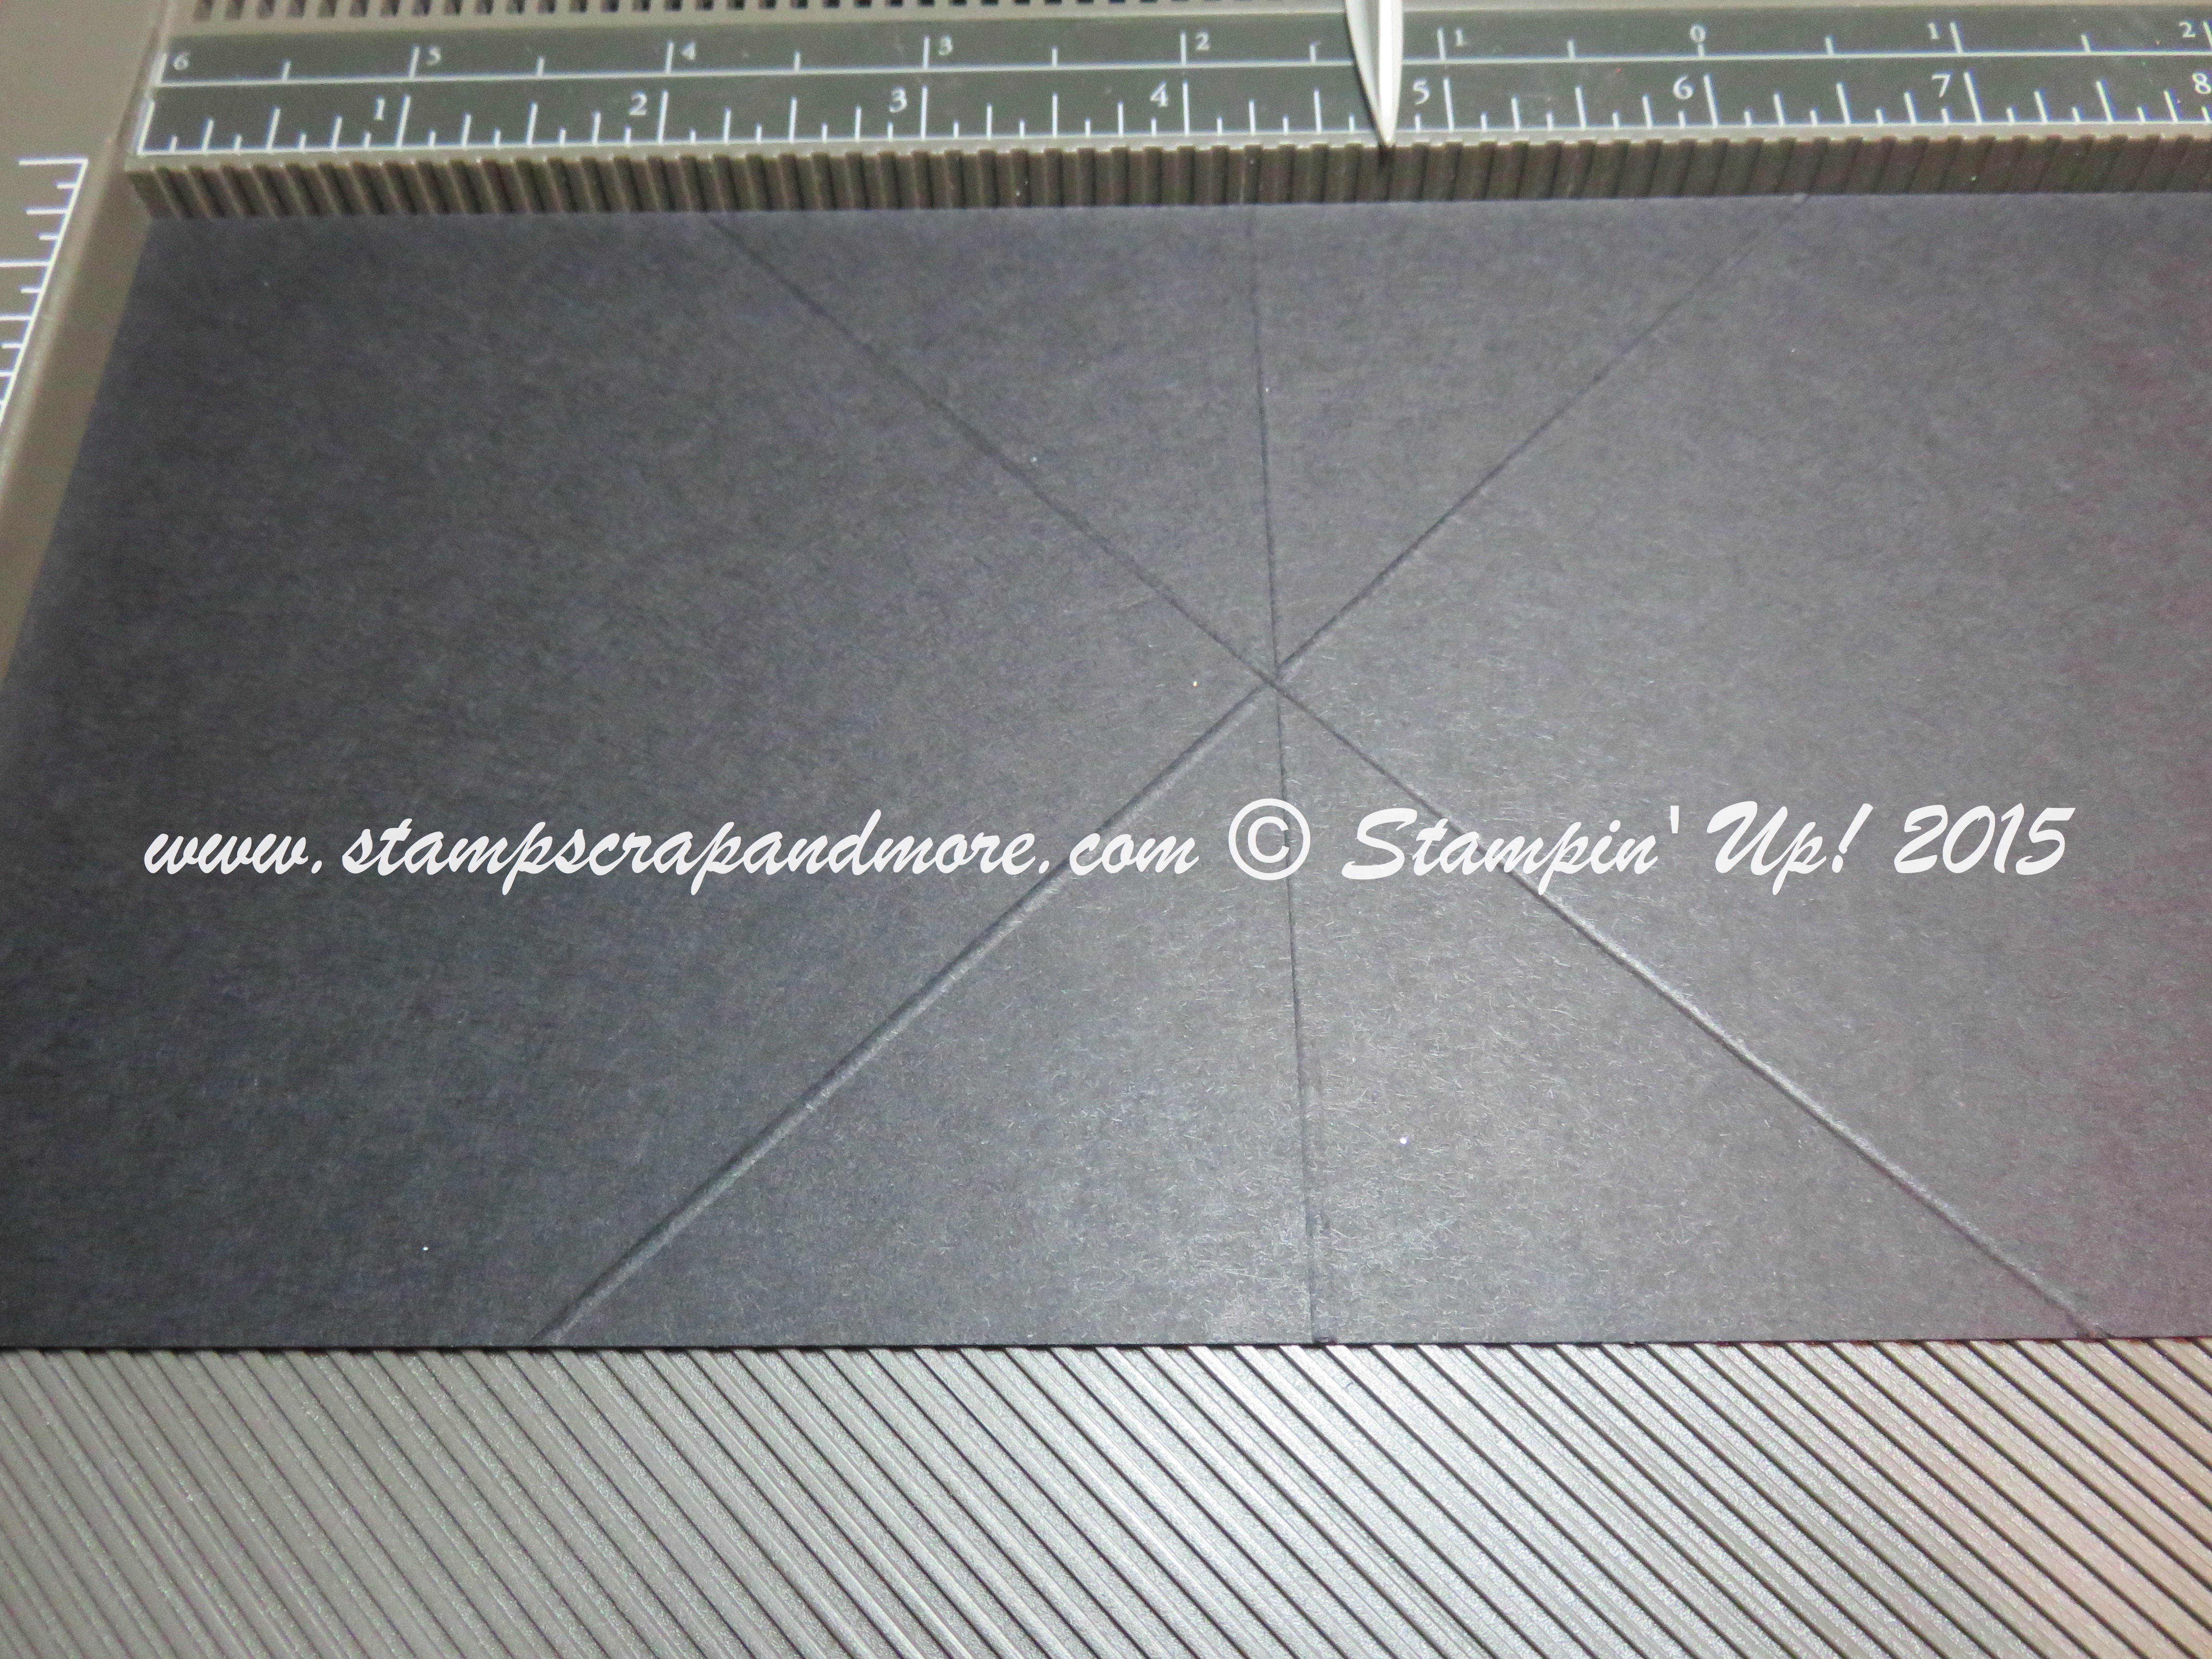
The card base is Basic Black – 9 3/4 x 4 1/4 – scored at 5 1/2″
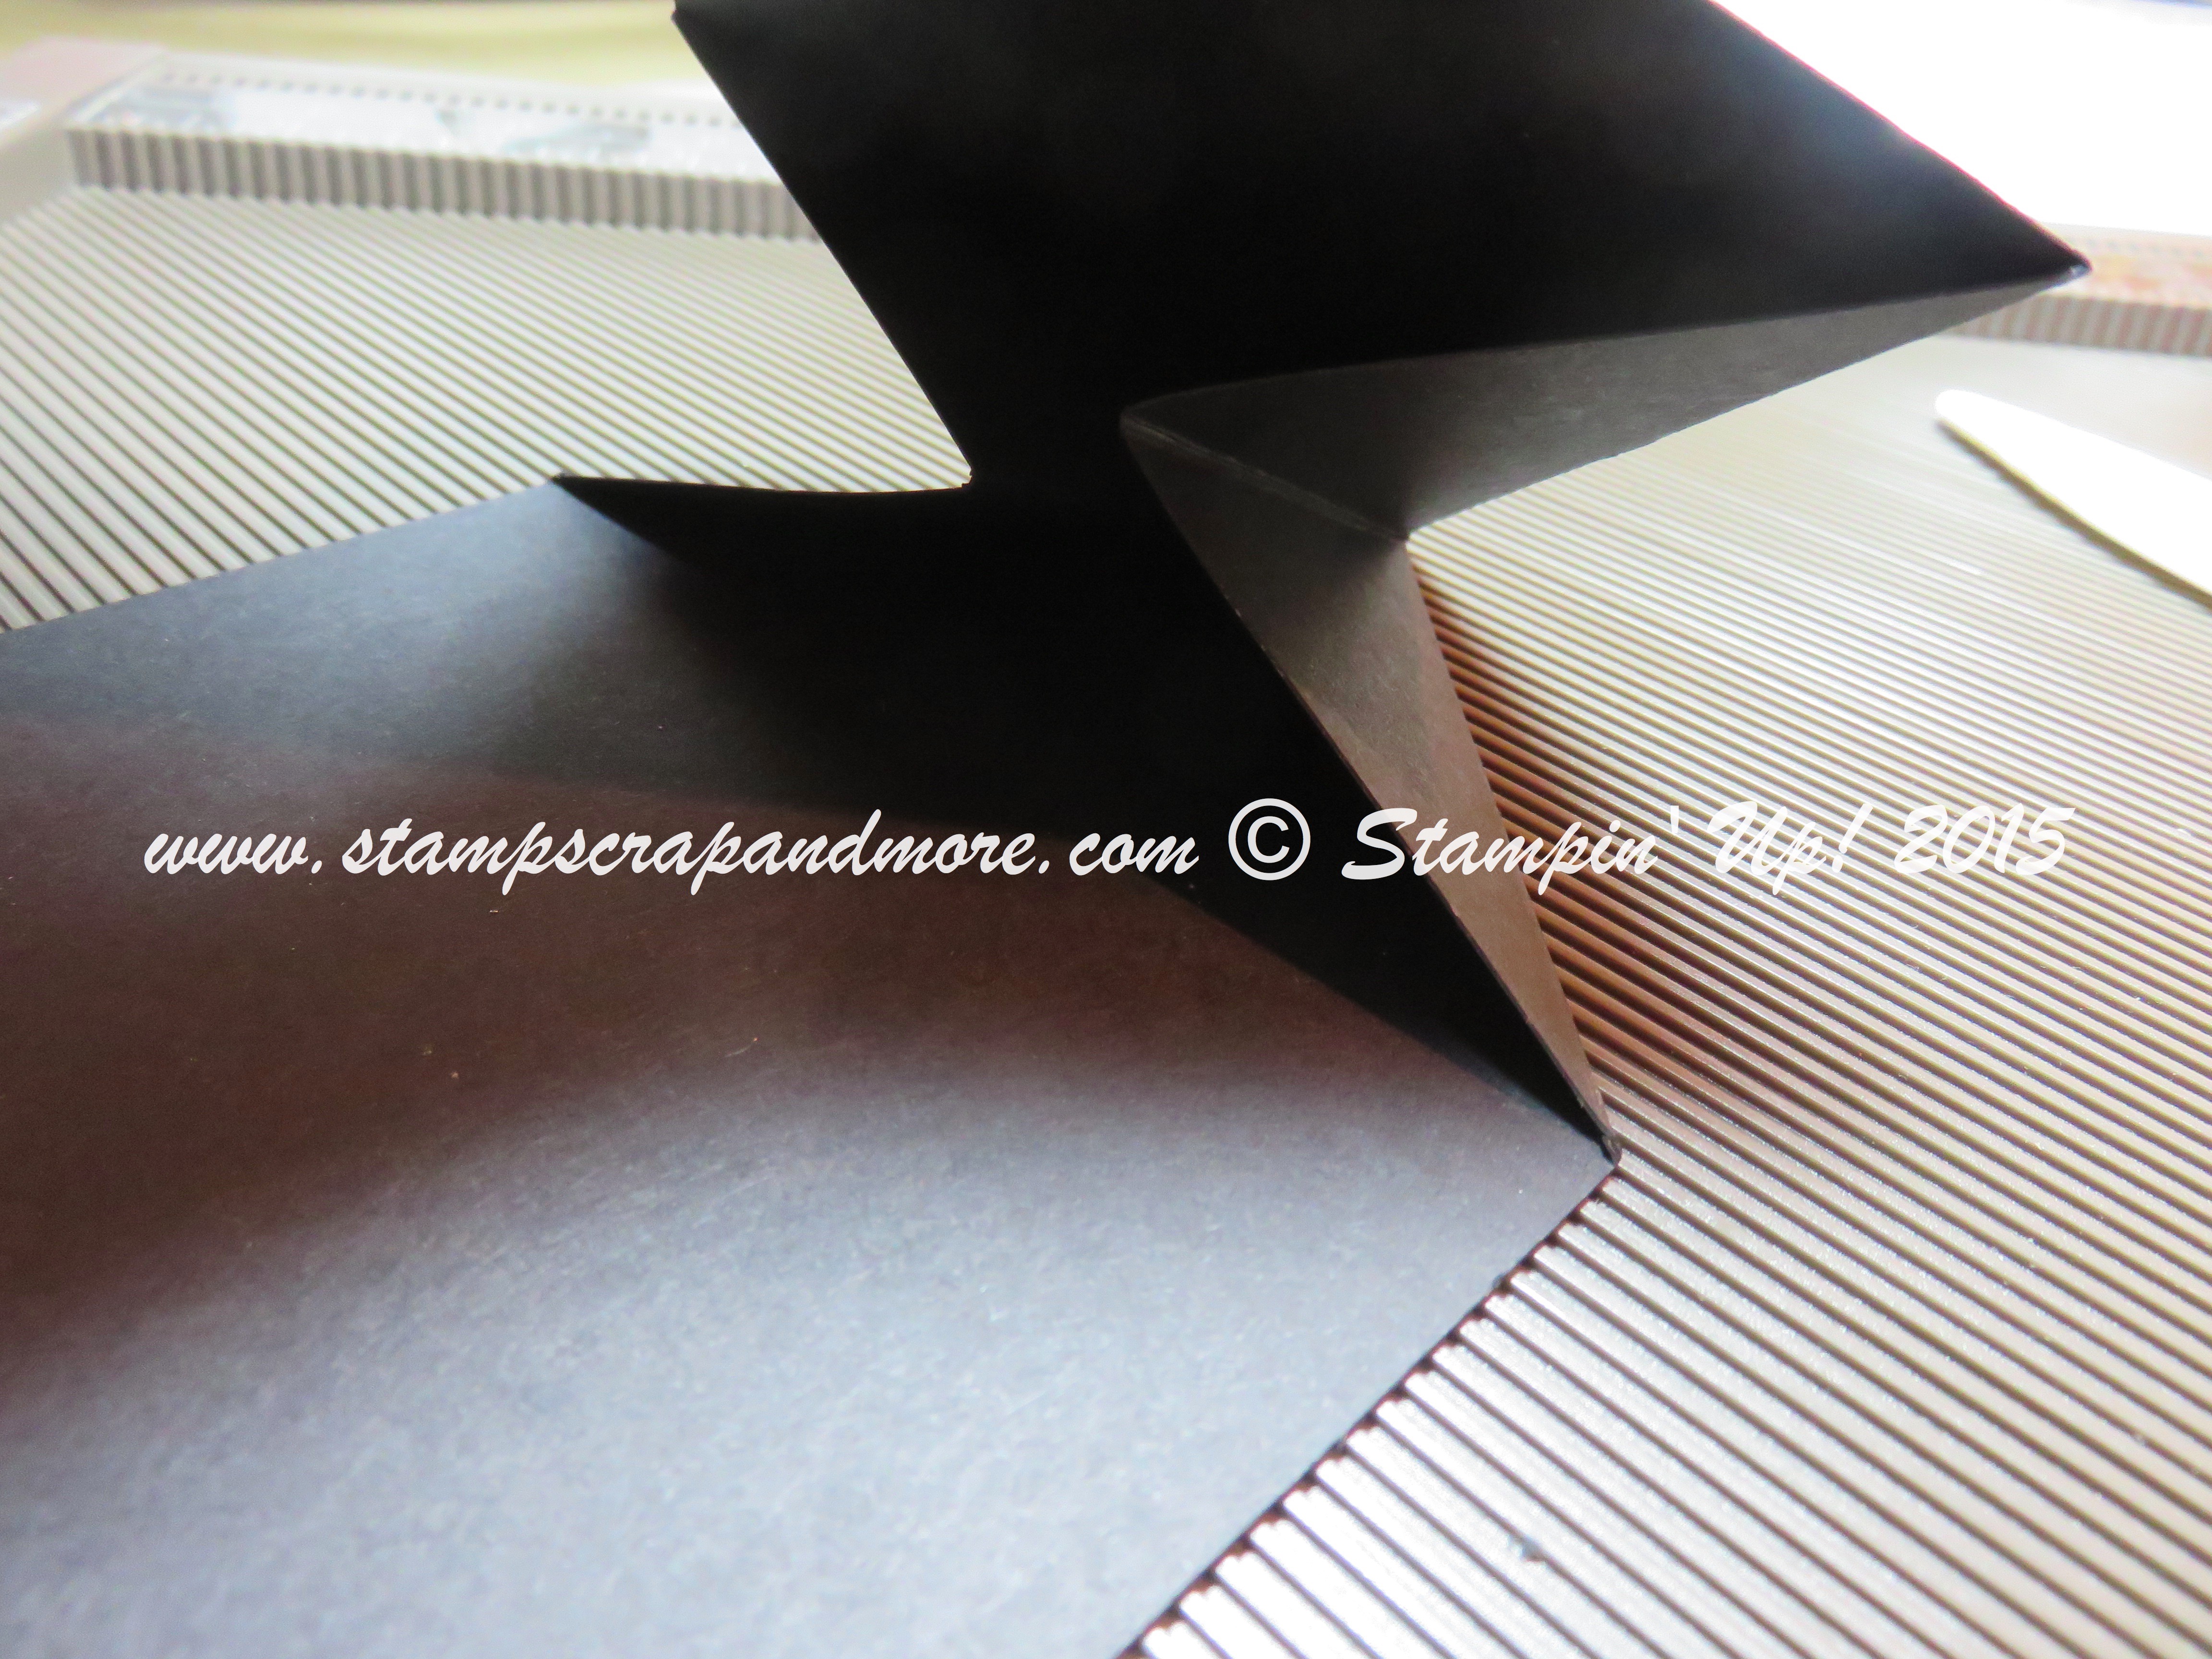
Place your Diagonal Scoring Plate onto your Score Board and place the card horizontally with the shorter end towards the left. Score diagonally from 2 1/8 then flip it over and score again at 2 1/8… (ignore the marker at the top).
Now place the card vertically in the diagonal scoring plate and score at 2 1/8 and again flip over and score at 2 1/8. It should look like this.
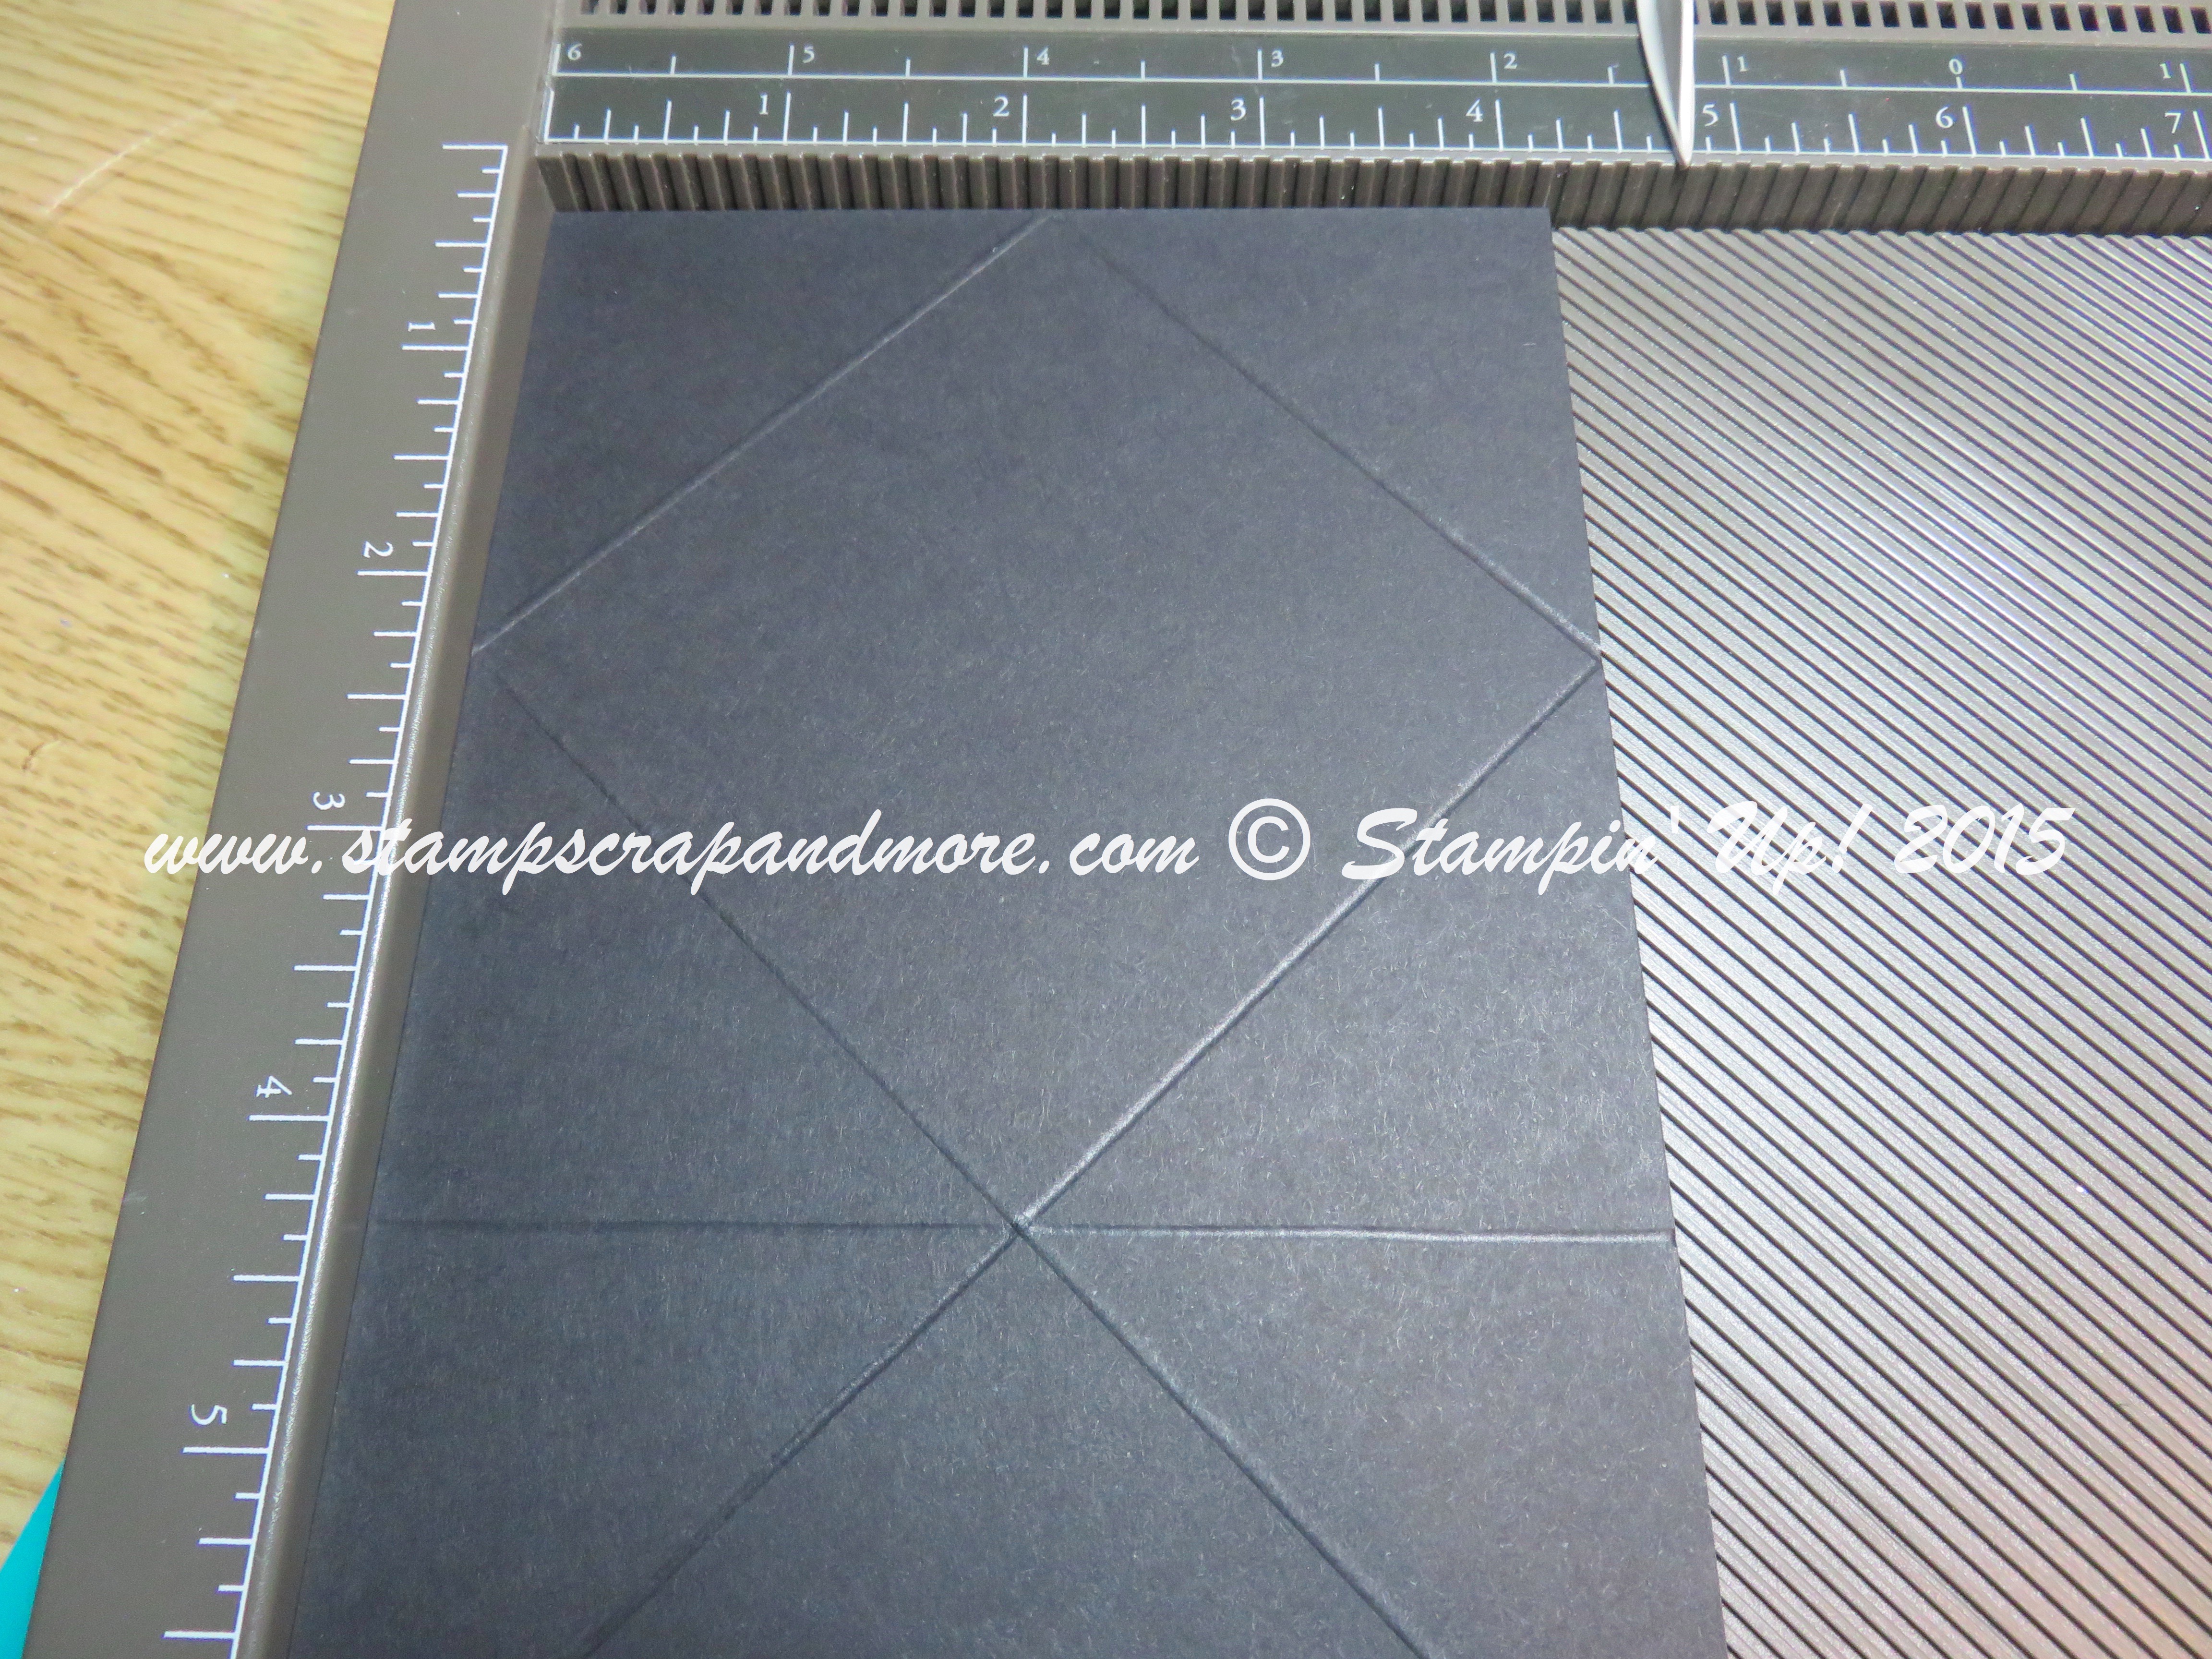
You will now have two triangle pieces on the top left and right that you can cut off.
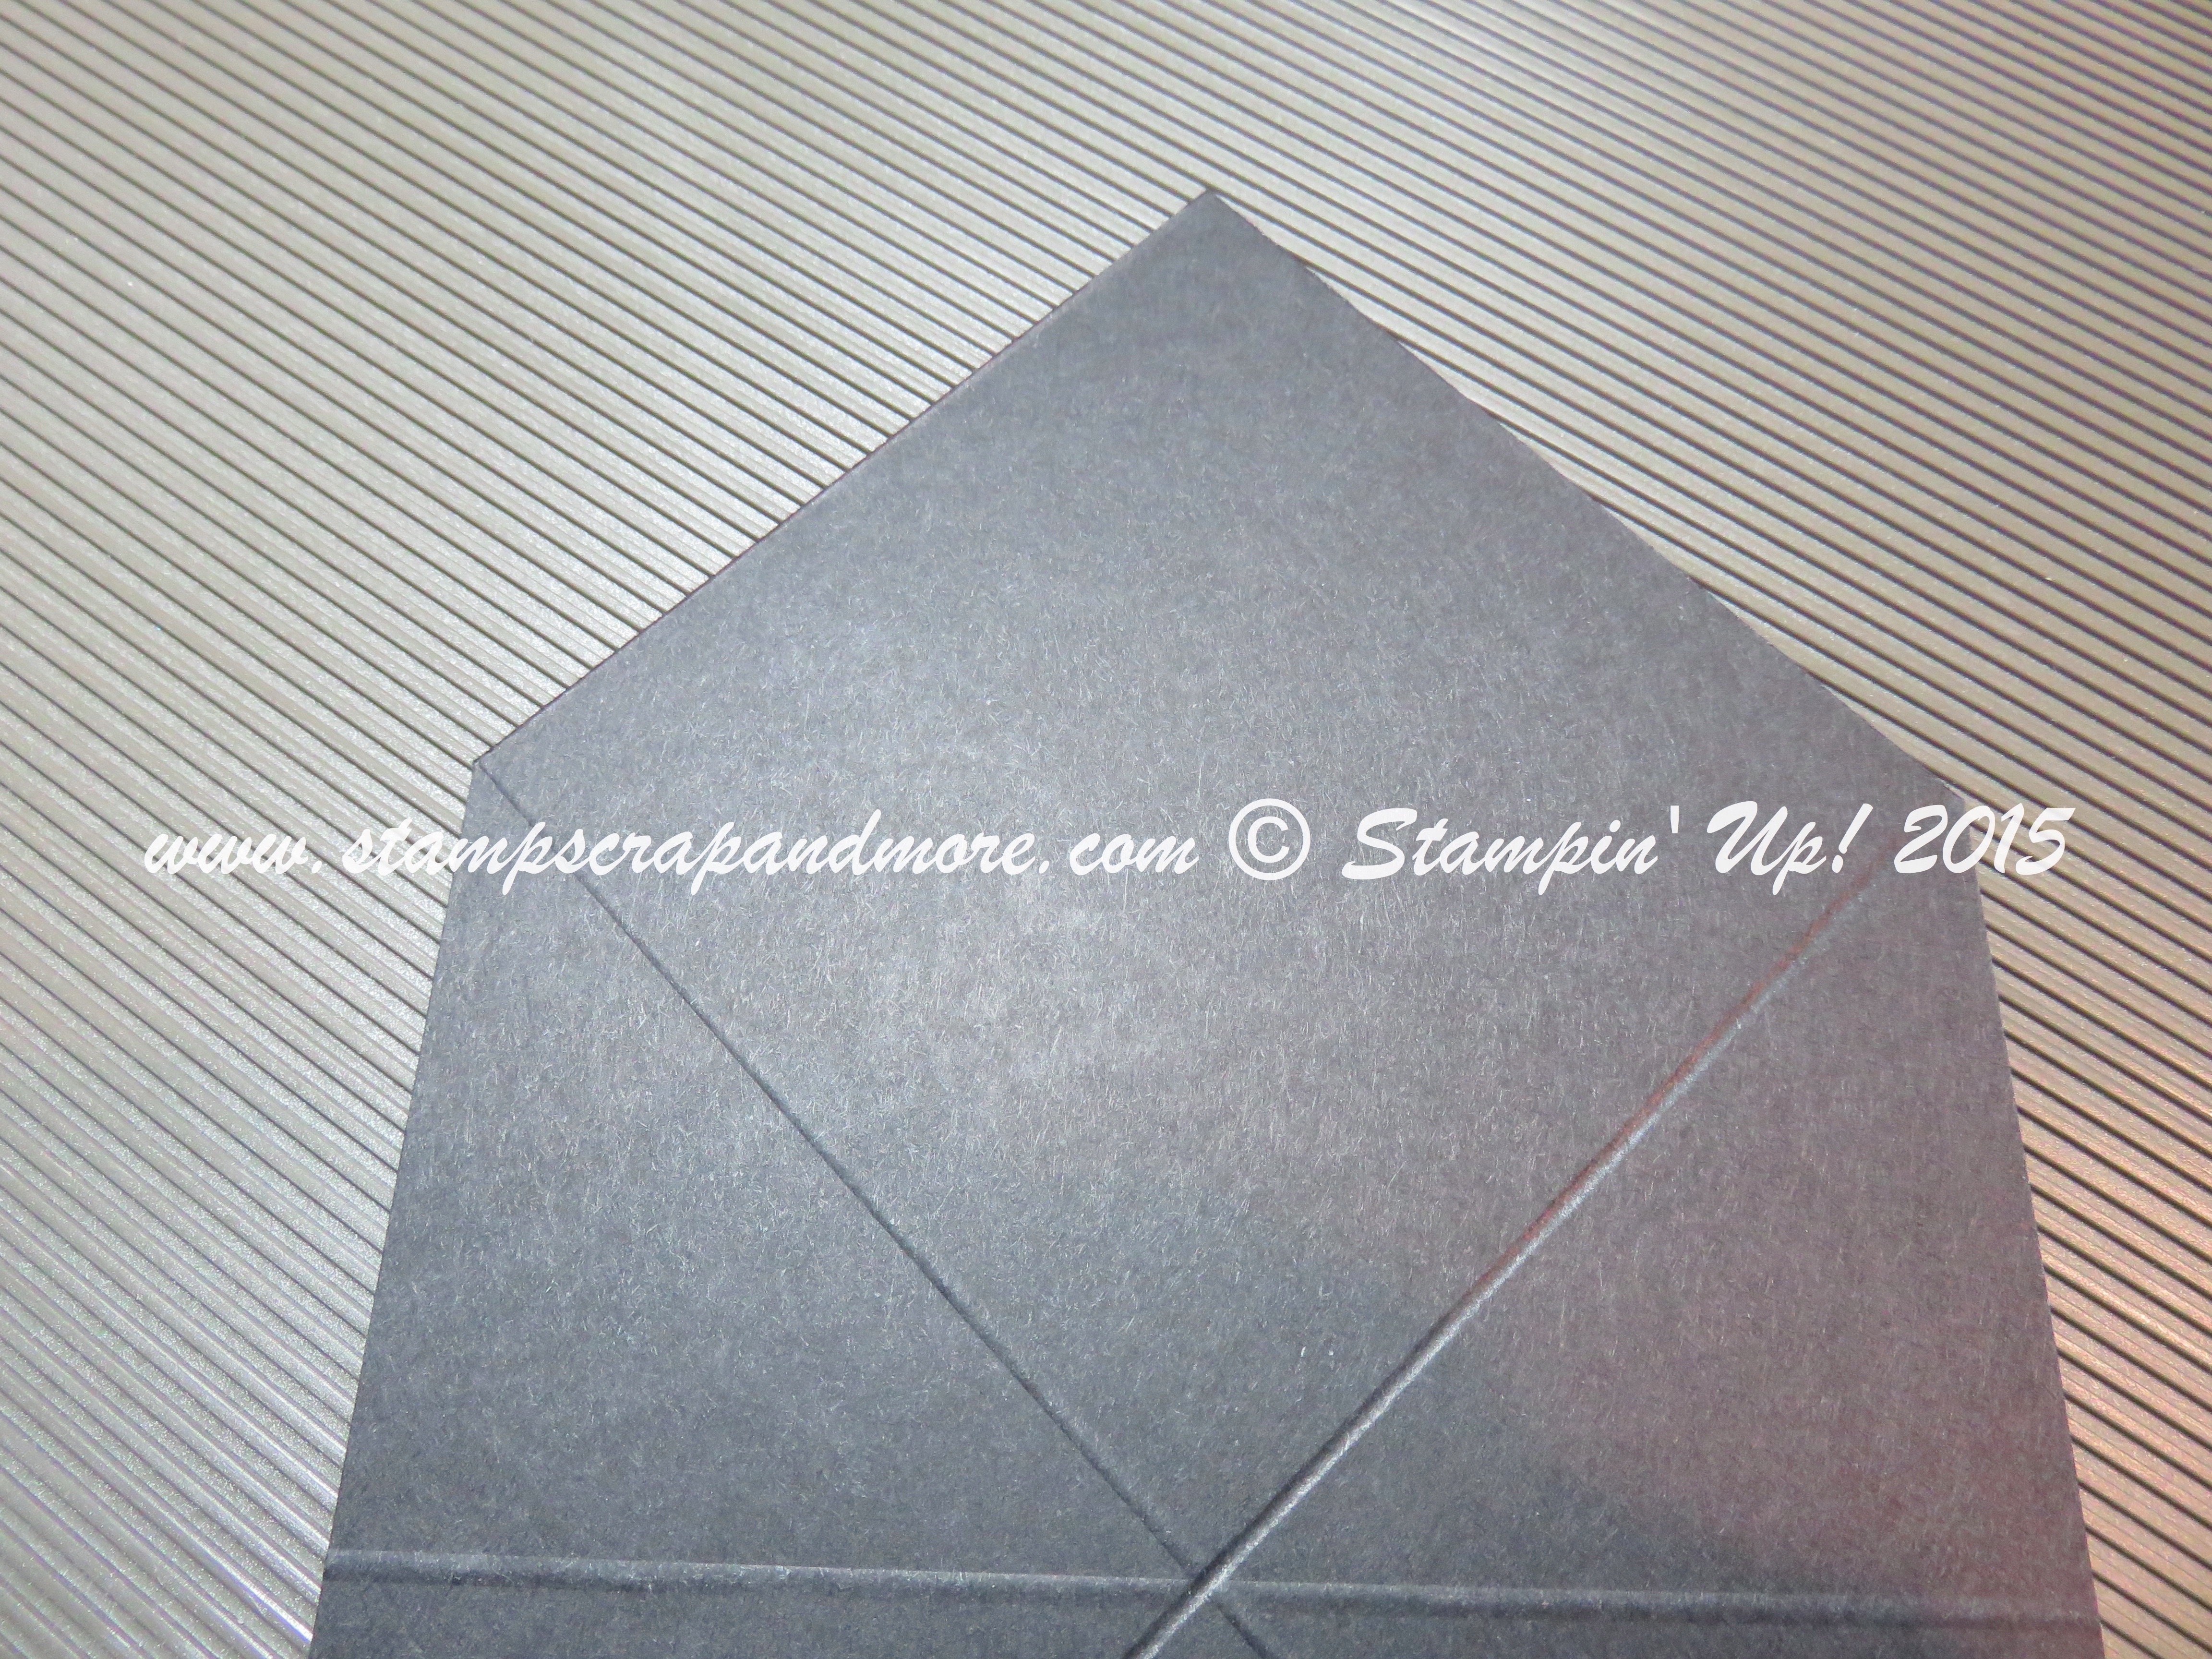
Now bend your card with peaks and valleys and you have yourself a card with a grad cap on the front.
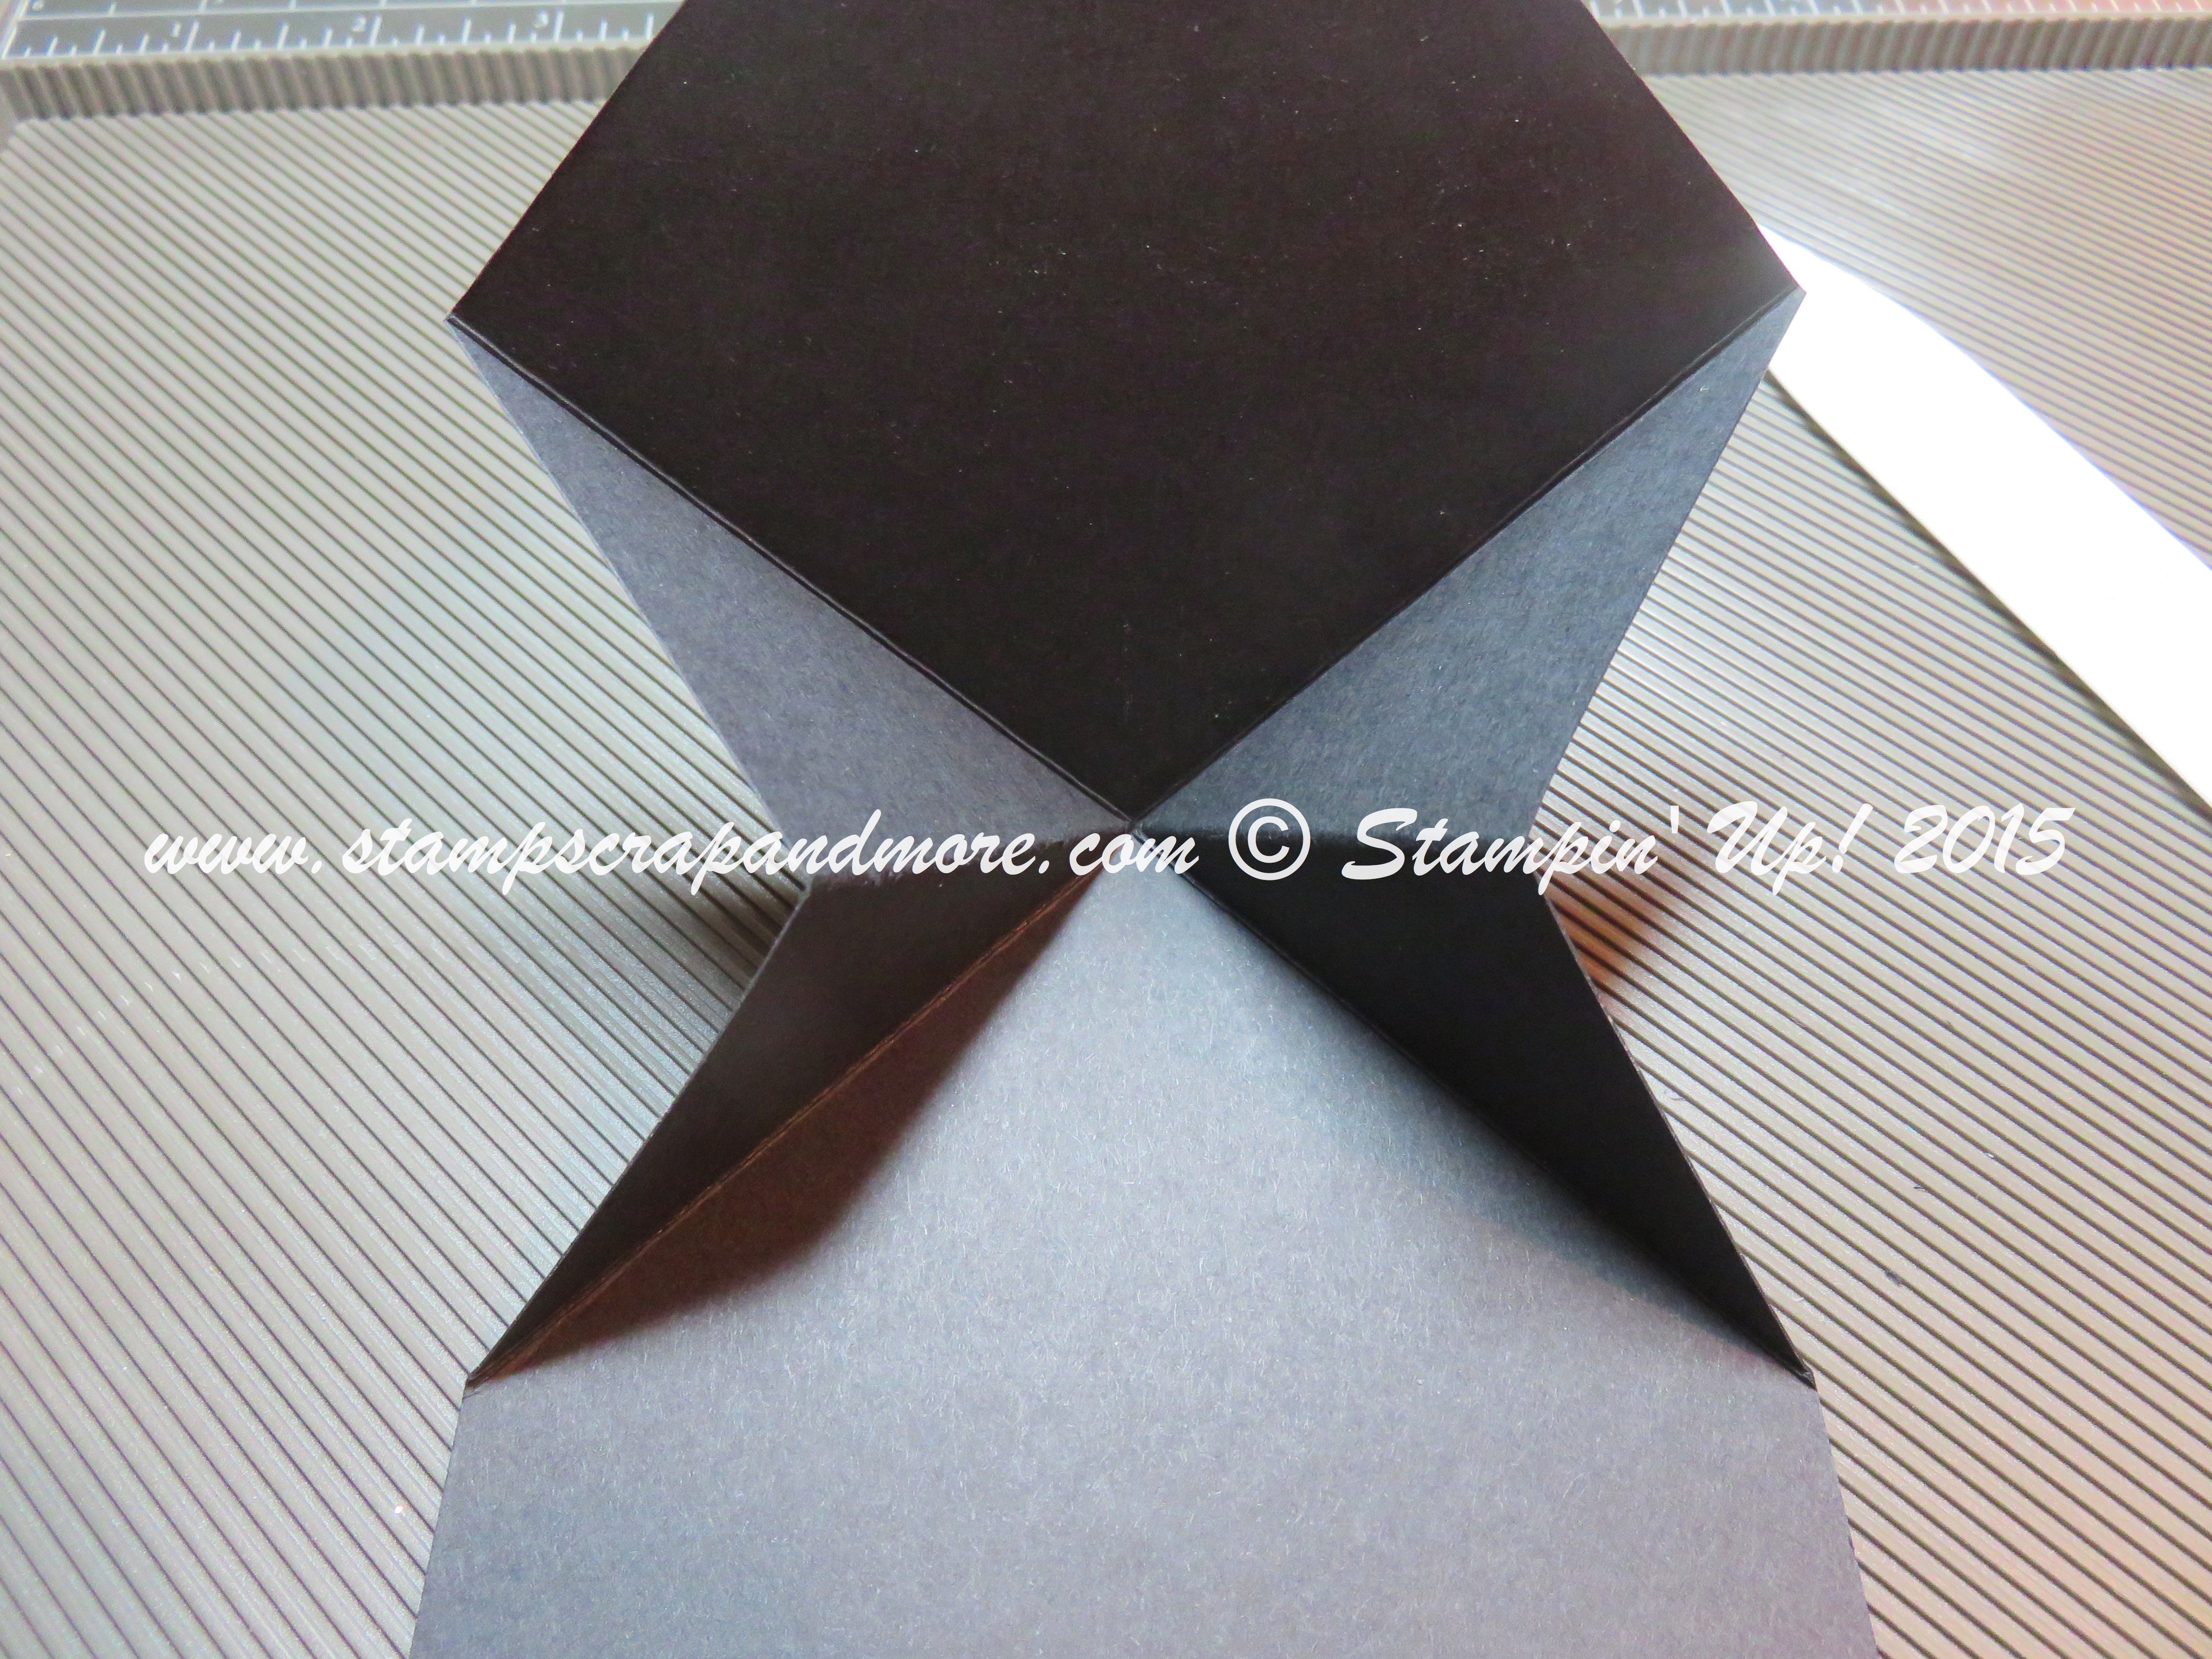
Before going any further, make yourself a tassel. I used thick Baker’s Twine. Attach the tassel to the top outside centre of the cap with a brad – do this before adding the inside sentiment so that you cover the prongs of the brad.
The top inside card stock is 2 3/4 x 2 3/4 – when stamping on this piece – remember to make sure the paper is in the diamond position.
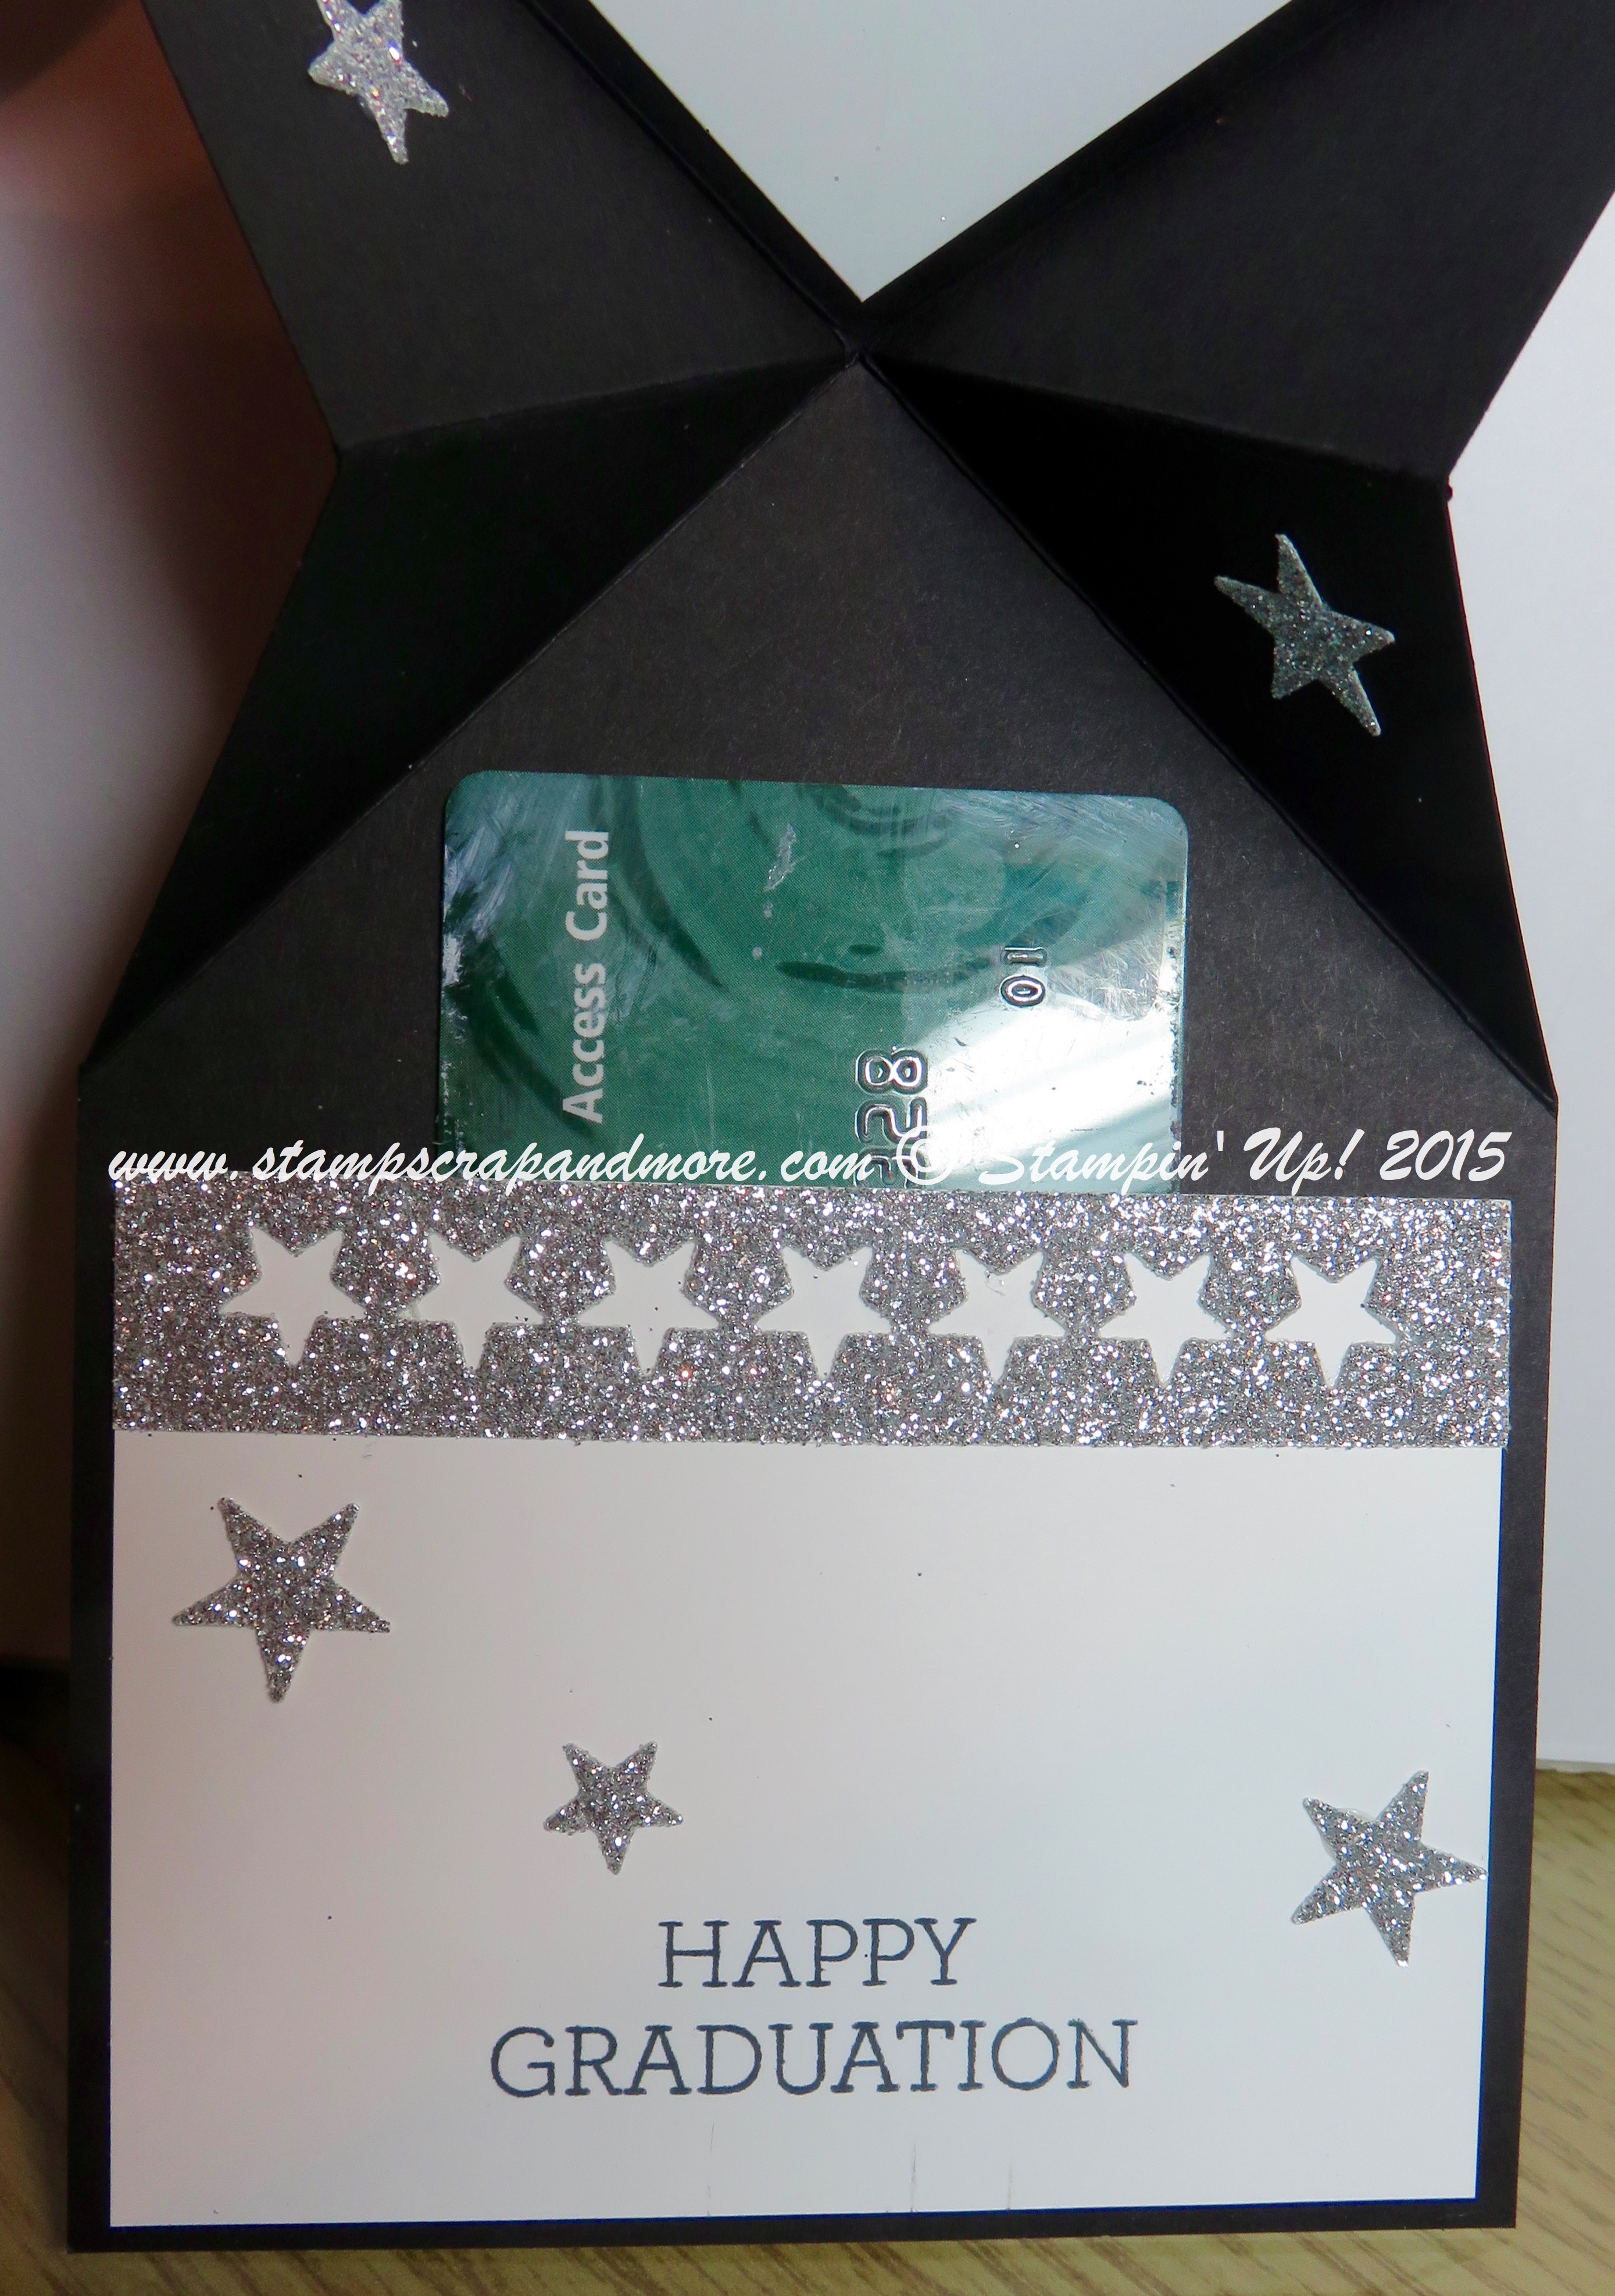
The bottom inside card stock is 4 x 3. When adding it to the inside, put sticky strip on the sides and bottom so you can tuck in the gift card or cash.
Now you can embellish as you like. I used the stars from the Mini Treat Bag Thinlits to create a shimmery border on the inside. I then used the left over stars (and some larger ones from a punch) to sprinkle throughout the inside of the card.
If you are making a card for someone specific – try making the card in their school colours.
Thanks for stopping by and I hope you are inspired.
Thanks for stopping by,Elizabeth, Your Stampin' Up! Demonstrator
www.StampScrapAndMore.com